. June 2022 | 🥇 House Cleaning & Maid Services on Demand | My Cleaning Angel ®
Select Page
Here’s How Professionals Deep Clean Things

Here’s How Professionals Deep Clean Things

Considering the effort and time deep cleaning requires, it is certainly an exhaustive task in today’s busy life. This is because it is difficult to give your house the attention it needs. Specially when you are a working adult living on a tight schedule. However, that does not make deep cleaning any less important!

While cleaning your home regularly is crucial, it is equally necessary to give your space a professional deep clean every 6 months or so. Professionals deep cleaning aims to target the places that often get ignored during a regular cleaning,. Like light fixtures, washing the carpets, organizing and cleaning the cabinets and drawers, etc. 

Thus it can be easily said that deep cleaning is no less than an art of its own and requires a specific set of skills and equipment. But you don’t need to worry as this guide will tell you all about how to professionally deep clean your home.

book cleaning service online

How to Professionally Deep Clean Your Home

To make your home germ free, you may either resort to contacting professionals deep clean service. Or you might want to undertake the process of deep cleaning on your own. 

If you plan on doing the latter then begin by making a checklist. Firstly, list down the name of the cleaning supplies that you will need. Start by looking for those things in your home before you go out to make any purchase.

For a professionals deep clean you must declutter the house. Make necessary repairs, clean ceilings and walls (including fans, blinds, and windows). Also organize the storage spaces, clean the bathrooms, kitchen, appliances, and floors. Finally dust and disinfect.

Let us take you through the process step by step, which the professionals follow.

Step 1: Gathering Supplies

The fundamental step to beginning your professionals deep clean is to get the right supplies for the task. Under this category, you will need the following necessities: 

Broom, sponges, dusters, vacuum cleaner, cleaning chemicals. Including but not limited to glass cleaner, surface cleaner, bleach, vinegar, and baking soda. And protective wear (such as gloves and masks). 

Once you have geared yourself with these supplies, move on to the next step. 

Step 2: Decluttering the House

A detailed deep clean begins with a decluttering of your house. The most convenient spot, to begin with, is your bedroom. Clear off everything from your bed and closet while taking note of things you need to dispose of. Follow the same procedure around the house and collect waste items in boxes or large garbage bags to get rid of. 

Such items would typically include empty cans and bottles, overused tools, old cleaning equipment. Also dirty utensils, worn-out towels, old clothes, etc. At the end of decluttering, take a final look at the collected items to see if anything can be donated.

Once you are done dealing with these items, move on to the next step.

Step 3: Repair and Maintenance

To properly repair and maintain your house, you must take off all the frames, clocks, and decoration items placed on your walls. Then take a thorough look around and note the places which require specific attention and repairing. 

The easiest way to repair damaged walls is to buy some putty. And fill up the holes with it so that they can be easily painted over.

Once the walls are taken care of, move to the appliances, the sinks, pipes. And any other drainage units around your house. Deeply inspect for any leaks or clogging and then assess whether or not you need to call a plumber. 

Similarly, take a look at other appliances and ventilation systems to be certain that everything is functioning properly. Once your house is fully maintained, only then you can move on to detailed professionals deep clean.

Professionals deep clean

Step 4: From the Ceiling

The most convenient way to give your house professionals deep clean is to follow the very steps of an expert. 

Grab a broom and a cloth, take a stool and start with the wall. Remove all the spider webs and other filth that may have accumulated on your walls. This is the step where you need your mask so you don’t inhale any dust particles. 

After the walls, move to the fans. To professionally deep clean your fans, you may want to try this easy trick. It’s known as the pillow case technique. 

Simply place a pillowcase on the blade such that it is fully covered. Then slowly wipe the dust as you pull the cover to yourself. Do it with all the blades and your fan will be as good as new!

For the windows and blinds, you can simply vacuum them to get rid of the debris. Then clean the glass with a glass cleaner and a microfiber cloth.

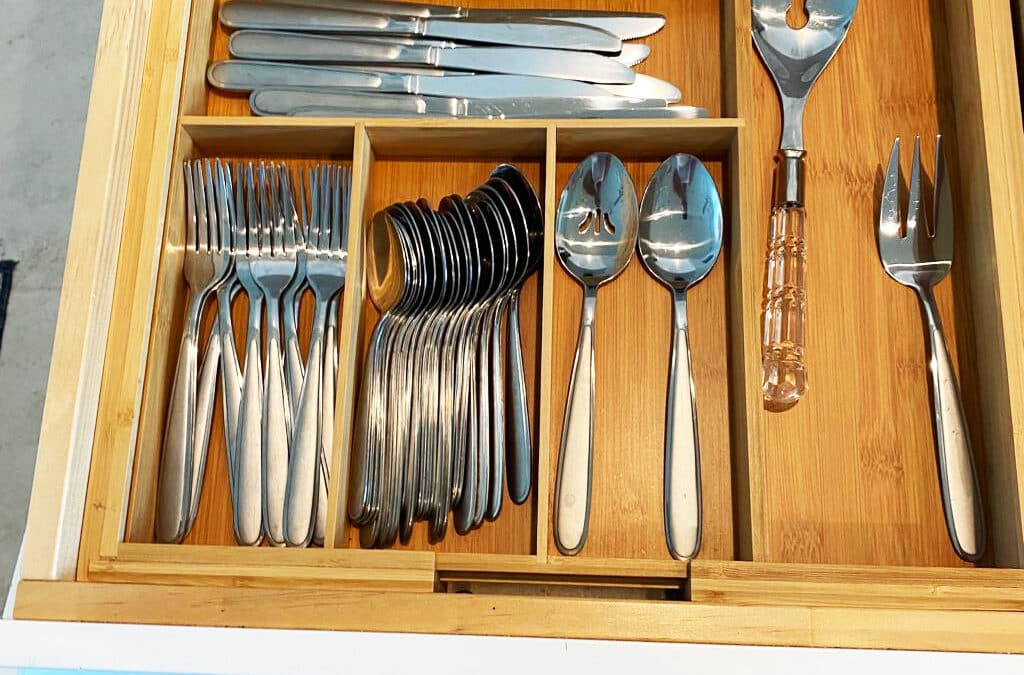
Step 5: Organizing the Compartments

An essential element of professional deep cleaning is organizing your storage spaces. But what comes before organizing is sanitation. 

To sanitize your drawers, shelves, and cabinets, make a solution of vinegar with water and some dish soap. Use a pair of sponges to wipe off that stubborn dust and dirt. Clean all the cabinets, drawers and shelves, and other storage spaces around the house in a similar way.

Since most of the storage cabinets are made out of wood, this technique will not damage the wood itself. Because it is low on chemicals. Once done, move towards the bathrooms.

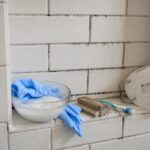
Step 6: Dealing With Your Bathrooms

Bathroom cleaning is often dreaded by many people because this is the filthiest place in a house. 

Since their cleaning requires much effort and time, it is often wise to hire a professional. But this does not mean that you cannot do your own expert deep clean in this case. 

As always, begin with the ceiling and wipe off any dirt from the corners. Bathrooms are a safe space for bacteria and microorganisms to thrive. So as you get rid of the stains and rust, disinfect the bathroom as well.

Simply get a hold of your cleaning liquids and sponges and start scrubbing. Shower heads, bathtub, toilet bowls, sink, counter, and vanity must be cleaned and wiped adequately. Use gloves when handling any chemicals and scrubbing as these are harsh for your skin. Wipe the mirror with any glass cleaner and a microfiber cloth. Finally, wash and wipe the tiles and mop the floor to leave the bathroom sparkling.

Professionals deep clean

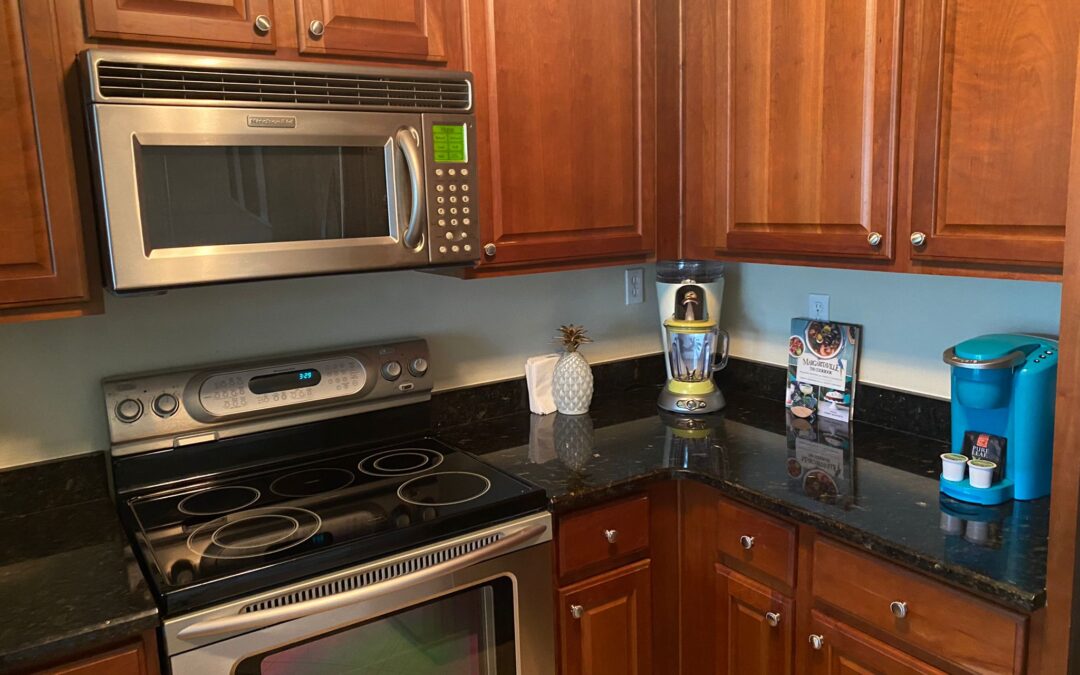
Step 7: Kitchen and Appliances 

Dealing with the kitchen and the appliances is a tricky business. For the kitchen, begin by decluttering and then move towards dusting everything. Remove the stove and the oven as well as the gas connection. Get to scrubbing with dish soap and vinegar. Scrape off grime or grease. After this, clean the cabinets and the drawers to get rid of any food leftovers preferably with a vacuum. Lastly, clean and wipe off the countertops and end by mopping the floor. You’ll have a neat and clean and tidy kitchen.

For the appliances, begin by unplugging them. The smaller ones can be easily cleaned. But the bigger ones require some work such as the refrigerator and the dishwasher. Begin by cleaning the outer and then the interior parts of the appliances. For instance, start with the exterior of the fridge while the inside ice melts and then clean and disinfect it from the inside. 

Step 8: Down to the Floor

This comprises carpets and the floor itself. Regardless of what you do, carpets can hardly be fully sanitized at home. Therefore, in this case, do not hesitate to seek the best professional deep cleaning service like MyCleaningAngel

As for the floor, you can simply vacuum the entire house to ensure that no dirt or debris is left. Then follow up with a bit of scrub and finally mop down with a cleaning detergent so that the floor is left shining. For tough stains or sticky dirt, use stronger chemicals but be careful with those. 

Step 9: Wipe it off!

The final and most important part of a professionals deep clean is disinfecting all surfaces. 

As you move towards the end of your checklist, all that is left for you now is to dust and disinfect the entire house. Dusting and disinfecting surfaces include the countertops of the kitchen and bathroom, windows, shelves, cabinets, and fireplace mantles, among other things.

The easiest way to dust and disinfect simultaneously is to pick up a duster. And clean the surfaces one by one, while holding a disinfecting spray in the other hand and spray along. As you clean, do not miss the doorknobs and the sockets. That way everything is left spotless and free from microbes.

professionals deep clean

To Summarize

While this is the most extensive guide on the internet on how to professionally deep clean your entire house, you may simply not have enough hours to do so. You can book cleaning service online, it’s fast, easy and you’ll get your home a very needed professional deep clean.

As we mentioned above, it is very difficult to deep clean your house if you are a working person. Or have kids and pets to take care of or both. In such a case, no cleaning to-do list can be easily executed as it requires a great deal of time and effort.

Therefore, if you want to save your time and focus on other things, check out MyCleaningAngel. Get in touch with remarkably professional cleaners. Their thorough checklists and safe products will ensure that everything gets done just in time. And in the most efficient manner.

Spring Cleaning Tips to Clean Faster

Spring Cleaning Tips to Clean Faster

As soon as the weather starts to dry up, you’d know it’s time to bust open your windows and begin spring cleaning. Though some people might not enjoy this process more than others, it still plays a necessary part in living a hygienic lifestyle.

It’s crucial for everyone, particularly people with allergies. And especially with the advent of COVID-19, you and your family should make sure that the house is spick and span. 

So, if you want to know where to start your spring cleaning project, you’ve come to the right place. To help you out, I’ve compiled a few of the best spring cleaning tips. Continue reading to learn more!

house cleaning

Decluttering

The first tip to getting a clean home would probably be to start with decluttering. This entails considering throwing out everything not utilized in the last six months. The only exceptions to this should be seasonal clothing or items.

You should then continue by separating these possessions into three different boxes. These should be labeled ‘trash,’ ‘keep,’ or ‘donate.’ Make sure you keep these items clearly denote these boxes, ensuring that none of your valuable treasures would get thrown away by mistake. 

Though you might not appreciate this ruthless stance on valued possessions, I promise you it’d be worth it. You’d be able to discover how many items you keep in excess in your home, understanding the added space that comes with throwing a few things away. Not to mention, there are numerous scientific implications to inhaling dust and living in a cluttered workspace

So, since we’re all bound to spend time in our home offices, the following are a few steps worth setting time aside for:

  • Organizing your closets
  • Managing and dusting your office
  • Looking through your messy and junk-filled desk drawers!

Cleaning Carpets

Fabrics would absorb most of the winter’s germs, dirt, and body oil. In fact, you’d be surprised by the amount of hair, dirt, and dust that can build up on your carpet. As a result, you’d need to give them a thorough spring cleaning before another year of use.

A quick and easy cleaning tip to do this is to first experiment with shampoos and cleaning upholstery. I recommend testing out new products in distinct areas on the carpet, ensuring you have an idea of how your machine works and can guarantee the treatment won’t discolor the fabric.

That said, you might need to move some furniture around. Try to check you don’t unnecessarily move anything against a wall or out of the room. And after a shampooing, try to place the legs of furniture pieces on small wax paper squares. This wax paper would help protect your carpet, preventing the furniture legs from getting wet while the carpet dries.

Likewise, another valuable spring cleaning tip to clean faster is to open your windows to speed up the process (which would otherwise typically take a day). And if you aren’t comfortable renting cleaning machines or safely moving furniture, you could always call for a professional cleaner; possibly from My Cleaning Angel!

spring cleaning tips

Dealing With It Room By Room

If you’re looking for quick and easy spring cleaning tips, dealing with the process room by room would be the way to go. It’s the most efficient way to get things done. By creating cleaning checklists for every room, you’d be able to remain organized and pay attention to areas that require more thorough cleanings. You can even skip on recently cleaned spaces, focusing most of your attention on parts of your home neglected over winter. 

Using Rubber Gloves to Remove Pet Hairs

Pets are always a joy to be around. But, they can be a nuisance for keeping your home clean. In particular with dogs and cats, you can find their hair everywhere. It’s difficult to maintain cleanliness when you have pets.

As a result, one of the best cleaning tips I can offer is to utilize rubber gloves. Due to their material, they create friction that’s ideal for making hair naturally stick to them. And even if they fail, a trusty lint roller is bound to get the job done and remove pet hairs from fabric. 

Minimal Cleaning Products

As counter-productive as this may sound, a tip for getting a clean home is to keep your cleaning products to a minimum. This would help avoid clutter from numerous cleaning supplies, which you don’t necessarily need to keep your home clean and fresh. 

Instead, you could probably just opt for an effective all-purpose cleaner with microfiber cloths. These items would cover most surfaces within your home, only needing specialty cleaning supplies for very particular instances.

Wash Baseboards, Walls, Woodwork, and Cabinets

You might be thinking that your walls don’t necessarily look like they need a bath – I mean, soot and dust are supposed to fall to the ground, right?

Well, this isn’t always the case. Sometimes, these substances can just stick to vertical surfaces, warranting a need for a pre-holiday or seasonal bath. I recommend utilizing a hand dishwashing detergent or sponge and washing parts at a time.

You can easily reach higher spots with a sponge mop. If you want to save time, you could use two buckets: one for wringing your sponge and the other for dishwashing detergent solution. After you’re done, you can also dry the walls and woodwork with washed cloth for a neat finish. 

Don’t Forget The Windows!

Especially after a rough winter, you need to let all of the sunshine back in. Winters in places like Wisconsin can be cold and long, so once the weather starts to warm up, you’re finally presented with the perfect opportunity to clean up the windows and screens.

I suggest utilizing more than just go-to window cleaning tools. Instead, to promote sustainability, you can recycle and clean simultaneously. 

One of the best spring cleaning tips for glass is to use a 3 to 1 mixture of water and white vinegar, wiping it down with old newspapers. This would be more efficient at absorbing liquid than cleaning with paper towels. If you don’t have any newspapers, you can also use paper coffee filters.

Spring cleaning tips

Sparkling Clean Fridges

Cleaning our fridges tends to be the last thing we ever think about. We’re all guilty of leaving them to accumulate dirt over the years, leading to the buildup of water, stains, and food matter. 

But, there’s no need to be alarmed. There are several quick and easy spring cleaning tips to help combat this. For starters, you could just use toothpaste and a toothbrush.

In particular, toothpaste has chemicals helping to remove stains. Meanwhile, the toothbrush comes with the necessary accuracy and friction you’d need for the job.

Afterward, you can move on to the lurking smells. The best tip for getting a clean fridge that I can offer is to cut a lemon into two and place the parts in the fridge. Place one piece on the bottom, and the other should be on the top. Then, the lemon would naturally absorb the unpleasant odors, leaving your fridge with a citrusy and fresh smell. 

Attention Given to Drains

Sink disposals are usually the source of most bad odors in your home. As a result, like your fridge, a quick and easy spring cleaning tip would be to put a few citrus peels (lemons or oranges would do the trick) at your disposal. If you’re looking to clean disposal blades, ice cubes would also be a great idea. 

Though this may seem more tedious than it needs to be, it’s crucial to ensure your bathroom drains and kitchen drains are cleaned without getting clogged. So, as a substitute for citrus peels, you could also pour a cup of white distilled vinegar down the drain. Upon allowing it to sit for half an hour, you can run cold water through the drain to wash it out. 

Steam Cleaning Microwaves

Microwaves tend to build up a lot of dirt and grime over time. This is because people think of cleaning their microwaves as an afterthought. It’s an appliance that we often take for granted. So, a good clean is probably long overdue and would improve its overall general hygiene.

To do this, I would again recommend a combination of water and vinegar as a spring cleaning tip to clean faster. This would create a solution that easily tackles stubborn stains. And you can add it by heating a measuring cup of a 50-50 solution in your microwave for about 10 minutes. When it starts to steam up, you can remove the jug, wiping away the moisture and dirt with a cloth.

Spring Cleaning Tips

The Bottom Line

There are a lot of quick and easy spring cleaning tips out there. But, with the overwhelming dirt accumulated over winter, it’s still daunting to approach the cleaning process alone. So, if you’re looking for cleaning services on demand, why look any further?

At My Cleaning Angel, we deal with everything related to maintaining a neat home. So, what are you waiting for? Contact us today for a quote on our cleaning services. 

The Ultimate Move Out Cleaning Checklist

The Ultimate Move Out Cleaning Checklist

If you’re moving out of your house, you would know that as fun and exciting as it might sound, the process itself is not too easy. With a lot of things to take care of at once, it can get overwhelming and tiring. But don’t worry; we have you covered with one of the most important factors of getting ready to move out i.e. the home/apartment cleaning.

You must clean the vacating place to leave a good impact as well as save the newcomers from possible contamination of dirt or germs. Therefore, we present the ultimate move out cleaning checklist to help you throughout the cleaning process.

From dishwashers to doorknobs, with this blog, you’ll be able to make sure that everything is left spotless and sparkling. So you can finally bid the house farewell. However, if you don’t have the time or energy to do the work yourself, hiring a professional cleaning service may be the best option. And My Cleaning Angel can do the cleaning is a feasible option. It’ll will save you the effort and get the work done efficiently.

Scheduling the Timeline

Once it’s been finalized that you’re moving out, you should prepare a rough timeline. You would require a bit more than three weeks to divide all the tasks. And not exhaust yourself as cleaning is not the only part you’d be covering. Certain things need to be taken care of at the appropriate time to have the entire place cleaned when it’s “the” day. 

If you have less time on your hands, consider hiring professionals. They would get all the cleaning work done And you wouldn’t have to worry about a single thing. Meanwhile, you can focus on the financial and packing aspects of the moving-out process.

The Ultimate Checklist:

move out cleaning checklist

Few Weeks Until the Move-Out Day

Having an adequate amount of time to plan things and distribute them evenly across a cleaning to-do list can feel like a blessing. You can prepare your mind and start doing the tasks that would make the cleaning easier. Such as gathering supplies, decluttering the house, and repairing whatever in the house needs some fixing. 

Gathering the Supplies

To begin your journey of cleaning before you move out, the fundamental step is to get the right supplies for the tasks. From cleaning equipment to protective gear, you would need it all in a good amount. Specially if you want to spend the following weeks without heading back to the supermarket.

The necessities include a broom, mop, sponges, dusters, and a vacuum cleaner to get rid of all dust and debris around the house. Then comes the cleaning chemicals, such as glass cleaners, surface cleaners, bleach, vinegar, and baking soda to leave the house spotless.

Once this is taken care of, you can focus on what else would you require to carry out the cleaning. For instance, getting gloves and a mask to protect your skin and breathing is crucial.

Decluttering the House

You’ve completed your shopping and now it’s time to consult the cleaning to-do list. Where to start? From getting rid of the things you don’t need anymore. Take a box, mark it as “disposal”, and simply put anything in it that’s occupying extra space in your house. Empty cans and bottles, overused tools, old cleaning equipment, dirty utensils, worn-out towels. And whatever you feel the need to get rid of and everything useless; it’s going in the box.

Repair & Maintenance

Living in a house, it’s unavoidable to not put frames, clocks, or certain decoration items up on your walls. But once you decide to pack them, the nails still linger on to the wall, waiting to be either removed or utilized.

Start by removing all the nails/screws that you’ve hammered in over the time you were living there. Get putty and fill the holes so they can easily be painted over.

Then you have to pay attention to the sinks, pipes, and any plumbing issues that might need some tweaking or repairing. Spend some time checking all drainage units and taps for any leaks or clogging. If found, get it fixed, either by yourself or by calling a plumber.

Similarly, check the vents and other appliances to be sure everything is functioning perfectly. It is only then that you can move towards the deep clean before you move out

Move out cleaning checklist

10 Days Until the Move-Out Day

Having a little more than a week left before you move out, it’s time to start the deep cleaning process. Refer to the move out cleaning checklist, take out a pen, and check every task as you finish it. While there isn’t any proper order of cleaning things, you should only ensure that you clean the floors at last. There is some tasks you should do before move out cleaning.

Ceiling, Fans, Blinds, and Windows

Take out your move-out cleaning checklist and glance at it. Your task is to start your cleaning from top to bottom, ergo, from ceiling to floor. Grab that broom, set that step stool, and start dusting the spider webs. Ensure that you wear a mask to prevent inhaling the dust particles or broken webs.

Once you’re done with the ceiling dusting, now comes the tricky part of cleaning the fans. You can start by dusting off the loose dirt. But the blades tend to move around when you try to clean them, especially when the dust is a bit sticky. That’s where the pillowcase technique comes in. Take a pillow cover, put it over a blade, and then slowly wipe the dust as you pull the cover to yourself. Do it with all blades and you’ll have a sparkling fan.

Blinds and windows can be vacuumed first to get rid of the debris, while the windows can be cleaned with a glass cleaner and microfiber cloth.

Cabinets/Drawers/Shelves 

An important aspect of home/apartment cleaning is leaving tidy storage spaces for the future residents of the place. As most of the storage spaces;., are of wood, one should consider the type of chemical being used to clean to not damage the wood itself. 

Using distilled vinegar water or dish soap should be the go-to method with a pair of sponges to wipe off that stubborn dust and dirt, if any. Make sure to clean all the cabinets, drawers, shelves, and other storage spaces around the house.

Bathrooms

In your move out cleaning checklistbathrooms should be a priority. It requires effort and you can consider professional help as well. However, if you plan on doing it yourself, then the first step in cleaning them is vacuuming the space.

You must vacuum the dust, debris, and webs before you deep clean. Then, it’s time to get rid of the stains, rust, and possible mildew.

Take out your cleaning liquids and sponges, and start scrubbing. Showerheads, bathtubs, toilet bowls, sink, counter, and vanity must be cleaned and wiped adequately. Use gloves when handling any chemicals and scrubbing.

Then, you may clean the mirror with any glass cleaner and a microfiber cloth. Lastly, wash the floor, wipe, and mop the tiles to leave the bathroom spick and span.

Kitchen

When it comes to cleaning the kitchen; it is a tricky yet dirty business. Hiring professionals for it would make it easier. But it would still require plenty of time. Either way, you ought to start by decluttering first and then moving towards dusting everything. You may remove the stove, gas connection, and oven. Make sure that no electrical appliances are connected to the socket.

Then, you can start with dusting and scrubbing the tough spots, such as the buildup of grease. After that, clean the cabinets and drawers to get rid of any food-related leftovers. Preferably with a vacuum. Lastly, clean and wipe off the dirt from the countertop, while mopping the floor to have a tidy kitchen.

Appliances 

Take out all your appliances, regardless of their usage. As it’s time to clean them before they’re ready to be moved. The small ones can be cleaned easily but it’s the bigger ones that need some work. For instance, the refrigerator and dishwasher.

Unplug the fridge and let it come to room temperature. While ice would start to defrost, you should take out the shelves and grills for cleaning. Instead of chemicals, go for baking soda or vinegar mixed with water. Scrub the shelves until they’re free from stains.

Then go forward with cleaning the inside and outside of the fridge, and put everything back together to have it ready to be moved. You may carry on to the other appliances and clean them similarly. Such as the oven, microwave, dishwasher, etc.

Carpets/Floor

Considering our cleaning to-do list, it’s time for the floors and carpets now. If you have carpets, you ought to get them vacuumed first. For the floor, you can start by vacuuming the entire house. This should ideally be followed by a bit of scrub and mop with a cleaning detergent so the floor is left shining at the end. For tough stains or sticky residue, you would have to scrub using a stronger chemical.

At My Cleaning Angel, we offer thorough vacuuming of your floors and carpets. With our top-notch and up to date equipment, we make sure that no dirt or debris is left when we’re done. 

Dusting and Disinfecting

Most of your cleaning work has been taken care of and you’re reaching the end of your move out cleaning checklist. All that’s left for you now is to dust and disinfect the entire house/apartment.

Countertops of kitchen and bathroom, windows, shelves, cabinets, fireplace mantles, and other surfaces that need a bit of classic dusting and wiping should be treated a day before the moving day. Pick up a duster, clean the surfaces, and disinfect everything in the house. From doorknobs to sockets, leave everything spotless and free from germs.

Move out cleaning checklist

The Move-Out Day

Congratulations! You’ve taken care of all the tasks and are ready to move out and get settled in your house. However, there’s a tiny task still left for you to finish off the move-out cleaning checklist.

The Last Sweep 

When all furniture and boxes have been moved, it is important that you do a final check. So you can ensure that no work is left. Survey the place and check for any broken pieces of furniture left or any leakage from pipes. Check for the spots that you might have missed in the previous week of cleaning. Once fully satisfied, go on with a final sweep and mop, and then you’re officially ready to move out without worrying about the tidiness of the house. 

The First Clean 

Moving into a new place requires a move-in clean as well. It’s not as exhausting as the previous one but equally important to make yourself comfortable in the new place as well as keep it free from dust and contamination. Grab your supplies, sweep and dust the entire place, and top it off with a mop. Lastly, disinfect all the hard surfaces and doorknobs. You would feel much at ease and be ready to call it a day. 

Or, if move-out cleaning was too much for you, you can always contact My Cleaning Angel for our top-notch move-in cleaning services.

Move out cleaning checklist

The Bottom line

Moving out of a house can be a hassle, especially if you’re a working person or have to take care of an elderly person or kids. In a position like that, one can’t imagine taking care of all the tasks themselves. While the cleaning to-do listwill come in handy, it is the execution that requires a great deal of time and effort. 

Don’t have plenty of hours to scrub the counter or wash the carpets? At , you can get in touch with remarkably professional cleaners and get their quotations. As well as get your hands on checklists, safe products, and tips to cater to your moving-out needs. Book cleaning services online, it’s easy, fast and simple. This will save you the time to spend with your loved ones. While the team would ensure that everything gets done perfectly just in time for you to move out.

What Does Construction Cleanup Consist Of?

What Does Construction Cleanup Consist Of?

Upgrading the look of your house through a renovation is a remarkable idea. The excitement of seeing the results and the satisfaction after the result are unmatched. You are left in awe of the new vibe you’ve added to your house. However, the actual concern is the construction clean-up that follows.

A thorough cleaning of your home after any construction job, whether minor or substantial, becomes a required chore because of the filth, debris, and the risk of contamination. There’s also the potential of allergies and infections, so you can’t afford to leave even a single spot unclean.

Hire or DIY?

Don’t worry if this sounds like a hassle; you don’t necessarily have to do the cleanup yourself, you can hire the experts! Both methods require time and effort, but the professional method is far more efficient, successful, and quick. You may relax and enjoy the fresh look of your home while the expert cleaners do what they do best: clean your home thoroughly and meticulously to the best of their abilities, using the appropriate equipment.

Whether you have remodeled or your house simply hasn’t been cleaned in a long time, you can hire cleaners from My Cleaning Angel. The post-construction cleaning pack included in our services is also referred to as the heavy-duty pack, and it leaves your house shining after a thorough process of cleaning.

post-construction

What does a Post Construction Clean up consist of? 

The following table shows what a construction cleanup necessarily consists of.

PCHD CLEANING CHECKLIST

Dusting and Decluttering

To initiate the cleaning process, the first step is to declutter and dust your entire house. The contaminants tend to stay for a prolonged time after any construction work, leading to respiratory issues and allergic reactions.

Grab a broom or duster and get rid of all the debris and dust from the residence. From room to room, clear the mess on the surface level. This includes all the tables, counters, frames, furniture, and other hard exteriors. Remove the stickers from the furniture or glass, and move towards extracting the hanging nails on the walls. In the end, vacuuming the house is a great idea to speed up the construction cleanup process that comes next. 

Deep Cleaning the Floors

Comparatively, cleaning the floor or carpet requires more effort and equipment than other tasks. This is because sweeping and vacuuming won’t suffice in a construction cleanup; it’s essential to adequately deep clean the floors, as floors get the most dirt because they receive the most traffic. 

After vacuuming, scrubbing the floor is important to get rid of stubborn dirt and tough stains. Using a washing detergent or cleaning chemical in this process can leave the floor shining and spotless. Additionally, scrubbing is also necessary for removing any sticky residue and cleaning under the couch cushions. 

Regardless of the texture or material of your floor, cleaning it can be hectic. You can also choose to hire a cleaning service for a long-lasting floor cleaning.

Shining the Bathrooms

A thorough cleaning of the bathrooms is often ignored, while it should be prioritized the most when it comes to cleaning the house, whether it’s during a construction clean-up or a regular one.

Starting with vacuuming, you must get rid of all the dirt, debris, mold, and cobwebs to make it easier to scrub. Then, taking out sponges and brushes, start the process of cleaning and washing the accessories. This includes the toilet bowl, showerhead, bathtub, sink, and cabinets. Using strong cleaning chemicals is helpful to fight off stubborn stains and bad odors. 

Moving forward from scrubbing, spray a glass cleaner on the mirror and wipe it with a soft microfiber cloth, moving from left to right and then in a zig-zag motion. 

The last step is to wash the entire bathroom and disinfect it to prevent germs and mold.

Construction cleanup

Decontaminating the Kitchen

After any remodeling around the house, an intricate cleaning job is due for the kitchen. It has to be done carefully and cautiously as there is a high risk of the exposure of food and utensils to contaminants.

Before you start, remove and disconnect all the appliances to set aside for later cleaning and safety purposes. This includes the stove, oven, and microwave. Once they are all cleared, the first step is to dust the surfaces as well as atop the cabinets. Then, use a sponge and a cleaning solution to wipe the dirt and sticky residue, such as grease, over surfaces like countertops, cabinets, shelf fronts, stovetops, sinks, etc. 

Clear all the mess with a wash and mop after a thorough scrub, and disinfect to guarantee a germ-free and immaculate kitchen. You may reconnect all the appliances after cleaning them separately.

Cleaning the Electrical Appliances 

Microwave or fridge, coffee machine or oven, all appliances should be cleaned inside out in the post-construction clean-up

When cleaning the refrigerator, opt for the DIY techniques instead of chemicals, such as baking soda or vinegar mixed with water. This solution is remarkable for scrubbing and getting rid of hard-to-clean marks inside a refrigerator. Industrial cleaners have certain toxins and components that aren’t preferred to be used where you would store food and drinks. The exterior of the fridge, however, can be cleaned with the said chemicals. 

Similarly, you should clean the oven and dishwashers with thorough scrub and wipe. If they offer self-cleaning options, you should turn them on before you start the cleaning process yourself, or until the professionals arrive, to save time. 

Moving to smaller appliances, thoroughly cleaning juicers and coffee machines is also essential, as everything around the house, whether it’s small or big, gets covered by construction dust and dirt during the process. Most importantly, disinfect all the items ahead of their placement back in the kitchen.

Wiping the Ceiling Fans, Shutters, and Blinds

Inevitably, ceiling fans and window coverings attract a huge amount of dust, including the construction build-up, that accumulates over time, ergo, cleaning them thoroughly is included in the construction cleanup.

Ceiling fans are dusted and wiped down off the dirt as well as the sticky debris on the blades. Once you wipe off the dust, use the pillowcase method to clean the blades. Put a pillowcase over each blade and wipe the dirt towards yourself. This way, the dust won’t fall or spread and both sides of the blades will be cleaned in one go. 

Moreover, vacuum the blinds and shutters and then wiped and disinfect them with a microfiber cloth.

construction cleanup

Scrubbing the Baseboards, Doors, and Frames

These wooden surfaces are the most exposed to the dirt and dust around the house, and even more so if you have kids, pets, or after construction work at the residence. 

Based on their texture, they are to be scrubbed with natural cleaners instead of hard chemicals. Sweep or vacuum the surface, and then move towards disinfecting them to get rid of any contamination, germs, and bacteria. Pay extra attention to the doorknobs as we pass and catch most of the germs simply by opening the doors. 

This is also a great way to get rid of any old spots or paint marks on the baseboards or doors.

Sweeping the Cabinets and Drawers

Storage spaces accumulate the most dust and germs than any other place around the house. All cabinets, drawers, shelves, and walk-in closets should be vacuumed for effective construction cleanup. Decluttering them before would make it easier to clean them. 

For wooden furniture, avoid using chemicals. Instead, distilled vinegar or baking soda will do the job when used for scrubbing the insides of these spaces. 

Similar to doors, cabinets and closets are also used daily and their handles and knobs are a hub for germs and bacteria. Therefore, don’t forget to clean and disinfect them too. 

Vacuuming the Windows and Racks

Next in line should be the racks and windows. Vacuum the racks for any debris, spray a cleaning chemical and then wipe the racks with a sponge or cloth.

Spray the windows with good-quality glass cleaners and then wipe them down with a microfiber cloth. Use the same aforementioned zig-zag motion to prevent any damage.

Lastly, disinfect both the windows and racks.

Cleaning and Disinfecting the House

At the end of the construction clean-up, you should have dusted, wiped, and disinfected all surfaces. This includes the cabinets, countertops, kitchen, bathroom, shelves, doors, windows, fireplace mantles, and every nook and cranny of your home.

construction cleanup

The Bottom Line 

Having plenty of tasks to do but not having the time for it can be frustrating. Remodeling or not, cleaning in itself is an important chore that asks for a significant amount of effort and time, but if you don’t have the hours to put into it, there are services out there who are willing to do the work for you. 

At My Cleaning Angel, our team is professionally trained to clean any residence. From vacuuming and scrubbing the floor to the spotless cleaning of the refrigerator, our cleaners have expertise in everything. You can get quotations for a construction cleanup pack as well for other services, such as a regular or a deep clean once a month. Additionally, we offer multiple services, checklists, and guides that will help you clean your property, with or without external help. Book cleaning services online, it’s fast and easy.

How do You Clean After Remodeling?

How do You Clean After Remodeling?

Remodeling projects are inevitably messy. Even if the contractor you hired was meticulous about keeping the work area clean, you will need to do a cleaning after remodeling. That’s because construction dust and debris, can get into every nook and cranny of your home. 

Why Is Post Remodeling Deep Cleaning So Important?

After all of the hard work that goes into a remodel, it’s necessary to clean up so you can appreciate your new space and start living in it. Remodeling projects generate dust and grime, especially when walls are broken open or relocated. A thorough cleaning is required for both health and comfort reasons.

While you can just clean up the apparent debris, remodeling projects leave behind harmful toxins and chemicals. Even the cleanest-looking homes may be hiding dangerous contaminants. Therefore, so it’s important to give your home a thorough cleanse, to know what you’re getting into. And what you will need before you start cleaning.

The air quality in your home is directly linked to your overall health. If you’ve recently renovated your home, or are planning a major construction project, it’s important to understand the risks of poor indoor air quality. From childhood asthma to cancer-causing toxins, contaminated homes can lead to a long list of health problems for homeowners and their families. Deep cleaning after remodeling is an essential step to ensure a healthy home environment for you and your family.

post-construction

Post Remodeling Cleaning Checklist

It’s finally done! The home remodels over, and you can settle back into a routine. But you may notice a significant amount of dust, dirt, and debris that has accumulated during the work. How do you clean the house after remodeling? Keep reading for a post-remodeling cleaning checklist that will help you get it all done.

Protect the Area to be Remodeled 

Before starting the deep cleaning after remodeling, make sure that your newly renovated home is prepared for it. Tape off the work area with plastic sheeting or drop cloths to keep dust and debris confined. Cover vents with plastic and tape down all seams. Remove furniture from rooms that are to be remodeled and cover those that cannot be moved with plastic sheeting or drop cloths.

Spread heavy plastic over the floor in hallways and other areas adjoining the work area and seal under the doors with duct tape. Move things away from walls if possible, so that dust has a lesser chance to settle on them. If you have drapes and blinds, remove them and place them in garbage bags to protect them until you’re done with the cleaning.

Vacuum, Vacuum, Vacuum!

Remodeling projects can create quite a mess. This includes dust, dirt, and other debris that often spreads throughout the house as most of it can’t be contained. Start by cleaning all the surfaces that have been used for remodeling. Use a vacuum to get rid of any dust from the surface. You can opt for an electronic duster to clean surfaces that are hard to reach using a vacuum cleaner. Make sure to use duster pads that do not leave any residue behind, as it can make cleaning harder later on. 

But don’t stop with the floor. You can also use the vacuum’s hose attachment to vacuum your drapes and chairs, especially if they are leather. You can even vacuum upholstered furniture and mattresses.

Ensure that you use a vacuum cleaner with a HEPA filter since it can suck most of the dirt and dust. It will also clear up the mold spores and chemicals left behind by the paint and other materials used in the remodeling process.

deep cleaning cost

Time for Damp Cleaning

Damp clean the home after remodeling by dusting fixtures and windows and trimming with a damp cloth. Clean dirty walls with a cleaning solution and rinse them thoroughly with water. Clean woodwork, such as baseboards, door frames, and window sills, with a cleaning solution (made specifically for wood) and wipe them dry.

Dampen your cloth using a mixture of dish washing liquid and warm water. Make sure the cloth is wet but not dripping. Use the cloth to dust all light fixtures, including fans and chandeliers. Wipe down all exposed plumbing pipes in the bathroom or kitchen, as well as any metal switches or outlets, with a dry duster. If there is a broken pipe or faulty wiring in your home, then stay away from those areas until an electrician can come and fix the problem for you. If you are not a pro, you should not attempt to fix the problem yourself because it could result in electrocution or other serious injuries. 

Wipe down any glass surfaces in the house, such as windows and mirrors. If there are smudges that won’t wipe off with a damp cloth, use a good-quality window cleaner. Wipe any metal surfaces clean with a damp cloth. This includes door hinges and doorknobs, as well as cabinet handles throughout the home. Thoroughly wiping down everything is crucial in a post modeling cleanup.

Clean Air Vents & Filters

Remodeling projects can cause dust and particles to contaminate your HVAC system, so it’s important to start by cleaning the air vents first. Just vacuum them out using a long-handled upholstery brush or use a vent register brush that has a long handle and soft bristles. Don’t forget to clean out the registers on the vent covers themselves as well as inside the duct-work if you’re able to access it. You should also remove and clean the filters in your heating or cooling system.

The first step in cleaning your filter is to remove it from the vent. Turn off your appliance before you remove the filter from the unit. Tap each side of the filter on a hard surface to dislodge dirt, and then vacuum any remaining residue.

Next, use soap and water to wash off any debris that may have accumulated on the filter. Once dry, put the filter back into its proper place within the air vent so there is no obstruction for airflow within your home!

One of the most important things to do after a remodel is to make sure all of your filters are replaced, and most importantly, clean. This includes everything from furnace filters to refrigerator filters and more. Depending on how long the remodel took, you can expect these to be covered in dust and dirt. That could cause minor and major issues for you. Replacing these will help ensure you have clean air in your home again as soon as possible.

Five tips for a Spotless Cleanup After Remodeling

Cleaning your home after remodeling is a challenging task. Right from the dust to the stains, the cleaning process needs you to follow certain tips and tricks. Here are some tips for deep cleaning your home after remodeling.

1. Cleaning up the Mess

Once you are done with the remodeling process, you get to see a lot of debris and heaps of waste in your house. It is best advised that you hire a dumpster rental service, where they will remove all the garbage from your place. 

2. Carpets in the End

Save carpet cleaning until last if possible. The dust will settle on carpets, even if there are plastic sheets over them. You must wait until everything else is done before vacuuming or having your carpets cleaned professionally.

3. Wipe the Windows

This is your chance to give your windows a thorough cleaning inside and out. If your windows were covered during the project, there might still be residue on them that requires some elbow grease to remove. Also, look for dirt or other debris that settled on window sills or around window frames during construction.

4. Clean Walls 

Use warm soapy water and a sponge or a soft washcloth to clean the walls, removing all dirt and dust. If there is paint on the walls, use an acrylic cleaner or degreaser. Don’t use any cleaners with ammonia, chlorine, or alcohol in them. They can react with latex paints and give off toxic fumes that could be dangerous if inhaled.

5. Get rid of Electrical Hazards.

After a post modeling cleanup, it’s also important to make sure that you don’t have any exposed wires or other hazards. Have an electrician inspect your wiring after replacing old wiring with new wiring, as well as after installing new lights or appliances in the home.

After renovation

Consider Hiring a Professional Cleaning Service!

You’re probably exhausted after the huge project of remodeling your home. Dust, dirt, and debris are part of remodeling and it takes a lot of work to get rid of it all. But why not hire a professional cleaning service to take care of this for you? There is a lot of benefits in hiring post construction cleaning professionals.

Let’s face it, when you’re tired and busy, it can be easy to overlook certain spots during a cleaning session, even if you think you did a thorough job. With My Cleaning Angel, however, that won’t happen!

Deep cleaning after remodeling can be stressful, especially if you are trying to take care of it by yourself. You may not have the necessary cleaning tools or equipment to get the job done right. You can book cleaning services online, it’s easy and fast.

You’ll save money on deep cleaning supplies and equipment by hiring a professional service. If you try to handle this job yourself, you might spend hundreds of dollars on supplies like vacuums, mops, brooms, microfiber towels, and more. You may also need specialty products for tile or wood floors.

A professional cleaning service like My Cleaning Angel has the experience and expertise to do all of the dirty work for you, with appropriate tools and supplies!