fbpx
Select Page
How To Clean Blinds?

How To Clean Blinds?

Blinds can be a great and stylish addition to any room. They look chic, come in various styles, protect from sunlight, and provide adequate privacy. But people tend to overlook cleaning their blinds! Just because they’re hanging on the windowsill doesn’t mean they don’t require proper care and cleaning. Blinds can easily catch dust, hair, fur, and other nasty things, losing their shine and quality over time. 

To get those perfectly clean blinds, you don’t need to take them down entirely like you would with curtains. This kind of cleaning is more hands-on and can be done while keeping them in their original place. All you need are a few simple starting materials and a cloth to clean blinds quickly and easily.

My Cleaning Angel offers blinds cleaning on post construction cleaning or as an extra during your regular cleaning service. Booking cleaning service online is super easy and fast, you can get a quote in seconds.

book cleaning service online

The Materials You’ll Need

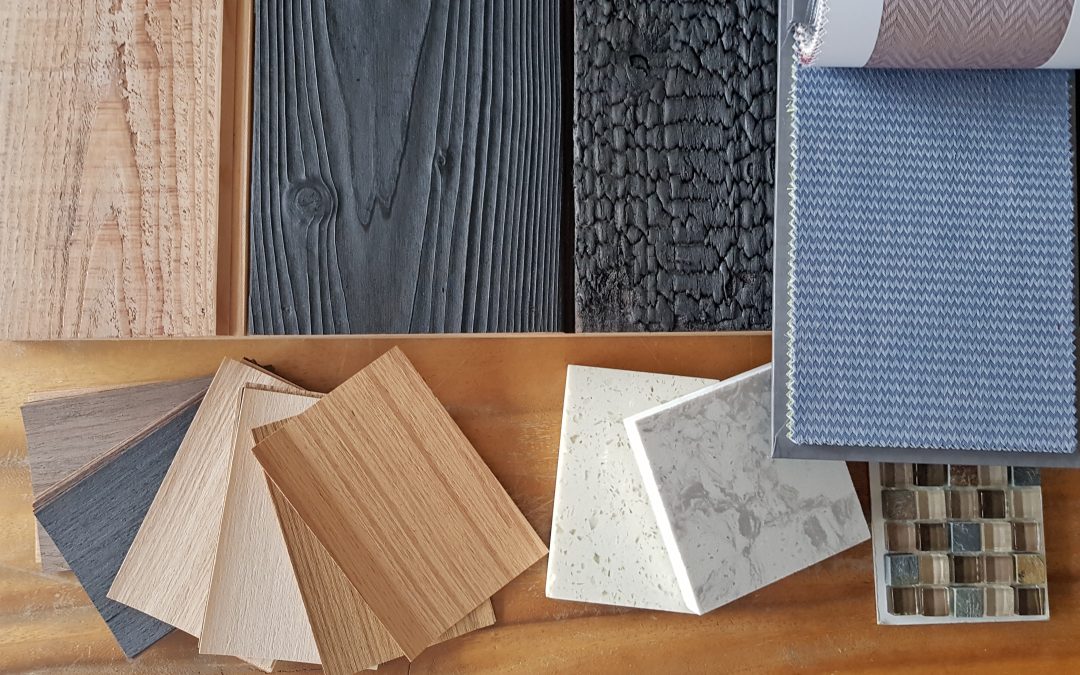
Blinds come in all kinds of varieties, such as wood, vinyl, faux-wood, and fabric. So, there’s no fixed way of going about this process. The type of cleaning will depend on the material, amount of dirt, and the blinds’ location. Kitchen blinds tend to get greasier and dirtier than usual, so they’ll require a more rigorous cleaning. 

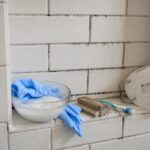
Whatever the make, the first step to achieving clean blinds will start with the following materials:

  • Dishwashing soap
  • Warm water
  • Vacuum cleaner with an attachment (mostly soft brush)
  • Microfiber duster or cloth

The Basics

Before we get into the details of cleaning each type of blind, let’s start with the fundamental procedure that you can apply to each one.

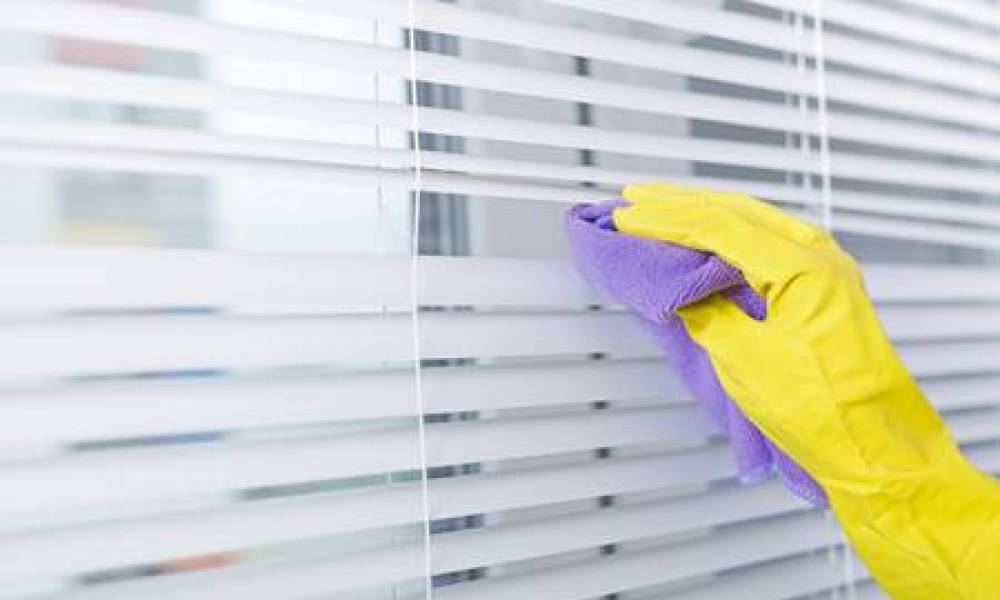
Start with dusting. If you’re using a microfiber duster, leave the blinds open and run the duster from top to bottom. Do this so that all the dust from the top settles at the bottom, which you’ll be able to clear out easily later. In the case of a microfiber cloth, close the blinds and wipe away the dust from top to bottom. Flip the blinds so that you can brush the other side the same way as you did before. Vacuum any dust that settles at the bottom.

Some blinds won’t settle for a simple dusting. They’ll need a more thorough cleaning depending on their make. Start with the instructions mentioned in the “The Basics” section and follow the procedures discussed below according to the blinds in your home.

clean blinds

Plastic

Plastic blinds are mostly made of vinyl or PVC. They’re popular due to their affordability and durability. You’re likely to find these in many homes and offices. You can clean them in two ways: by removing them entirely or keeping them in place. If you prefer to remove them, start with the basic dusting procedure mentioned earlier. Remove the blinds and soak them in a bathtub filled with warm water and soap for some time (an hour should do the trick). Wipe away any remaining dust on the blinds using a cloth and leave them out to dry. If you prefer to keep your plastic blinds on while cleaning, simply wipe them with a wet cloth soaked in soapy water.

Fabric

Fabric is a popular choice because it comes in a variety of colors and designs. But they are delicate and require greater care. You can either spot clean or deep clean them, depending on your preference and the type of cleaning needed. 

For spot cleaning, dilute some soap and water to make a mild cleaning solution and blot the stained areas with a sponge. Repeat till the stain is gone. Make sure not to rub! Always let the blinds air dry as heat tends to fix stains. Another trick for fabric blinds is to use a hairdryer on the “cool” setting to blow away any dust or other particles.

For deep cleaning, remove your blinds and start with a vacuum. Fill a tub with soap and water and let them sit for some time. This allows the soap’s chemicals to remove stubborn stains or dust that may have accumulated over time. Use a sponge to clean the slats and rinse well. Lay them out to dry for a day in an open area.

Wood

Wooden blinds are a favorite due to their beauty and elegance. They can make any room stand out and are an instant game-changer. However, they’re also more expensive than other materials, and the cleaning is more intricate. Avoid water at all costs as it causes the blinds to discolor and lose their shape. The same goes for harsh chemicals that can damage the material.

To clean your wood blinds, start with light dusting as described earlier. It would be best if you did this every week to remove dust and dander. You’ll need a cleaning solution made for deep cleaning, especially for wood, to retain its shine and beauty. Depending on the kind of solution, use it directly from the bottle or dilute it with water if it’s concentrated. Add the cleaning solution to a bowl, dip your cloth, and start cleaning the slats from top to bottom. Don’t forget to dry each blind with a cloth to absorb any excess solution. You can also use lemon oil or synthetic wood conditioners every once in a while if your blinds are looking dull or have lost their shine.

Faux Wood

If you want the sophistication that comes with wood blinds but don’t want the hefty price tag, faux wood blinds can be a great option! You can get the same look at a much lower price, and cleaning them is also comparatively more straightforward. Faux wood blinds have no problem with water, so you can use as much water as you want to get those squeaky clean blinds. Hence, they are resistant to moisture, fading, and scratches. 

For cleaning, you’ll have to start with the same dusting routine. If your blinds are exceptionally grimy, start with wiping to remove dust and debris from the surface. Add mild detergent to a bucket of warm water. White vinegar can also work in place of detergent. Remove the blinds from the window, dip a cloth in the cleaning solution, and start wiping each slat. Scrub thoroughly if a stain won’t go away by simple wiping. Don’t forget to flip the blinds and clean the other side. Use a dry cloth to remove any excess moisture and let them air dry for a bit before you hang them up again.

clean blinds

Tips and Tricks

Getting clean blinds is not such a difficult task. All you need to do is follow a consistent cleaning regime to make your blinds last for years. It all starts with regular cleaning. Make sure you dust them weekly so that dust doesn’t accumulate to such a large extent that it becomes a hassle to clean. Depending on the material, deep clean once a month or every two months. For first timers using a cleaning company, it can be hard to wonder how much would cost weekly maid service. Read what we know about it.

You can clean blinds using an old sock for greater reach and area coverage. Just put it over your hand, dip it in cleaning solution or water, and start cleaning! This trick will help you reach those nooks and crannies that might be inaccessible with a cloth. 

We hope this article provided you with all the information you needed to clean all kinds of window blinds. Just make sure you’re cleaning regularly and follow these tips to get clean blinds in no time.

 
How To Clean The Oven?

How To Clean The Oven?

Cleaning an oven can be a very daunting task, something one tends to avoid for as long as possible. Scrubbing off grease and stubborn burnt carbon plus picking up burnt pieces of food and the accumulated residue is just exhausting! Keeping your house clean is not an easy job.

But who doesn’t love a clean oven, almost as good as brand new! 

Yes, cleaning the oven may be a long tedious task but it doesn’t always have to be such an extensive and exhausting process. We are here with the ultimate guide to cleaning your kitchen, and the reward is a sparkling clean oven that feels worth the time and trouble.

Now for those who are wondering, why should we even clean the oven?

Why Should You Clean Your Oven?

A dirty oven can be hazardous and can lead to multiple issues including fire hazards. If you don’t clean the oven for a while, grease and little bits of food can get left inside. This can cause extensive smoke output the next time you cook. As the food will continue to burn, resulting in a fire hazard. Along with that, the smoke can trigger fire alarms. And let’s not forget, the bitter burnt flavor may impact the taste of your meal.

If you avoid cleaning your oven for long you will start to notice visible discoloration. As well as damage to the oven, grime on the glass and all this of course leads to a reduced oven life. Booking cleaning service online to clean your oven and the whole house is super easy. Try it yourself.

book cleaning service online

Choosing the Right Products

Most cleaning products contain sodium hydroxide which is a highly corrosive chemical. Yes, it’s a very effective cleaner and gets the job done momentarily but it leads to reduced oven life. The quality of your oven clean will be dependent on the type of oven cleaner you use. There is a selection of cleaning products available in the market, ranging from strong solutions – easier cleaning and target heavier stains. Versus ones with a low chemical concentration – lighter clean and more scrubbing. Your aim when finding the right cleaning product for your oven should be to focus on the type of oven you have and to avoid anything that contains a high concentration of sodium hydroxide. 

What Is The Best Way To Clean Your Oven?

Here’s the ultimate guide to cleaning your oven. First and foremost, it’s important to cleanse all components. From the oven racks to the glass exterior to the inside walls of the oven. Every bit of the oven requires thorough cleaning.

What Will You Need?

Using the right equipment is key. Here is what you will need:

  • Oven cleaner of your choice – No sodium hydroxide 
  • Rubber gloves
  • Cleaning cloth – preferably microfiber 
  • Large resealable plastic bags
  • Sponges
  • Scourer
  • Kitchen towels to line the floor
clean the kitchen

Procedure:

If you have an electric oven, you must ensure the oven is switched off from its main power outlet. As you will be using liquid cleaners in an electrical appliance. It is important to also ensure that the oven is cold before you start cleaning. Stop using it for at least two to three hours before starting the cleaning process. Put rubber gloves on, keeping your arms and wrists are covered at all times. Pick up any bits of burnt food, dirt, and crumbs.

The next step would be to clean out the oven racks. Begin removing the oven racks and knocking off any debris or stuck-on food. Place them in the large zip-lock bags with the cleaning solution and leave it for 5-6 hours or preferably overnight. This will remove most of the tough residue. Remove the racks from the bags and scrub the remainder of the residue off with a scourer and hot, soapy water. Then rinse and dry immediately. Place them back into the oven once you’re finished cleaning everything. 

In case you don’t have large zip-lock bags available, you can soak the racks in the sink in warm water mixed with dish soap. Leave them in there for a few hours, preferably overnight, and then continue with the steps as above.

To clean the inside walls of the oven:

Apply the oven cleaner as directed on the safety instructions of the chosen oven cleaner, use a sponge and scrub away all the grease and grime. Keeping your gloves on, wipe the oven using a wet cloth. You can repeat this step, in case of any stubborn stains. Since the oven cleaners contain a lot of chemicals, it is important to leave the oven door open to allow ventilation. 

To clean the glass door:

You can use a mixture of water and dish soap to clean the glass door or buy a special glass cleaner if you prefer or even use the oven cleaner itself. Open the oven door and lay it as flat as you can to avoid the liquid mix from running down. Scrub the glass gently with a sponge to remove the stains and grease. Pro-tip: Use any old toothbrush to get into the corners and crevices of the glass door hinges. You can repeat this step until you’ve achieved perfection. Once this is done, take a cloth, microfiber preferably, and wipe the glass door clean.

To clean the oven trays:

Once you’ve taken the oven trays out, take some paper towel and wipe off all the excess grease, especially parts like the inner corner since most grease accumulates in the corners of the tray. Removing the grease like this helps the remaining process. Place the trays in the sink and run warm water until the trays are sufficiently covered. Add biological washing powder and mix, this helps break down any stubborn oil stains. Leave them to soak for three or more hours – turn halfway if your trays don’t fit completely in the sink. Use a scouring pad to remove any remaining residue. Place in the dishwater for an additional final cleanse.

The final step: Reassemble the oven.

Once all the components of your oven-dry out, wipe all the components with a clean microfiber to ensure there’s no residue left. Gently place each rake in the oven one by one. Make sure each component is replaced properly. Leave the oven door open if needed to ventilate any remaining product.

clean the kitchen

Why Should You Hire Professional Cleaners?

Yes, cleaning an oven yourself is manageable, especially when you have plenty of time and the right products. However, many people are turning to professional oven cleaners. Hiring a House Cleaning Company provide maintenance, deep cleaning, professional equipment, and most importantly a hassle-free day. 

Cleaning solutions claim to provide deep cleaning but that’s just temporary especially if they aren’t used as per the instructions. Professional cleaners get into the deeper crevices and corners removing all the carbon deposits and built-up dirt in the filters and deeper mechanisms. A professional oven cleaner will be able to get deeper into the oven to remove grease deposits in the mechanisms. Often the parts and areas which aren’t so obviously visible to us. 

Another reason to hire Professional oven cleaners instead of cleaning the oven yourself is that they can dismantle the oven and reassemble it a lot faster and accurately. They understand how it works and which bits to take apart to get the best deep clean. They can also carry out a maintenance examination to find any damage that has occurred.

In comparison, home cleans are not as thorough. Therefore, having a full service means you have the comfort of knowing your appliance is working to its optimum efficiency.

 
How To Clean Every Type Of Floor?

How To Clean Every Type Of Floor?

Like it or not, cleaning your floors is something you simply can’t avoid. Even if you keep your floors in impeccable condition, dirt and grime will eventually settle in. What’s tricky is that clean floors don’t go by a “one size fits all” method – you need to tailor your cleaning regimen according to the floor type. But it doesn’t always have to be such a painstaking task. Cleaning procedures may vary according to the materials, equipment, and frequency, but no matter how varied each method is, what you’re getting at the end of the day is a neat and tidy floor that’ll make each room in your house stand out and look beautiful.

All you need is the proper guidance and information on maintaining your floors, and that’ll make your job ten folds easier. If you’re applying the wrong technique, then that’ll not only leave your floors looking dirty but may also end up damaging them in the long run.  That’s why it’s better leave the job for house cleaning companies. They can clean faster and better.

In this article, we’ll list down some tried and tested methods depending on the kind of flooring you have so that you can have clean floors in no time.

book cleaning service online

Hardwood

There are two kinds of hardwood floors: sealed and unsealed. If it’s unsealed, water can penetrate between the crevices, causing the wood to swell. However, if it’s sealed, then cleaning with water is perfectly fine. To figure out whether your floor is sealed or unsealed, rub your finger across the floor. If you see a streak, then the floor is unsealed and vice versa.

Always start with a dry sweep using a vacuum or mop to get rid of dust, hair, and debris. Sealed floors have a protective coating that prevents stains or water damage. In that case, use mild soap and warm water to clean the floor with a microfiber mop gently. Make sure the mop is sufficiently damp but not soaking if you don’t want to spend the next couple of minutes waiting for the floor to dry. If your floor is unsealed, then try using a commercial cleaner instead. You can still use soap and warm water, but make sure that water doesn’t pool. It is recommended you clean high-use areas such as the kitchen once a week and the less frequented areas once a month.

For understand and see what is price of a weekly maid service, read out blog post about it.

Laminate

People often confuse laminate and hardwood floors due to their similar appearance, but you can’t apply the same cleaning strategy to laminate that you do on hardwood. Laminate is relatively easy to maintain as there are very few things that may harm it. A dry mop or vacuum is sufficient but remember to avoid water seeping underneath the planks. You may also spot-clean with a damp mop if need be. If the plank looks worn out, it’s better to replace it altogether rather than polishing it.

Bamboo

Bamboo is a beautiful and sturdy material for flooring. It’s as long-lasting as hardwood and even more resistant to water damage. While bamboo is easy to clean, it needs regular maintenance to keep that original shine. It’s softer, so there’s a higher probability of scratches compared to hardwood. Clean heavy traffic areas such as the kitchens or hallways daily. Make sure you clean spills immediately and run a damp mop at least once a week. 

Mild soap and warm water make an effective cleaning solution for bamboo floors. Swipe this solution using a microfiber mop across the floor and wipe up any excess water with a dry towel. A good tip is to use a tennis ball to buff out marks and scratches. Broom bristles may scratch bamboo floors so that a tennis ball can do the trick.

clean tile floors

Cork

Cork is a popular choice for home flooring but is a tricky material to clean. It absorbs water almost instantaneously due to its high porosity. That’s why most cork floors are sealed, but they’re never completely water-resistant. Hence, it would be best if you clean any spills immediately. Vacuum the floor daily to prevent dirt build-up. Make a cleaning solution of vinegar, dish soap, and warm water. Spray the solution on the floor one section at a time and wipe using a soft mop. Make sure the mop isn’t soaking to prevent the floor from swelling up. For the more stubborn stains, make us of a fine grain steel wood pad.

Vinyl

Frequent mopping with plain water does the trick for vinyl floors. Vacuum or dry sweep to remove dirt and dust. Apple cider vinegar is the holy grail of vinyl floor cleaners. The acid removes dirt without leaving any residues. Mix apple cider vinegar with hot water and use a damp mop to sweep the floor. If you’re looking for a disinfectant, then replace apple cider with white vinegar. Use jojoba oil and baking soda to add shine and remove stubborn stains, respectively. Avoid abrasive scrubbers, detergents, ammonia-based products, and the neater-bar configuration on your vacuum while cleaning vinyl floors.

Tile

Clean floors start with a dry sweep and vacuum to get rid of any surface dust and debris. Use mild soap and hot water to mop the surface. While many people focus on cleaning their tiles, they forget to take care of the grout. This is the porous material that seals the tiles. It’s made of sand and cement, so it absorbs grease and dirt quite quickly. To clean grout, mix water and hydrogen peroxide and scrub using a toothbrush. 

Make sure you’re using a chamois mop instead of a sponge, as the latter pushes dirt into the grout. Avoid acid-based cleaners, especially vinegar; the acid loosens the tiles and causes long-term damage.

Shag Carpet

Let’s not forget that carpets and rugs are still in fashion. Many pages will give you tips on keeping your tiles or hardwood clean but won’t provide much information on carpets. Ensuring your carpets are in good condition is just as important. Once in a while is good to hire a carpet cleaning company.

Shag carpets are woolly rugs and add a cozy vibe to any room. But keeping them clean is an intricate task. Improper or careless cleaning damages their look. For the best results, use a steam cleaner. A straight-function floor nozzle can work for regular, everyday cleaning. Another tip is to take the carpet outside and beat it with a broom to remove all dirt and dust particles.

clean tile floors

Looking for a Professional Cleaning Service?

While this article gives you all the tips you need to know to clean floors thoroughly, certain limitations may prevent you from doing so. You might not have the time or energy to do such an in-depth cleaning every week, or you prefer to spend that free time with your family rather than scrubbing the bathroom floors! If that’s the case, you can always call My Cleaning Angel to provide you with the best home and floor cleaning solutions!

My Cleaning Angel has been in Florida since 2013, all thanks to their fantastic team and excellent reviews left by the customers. If you’ve decided that house cleaning services are the right option for you, then get in touch with My Cleaning Angel today! If you have any queries or would like to contact the team, a customer service assistant will be glad to answer your questions and get you on your way to a spotless home!

 
How To Clean Ceramic Floors

How To Clean Ceramic Floors

It’s Shine Time

Ceramic floors are only as durable as how well you treat them. Suave looking, modern and the perfect background for your rugs, ceramic floors are all the rage today. In high-frequency areas like bathrooms and kitchens where spillages are common, ceramic floors prevent moisture erosion. And huge, sticky messes. Houses with kids and pets are more prone to overlooking ceramic floors while cleaning. But our tips are here to make your floor as sanitary as can be! Clean ceramic floors are extremely easy to maintain compared to other types of flooring that require more work. If your ceramic tiles have started looking grimy and dull over time, a simple mixture and some household cleaning items will suffice to transform them into clean ceramic floors again.

You should have a recurring cleaning, so you don’t have to worry with your ceramic floors. And try to always advise your house cleaner those tips you read on our blog.

Get your Hands Dirty

Getting tempted into spending a pretty penny to cut out the mud the kids have been tracking onto your ceramic floors? Instead of using commercial cleaners that can sometimes be abrasive and dull the shine of your floors, opt for our easily-made cleaning agent instead. Vinegar and castile soap, phenyl, and even dish soap mixed with warm-hot water can create a magic de-greaser for your floor!

Before you go sloshing this mixture around with a mop, it’s important to vacuum or sweep the floor dust away. Otherwise, all you will be doing is spreading grime instead of cleaning it. It’s important to not go overboard with high amounts of vinegar and spread it copiously everywhere. Instead, use a spray bottle to take out the desired amount of solution for particularly stubborn floor stains. Microfiber mops are your best friends, since they are reusable and cheap. (This is what we use at My Cleaning Angel, too, to maintain sustainability.) And also eco-friendly. For that extra clean ceramic floor that doesn’t smell like bucket loads of disinfectant, you can add some drops of essential oil or room freshener to your cleaning solution.

book cleaning service online

Weekly Washing for the Win 

You may not need to pull out the big guns and spend a lot of time and effort mopping away the accumulated dirt if you clean your floors weekly. Most people do some arbitrary sweeping every other day. And mopping weekly on top of that may be your best bet for floor maintenance. Are you wondering how much is a weekly maid service? We have the answer. Clean ceramic floors can be a common phenomenon at your house with weekly warm water and dish soap mop. This ensures that pathogens, bacteria, grime, and grout don’t make a permanent home in your ceramic floors.

Cleaning ceramic floors more frequently also means you won’t need to use strong-smelling, abrasive and harsher chemicals on your kitchen and bathroom floors. Ceramics are there for aesthetic appeal. So make sure your frequent cleanings don’t tone down the color and style by bleaching the tiles. Choose an infrequent spot, test it multiple times with different solution strength. And pick the potency that doesn’t erode the finish of your ceramic tiles.

No-No to Grey Tiles 

When it comes to frequent cleanings, you may sometimes find your tiles worse for wear. Cloudy residues, dust clinging to the ceramics, or pushed into corners are all easily avoided. The simple trick here is: use a string/rope mop. Sponge and cloth mops push dirt and grease here and there, instead of lifting it off the floor. String mops also prevent dirt from accumulating as grout in the cracks of your ceramic tiles. To achieve a truly clean ceramic floor, replace the water in your bucket frequently to prevent clouding your tiles. 

No Slip-Slopping-Spilling 

Sticks and stones may break your bones- and slippery ceramics will, too! Many people tend to leave water coating ceramic tiles while cleaning- and the rest is predictable. Ceramic tiles are very slick when wet. And so it is best to choose a time where the room is less frequented and to turn the fan/air on to dry the floor faster. Spilled milk, juice, and food on ceramic floors may not catch the eye as being a slipping-hazard. But many a sticky puddle have had people skidding over them. Damp mops clearing up the spillage is the smartest way to prevent someone from getting hurt. And also your tile looking sprightly and clean all the time.

clean ceramic floors

Goodbye to the Grime 

Dark streaks in the crevices of ceramic tiles look gross and unsightly. But there is a simple way to get them clean. Frequently using a stiff brush with your vinegar-dish soap solution. To scrub away at any grout and dirt can prevent grime from accumulating. For very stubborn, moldy grime, using hydrogen peroxide can work like a charm. To prevent the extra time spent on waiting for the solution to work or creating a solution with higher potency, make sure to clean between the cracks frequently to prevent build-up and achieve clean ceramic tiles

A Quick Run-down: 

  1. Sweep, Vacuum, Clear: Your mopping ritual will be futile if you don’t sweep or vacuum the floor prior to dampening it with a cleaning solution. Dust can very easily accumulate in corners and furniture edges. So do a thorough job to sweep the floor for clean ceramic tiles.
  2. Use your Concoction: The special vinegar, water, dish soap, and scented oil solution is your best weapon to wipe those ceramic tiles clean. Use a spray bottle for smaller surface areas and allow time to dry the floor. 
  3. Scrub the Stubborn Grime: Using eco-friendly microfiber mops/rags, or a firm brush for particularly stubborn areas, go across the floor vertically or horizontally. Switch out the water you are using frequently.  Use circular motions to compel the brush to dislodge grout from the tiles. 
  4. Plan, Don’t Overdo: Many people’s brightly colored ceramic tiles become grey and dull prematurely because they use very strong floor cleaners. And apply excess pressure to the tiles. Testing out a small, inconspicuous area with the solution before you use it on your tile is always a good idea. 
  5. Switch out Material: It’s important to get fresh water if the water in your bucket has gotten cloudy with dirt. The same goes for mops, especially ones that are visibly dirty after some scrubbing. Either wash them thoroughly if they are reusable and wring them out till the excess water is clear before you use them on the floor again.
  6. Go Over the Floor: Components like vinegar and detergent, especially floor cleaners, can leave an unpleasant, chemical smell. To cut this out and also remove the vinegar/detergent from the floor, it’s important to go over the floor again with a cloth saturated with only plain water.

clean ceramic floors

Professionally-cleaned, Pristine Floors 

While maintaining clean ceramic floors yourself isn’t a very hard feat, sometimes professionals can do it better. If you’ve neglected your tiles for too long, the expertise of floor cleaners in our expert team will beat out the germs and the dirt alike. The aesthetic appeal and multitudes of colors, patterns, and themes clean ceramic flooring brings to your house is worth the extra buck. Build-up between tiles can be very difficult and time-consuming to remove and an expert can do it better and faster. Book cleaning service online for your home has never been more easy. The money you spend consulting a cleaning team with credentials like ours will be worth every penny as your clean ceramic floors exude a wonderful shine!