fbpx
Select Page
How To Get Rid Of Water Stains On Wood

How To Get Rid Of Water Stains On Wood

Wood is a sturdy material, adopted by humans into their everyday lives in diverse ways. It has great shine and luster to it, the degree of which depends upon the kind of wood you use. It is used greatly in construction and furniture-making all over the world. As a material, wood is extremely sturdy and can have a long life depending on its usage, but is not resistant to the wear and tear of everyday life. 

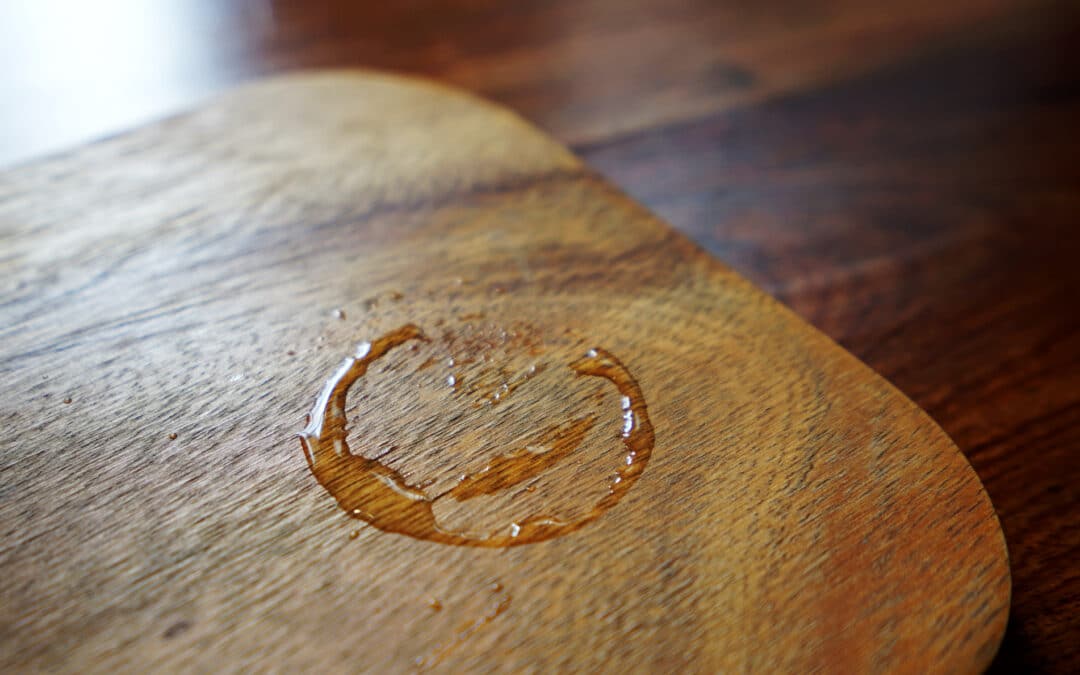
White stains or watermarks, visible on the top of your wooden furniture, are due to the moisture that has soaked into the top layer of the wood finish. This moisture gets into the wax and naturally clouds it up, forming the whitish stains. One of the biggest assets in avoiding these stains are coasters and table covers, which protect the surface of the wood from any moisture or spillage. But being proactive doesn’t work all the time. Doing or hiring someone to do a house cleaning in your home can help.

Wood furniture is usually labeled as ‘damaged’ with the appearance of watermarks or stains of water on wood. But you need not be so quick to disregard your wooden piece, instead, stick around to find out how to clean wood or more importantly, how to get rid of water stains on wood. 

Here is a list of ways you can DIY the stains out of your wood. It is naturally a job best left for professionals to do, to protect the wood from further damage. My Cleaning Angel is our cleaning company that provides all sorts of cleaning services. So, if these tips and tricks don’t work out in your favor, contact My Cleaning Angel and book cleaning services online for a job well done!

book cleaning service online

Tips and Tricks to Remove Water Stains from Wood

These tips will come in handy when you’re trying to remove the coaster rings/water stains off your furniture. These are the most reliable techniques to clean wood, but you might have to go through the process of trial and error to figure out the best trick that works in your case. 

1. Buff It Off

If you have recently spilled water on your wooden floors or any wooden piece of furniture, acting quick might work in your favor. If the stain has already formed, you will need a cotton cloth, hairdryer, and oil-based wood polish.

–       Use a soft, cotton cloth to buff the surface over the stain.

–       Work in the direction of the grain for best results.

–       Use a hairdryer on its lowest setting to help with the process.

–       Cover up the now clean wood with oil-based furniture polish.

2. Use an Iron to Get Rid of the Moisture

If the rings on your furniture are light-colored or cloudy, it means that the moisture hasn’t yet reached the wood. If the stain is new, acting fast helps secure your chances of removing the stain. Use a heating tool to remove the moisture from the surface of your wood. Here’s how to go about it:

–       Take your iron and make sure no water is left inside in case of a steam iron. (You can use a hairdryer, heat gun, or any other heating device)

–       Lay a cotton t-shirt, napkin, or cloth over the stain.

–       With the device on its lowest setting, use it lightly over the fabric and repeat until the stain has vanished or diminished completely. 

3. Scrub Away Your Worries

If you have been unsuccessful in removing the stain with heat, the next step for you is to move onto a rag and toothpaste. Using white toothpaste instead of a gel is ideal for this process. 

–       Squeeze a generous amount of toothpaste onto a rag.

–       Rub the toothpaste into the stain and rub only for a minute to see the results.

–       Wipe it off with a clean cloth.

One thing to keep in mind is to not over rub the furniture and focus only on the stains. Overusing toothpaste can otherwise damage the finish of your furniture.

clean wood

4. Rub on Some Mayo 

Another way for you to clean wood is to use mayo on the stubborn stains. For this, you will need again a rag and some mayo.

–       Put some mayo on a rag and rub it on the water stains. The ideal hack here is to start from the least inconspicuous area and do a patch test.

–       Let the mayo set in and leave overnight if needed.

–       Wipe it off with a clean cloth. 

If the mayo seems to work but only slightly, consider adding some cigarette or fireplace ash to the mayo and then rubbing it in the stain. The friction caused by the abrasiveness of the ash works well with the oil to rid you of the moisture stains. 

5. Use a Mix of Olive Oil and Vinegar 

If all the above tricks have failed you in removing the stains, maybe this one will help. Olive oil is a miracle worker and will not disappoint here either.

–       Mix equal parts of olive oil and vinegar in a bowl.

–       Use this mixture to cover the water stains on your furniture using a rag.

–       Rub this mixture in the direction of the grain until you see some improvement.

–       Wipe it off with a clean, dry cloth.

Olive oil and vinegar are great ingredients to use on your expensive furniture. Vinegar helps in the removal of the water stains while olive oil acts as a natural polish for the wood. 

6. Sand Away

When no above-mentioned trick works on your stains, don’t lose heart. There are still many ways to recover your wood from these ugly watermarks. But keep in mind that this trick must be used as a last resort.

–       Take mild grain sandpaper.

–       Sand the furniture sound to bare wood.

–       Use a lacquer, oil-based furniture polish, or linseed oil to refinish it.

clean wood

No Success? Consider Hiring My Cleaning Angel!

Wood furniture is often really expensive and not easily replaceable. To protect your wood furniture from damage and to keep it looking fresh, you have to take care of it. Using chemical-induced cleaning products can damage the surface of the furniture and destroy the wood underneath. A clean rag is enough for surface cleaning of wooden furniture. To protect from water stains, use coasters, and table runners and monitor the surface for any stains, regularly. 

For most water stains on wood, you have to gauge the severity of the stain. The watermarks that have turned brown or black scream trouble. Most stains are easily removed by the above-mentioned tricks, but older, darker rings require professional help. You can find help cleaning your living room in a past article.

My Cleaning Angel is a cleaning company ready to dispense expert cleaners to your home in less than 60 seconds. We have a team of qualified professionals ready to cater to every one of your cleaning problems. Whether it is a deep cleaning of your house, washing scorched dishes, or getting rid of water stains on wood, we do it all. Getting stains out is hard from any surface and requires a bit of elbow grease, but hiring qualified professional help makes it so much easier. So the next time you observe water stains on your furniture, call My Cleaning Angel services to take care of all your cleaning needs!

 
How To Maintain & Clean Your Leather Couch

How To Maintain & Clean Your Leather Couch

As luxurious as your leather couch looks today, with proper care and maintenance, this investment can last you a very long time!

Compared to other fabrics used in couches, leather is by far the most durable option. One of the only fabrics that look better with each passing day, only if you follow the tips.

Read along to discover the best solution to clean leather couches, making them look brand new even after all these years.

house cleaning

Daily Care Routine

Whether protected or unprotected, leather upholstery is delicate. To make it long-lasting we have some suggestions for you:

Soft Wipe

Regardless of the weather and haze intensity in your area, it is ideal to wipe and dust your couch with a soft micro-fiber cloth every fortnight if not every day. This is very important because it prevents any dust particles to settle in your leather or leave a stain.

Don’t Let A Spill Sit

If by any chance, someone drops off a drink or a bowl of spaghetti on the couch, use a cloth or toilet paper to wipe it as soon as possible. Don’t let any liquid or solid sit on your leather couch for long. It might leave a permanent stain.

Monthly Cleaning Routine

Are you not an everyday cleaning person? And prefer to do it once every three to four weeks? Well don’t just leave, we have some secret tips for you too.

Vacuum

Dusting your couch and other furniture every day could be hectic for a working person like you. We understand that you need a less time-consuming yet effective way to clean your leather couch.

Vacuuming your way through your upholstery is just the right choice for you. Leather is sensitive and can bruise easily, we suggest you use a soft bristle brush to clean your leather couch.

Leather Cleaners

You can always go for the store-bought leather cleaning potions. These are handy and widely available. Less time-consuming and of course, it has good results.

NOTE: please consult your manufacturer for the type of leather used in making the couch. Every type has a distinct nature, and the cleaner might not be suitable for your couch.

If you are unsure of the leather used, read till the end where we tell you how to identify the leather of your couch.

Professional Cleaners

If you are unaware of the nature of your couch, and cannot contact your manufacturer, we suggest you not experiment with anything. Hire a professional and let them do the job for you. In doubts on how to clean your living room too? We have the answer.

To decrease the pressure of cleaning and maintaining your leather furniture, don’t forget to wipe the stain then and there with a cloth damped in distilled water.

clean leather couch

Maintain Your Leather Couch

Leather sofa and couch have their own aesthetic, timeless vibe to them. Even after decades, they can still look just as if they were bought last month. Easy to care for and easy to maintain.

Cleaning and maintaining furniture go hand in hand. If you are not providing your leather with its required needs, your cleaning efforts will go to waste.

Follow our guide on how to maintain your leather couch!

Keep Your Pets Away

Owning a pet is good. But having it around your leather couch is a big no. wondering why? Well, that is because cats and dogs have paws, that can scratch and bruise the leather. Teaching them not to sit, cuddle or go close to the couch is your task.

Your investment in luxury might result in a big expense if your pet isn’t trained.

Avoid Direct Heat

Natural products like leather are sensitive to extreme heat or cold and sunlight. Not only if the texture of the material, but also the color of the leather can be worn out in extreme temperatures.

Avoid keeping your leather couch in direct sunlight or near the fireplace. These are two main sources of heat that can affect the natural product. air conditioners can also be a hidden rival of your fabric.

Dust All Sides

Everyone is in a hurry, isn’t it? In the hassle to finish work off as soon as possible, most of us try to clean whatever the eye sees and forget about the rest that doesn’t meet the human eye.

It is essential for you to wipe, dust, and condition all the corners of your leather couch. Why so? Because with time, the leather ages, if it is not treated as a whole, the quality might start to deteriorate from certain areas. Giving it an uneven and untidy look.

Buff Your Leather

Like any other surface, polishing and waxing are vital for leather to maintain a velvety feel. But how? We have a DIY tip for you!

  1. Mix vinegar and any natural oil (preferably flaxseed or lemon) in equal parts.
  2. Dip in a soft microfiber cloth in the mixture
  3. Strain it completely, make sure it isn’t dripping any.
  4. Wipe your leather couch with it and leave it overnight.
  5. Clean the leather couch the next morning with a dry cloth.

Note: please try this on a hidden area to see if your leather reacts to any of the substances used. We prefer you consult with a professional before testing any DIY tip. Or hire our house cleaning services to clean everything in your home.

clean leather couch

Things That Can Cause Stains and Scratches

We know you care about your furniture and we love that. To help you take care of your precious belongings, we have listed all the potential hazards to your leather couch. Try your best to avoid these and you are good to go!

Ink

Leather stains very easily especially dyes. One thing you should avoid using near light-colored leather couches is any kind of pigments.

Pets

Train them or keep them away. This is the only way to avoid scratched leather furniture.

Nails

Anything pointed has to be avoided! From your fingernails to knives or even tools. All these things can not only scratch the leather but also tire it apart.

Solids or liquids

You should dry out any spill caused on your leather. These spills can leave permanent stains or even fade the color away.

If you notice any scratches, rub a clean finger over them and rub them gently with a slightly damp cloth. Buff the couch later to seal the leather. You can also use some leather protectors, subject to the nature of your leather.

How to Find the Leather type?

Before cleaning, buffing, or polishing your couch, make sure you know the type of your leather. This is very important because each type has a separate set of characteristics and has to be cleaned and maintained differently. One way to find out is by reading the manual that came in with your furniture. But you can’t find it, don’t worry. We have a way!

If your leather feels a little stiff, it is probably because it is a protected leather. This means it can handle some wear and tear, but it is sensitive to alkalis; so make sure your cleaner doesn’t have any.

On the other hand, if your leather feels softer and velvety, especially if it was more on the expensive side, it is an unprotected leather; very delicate and sensitive. We wouldn’t suggest you take any DIY steps for it.

If you are looking to get your leather couches cleaned up and give them a fresher look, book cleaning services online with My Cleaning Angel and set your worries free!

 
How To Clean A Showerhead

How To Clean A Showerhead

Is the flow of water from your showerhead blocked? Or is it shooting in all directions? Well, that is because your showerhead needs a deep clean.

Taking a shower is a part of your daily routine. We often forget, but the showerheads are some of the most frequently-used bathroom accessories in our household. Keeping them clean and well-maintained is our responsibility. 

Wondering where your showerhead got all the dirt from? Read along as we explain to you the whole process.

Why Do Showerheads Get Dirty? 

Like everything else, showerheads can also store dirt and tarnish over time. The first thought that comes to mind is, “but showerheads are used to wash dirt, how can they get dirty?” 

Well, water contains some microscopic particles that stick to the holes of the showerhead, leading them to clog over time. These particles are mostly minerals that flow with the tap water.  Another reason for the showerheads to get all rusty and dull is because the lining inside some pipelines corrodes. It travels with the water, but get blocked by the small nozzles in your shower head. 

Over time, these accumulated micro particles create a disturbance in the water flow from your showerhead.

book cleaning service online

Why Should You Clean the Showerheads? 

To have a healthy bathing environment, it is vital to keep your showerheads and other accessories clean and tidy. Talking about the showerhead, particularly, the microscopic particles become home to bacteria and other microbial species that can take a toll on your health and wellbeing. Ingesting the contaminated water, or even getting in contact with it can result in skin allergies and other diseases if not controlled on time. 

Clean the bathroom is essential for some people. And cleaning your showerheads is not a difficult task if you do it regularly, let’s see how!

How to Clean the Showerhead?

Planning to have a long shower after a hot, tiring day that would take all your worries away? Please don’t jump into the shower just yet. You got to have it cleaned up first!

To start, think about the last time you cleaned the showerhead. If you can’t remember the day, it’s probably because you haven’t cleaned it ever. But don’t freak out, we are here to guide you with the deep cleaning process.

Deep Clean

Don’t worry and be prepared to see all the gunk and dirt hidden in your showerhead over the years. Following are the steps to deep clean a showerhead.

1. Detach the Showerhead

The first step is to remove the showerhead from the shower arm. You can use a screwdriver to unscrew the nuts. Place a tissue paper or a rough cloth in between the surface to avoid ruining the polish of the equipment. 

2. Rinse it

Wash the showerhead thoroughly under a faucet. Making sure all the gunk and slime are completely rinsed off. Good job, you are already halfway there. 

3. Pour Some Vinegar

You might be thinking that the water has cleaned up the showerhead, but we suggest you dip the showerhead in a bowl full of vinegar. Vinegar will dissolve all the mineral deposits from the showerhead. Add some baking soda to the bowl for some extra cleaning.

4. Use a Toothbrush

After soaking the showerhead in the vinegar solution, scrub it inside out with a toothbrush. Pour over some baking soda, and rub it in. This will clear all the clogged nozzles and release any settled micro-particles. 

5. Rinse it Again

After you are done scrubbing the showerhead, leave it for 10 minutes before rinsing the substance off. Make sure to wash it thoroughly.  

6. Reassemble the Showerhead

Your deep cleaning is complete. Reassemble your shower and enjoy the smooth flow of clean water. 

Don’t forget to wear gloves while working with vinegar. Your skin might be sensitive to it, better to take care of all the precautionary measures.

clean a showerhead

Routine Clean

You don’t need to deep clean your showerheads every month or so. But to ensure there isn’t any residue piling up, we have some tips for you to perform every month or two.

1. First Step

Mix some vinegar with water in a spray bottle. Spray it all over the showerhead and gently scrub it with a brush. It will clean all the dirt particles that may have started to sit in the nozzles. 

2. Second Step

Be sure of the material of your showerhead. If it is made up of nickel, avoid using vinegar as it might dull the metal overall. You can replace the vinegar with soap from tip 1, and follow the same process. Using lukewarm water may speed up the process.

3. Third Step

Not in a mood to scrub the showerhead yourself? No problem! You can fill a plastic bag with vinegar and water, dip your showerhead in it, and tie the bag with a rubber band. And let it sit for a while or overnight. This way you don’t have to disassemble the showerhead but can still clean it from inside. 

After performing any of the above-mentioned tricks, don’t forget to rinse the showerhead well. Make sure all the vinegar is washed away before you hop in to take a shower. 

clean a showerhead

Things You Should Avoid

While cleaning your showerheads, there are certain things you should take care of, especially if your showerheads are made of metals. Read along to find out!

1. Do not Bleach

While bleaching sounds like the ultimate solution to cleaning everything, it wouldn’t be the right choice in this case. This is because, under the latest research, scientists have found out that bleaching solution tends to boost the reproductive cycle of the bacteria and other microbial species living inside the showerhead. 

We suggest you stick to soap and vinegar only, depending on your showerhead. 

2. Do Not Use Chemicals

You will always find an aisle in the supermarket filled with cleaners. They might claim to wash off showerheads too, but please don’t try anything without consultation. These cleaners comprise of highly reactive chemicals which might cause further damage to your washroom equipment. 

3. Do Not Use Harsh Brushes

As you read above, we suggested you use a toothbrush for scrubbing the showerhead. Well, this was for the same reason. Toothbrushes are comparatively softer than the normal bathroom scrubbers available in the market. 

To clean the showerheads, opt for a brush with soft bristles to protect the shine of your metallic showerhead. 

4. Do Not Use Vinegar

Vinegar tends to react with metals leading to a rusty, corroded look. Prefer using a bar of soap or a dishwashing liquid to clean your metallic showerheads. 

For the plastic ones, you can use vinegar, no problem!

clean a showerhead

Is the Process Difficult and Time Taking? 

The process to clean showerheads is relatively easy if the dirt is not much. But if you haven’t had them cleaned in a while, it might get tricky. 

On average, routine cleaning and deep cleaning, both shouldn’t take more than a day. But if you are lazy and don’t have time to do these chores, we do have a solution for you! 

Let us handle all your cleaning duties at the most reasonable prices ever. From cleaning your showerheads to your marble floors, leave it all on us. We have a team of extremely professional cleaners just a call away from you. Book cleaning service online with us now and free yourself from all the household cleaning duties!

 
How to Clean Scorched Pans And Pots

How to Clean Scorched Pans And Pots

Every one of us has heard the phrase “A watched pot never boils”. But the other half of it, “it scorches as soon as you leave it unattended”, is rarely talked about. Just because nobody talks about it, does not mean that it doesn’t happen to the best of us and often, to the best of our pots. It might be a bawling child, a climax to your favorite TV show, a phone call, a Zoom meeting or, a ringing doorbell, that drags you away from your pots on the stove. 

When you burn a pan, you immediately start thinking of harsh chemicals or scratchy tools to get rid of the marks. This can greatly damage your utensils especially if they’re made of stainless steel or aluminum. Before you resort to that, understand the nature of your pot and the gentlest way to get the scorched material out.  Non-stick pans require gentle use and cleaning, so it’s better to get them cleaned by a professional, rather than attempting on your own. 

If you’ve ever been in a similar predicament and are mourning the loss of a beloved pot, keep reading to find out some tried and tested methods to clean scorched pans and pots. If you need help with more than your pans, check how to clean the kitchen.

book cleaning service online

Tips to Clean Burnt Pans and Pots

1. Soak It In

When you take your burnt pan off the stove, the first instinct is to put it in water. And that’s exactly what you should do. Try to scrape off the access burnt material with a wooden spatula, soak it in water, and leave it in overnight. The water softens the burnt material and breaks its bond with the pan, eventually removing all of it from the surface. Soon you’ll have a clean scorched pan. Proceed with washing it with dish soap and removing the clumps with a wooden spatula until the pan is rid of the scorched material. 

2. Use A Dishwater Tablet

A dishwasher tablet can be used in more ways than it’s intended for. The most tried and tested trick to clear off burnt food from your pan, is to heat up some water in the burnt pan. Take it off the stove as soon as it comes to a boil. Rub a dish washing tablet across the burnt surface and the clumps come right off. You can go about washing the pan normally for the desired cleanliness. 

3. Use Eggshells

There are many home remedies to salvage a scorched pot and the craziest one is using eggshells to do it. Heat some water in your pan, take it off the stove and add your eggshells to it. Try using a scrubbing pad to rub your eggshells into the scorched mess. The eggshells create friction, and successfully remove all of the scorched clumps. You may need to add more or fewer eggshells depending on the degree of the burn. Remove the eggshell clumps, wash off your pot normally and you’re good to go! 

4. Use Water, White Vinegar and Baking Soda

To start off with the cleaning process, fill your burnt pan with enough water to submerge the burnt bits. Add a cup of white vinegar to the water and let it boil for about 10-12 minutes. Add 2 tablespoons of baking soda to the water-vinegar mix and let it stew. The baking soda will react with the vinegar and form bubbles. This chemical reaction will help lift the burnt pieces off from the pan. Let the pan get cold and then throw away the water, vinegar, and baking soda mixture and scrub the pan gently with detergent and water. This will get rid of the most stubborn burnt residues.

clean scorched pans and pots

5. Use an Aluminium Foil Ball

Aluminum foil is one of the better ways that get the burnt gunk off your pans but it requires a lot more scrubbing and working than all the other remedies mentioned above. It is also a cheaper alternative but cannot be used for non-stick pots or pans. Before you start the cleaning, put some warm water and dish soap to the pot, enough to cover the charred part and leave it to soak for 30 minutes. Crumple a piece of aluminum foil into a ball, and start the scrubbing process. The friction from the metal on metal will cause the charred bits to loosen up. When you’re done, throw away the improvised metal scrubber into the bin, and wash your pots normally.

6. Lather on Some Ketchup

Out of all of the tips to get out the charred bits from your pans, ketchup may sound the most absurd. Well, it’s totally reliable. The acetic acid in ketchup, help break down the build-up and softens the burnt clumps. Lather on some ketchup, enough to cover the burnt area of the pan, and let it sit for a few hours. After that’s done, scrub with a pot cleaner, or a sponge to get rid of the most resilient stains. Wash your pots normally after that, with water and soap.  

7. Boil Some Lemons

Lemons are famous for getting rid of the most stubborn burns. Just like the acetic acid in the ketchup, the citric acid present in lemons, help with the breakdown of the charred surface of the pan. To start of with this method, take enough water to fill up the scorched pan and fill it to the top. Now add a bunch of cut-up lemons and let it boil for half an hour. You will see the burnt bits coming off and floating on the top while the lemons boil. This technique will get rid of most of your scorches and will give your kitchen a fresh citrus-y scent.  

8. Bring In the Big Guns

Kitchen utensils are the hardest things to clean and the ones that require the most love. Every one of us has experienced the pain of a burnt pot. Many times, we part with our favorites or put them at the back of the cabinet, never to be seen again. This is where My Cleaning Angel comes in. There are numerous tips to recover a scorched pan, but it can never be returned to its original form. My Cleaning Angel provides house cleaning services take pride in taking care of all things cleaning-related. Our team works hard to restore your beloved pieces back to their original gleaming form so you can have the joy of cooking back.

clean scorched pans and pots

Conclusion

Most of the tips and tricks (that have a chance of working) are mentioned above. Yet if you still can’t get the scorched bits out, contact My Cleaning Angel to do your ‘dirty’ work for you. Our expert cleaners work vigorously to give you the cleanliness that you desire. Often higher grade of chemicals and professional cleaning is required to get out the harshest stains. Book cleaning service online is easier than you imagine. We provide you with one of the best house cleaning services in town. Contact My Cleaning Angel for services if you want your scorched pots and pans clean and gleaming.