Select Page
Guide to Cleaning Major Appliances Effectively

Guide to Cleaning Major Appliances Effectively

Keeping a home sparkling clean is no small feat, especially when it comes to those major appliances that work hard behind the scenes. From sticky refrigerators packed with last week’s leftovers to dusty washing machines hiding forgotten socks, these essential devices often get overlooked in the hustle and bustle of daily chores.

The problem many face isn’t just finding the time to clean, but knowing how to do it effectively without causing damage or wasting hours. This is an essential part of a proper house cleaning.

Here’s an interesting fact: research shows that regularly cleaning your appliances can not only extend their lifespan but also improve their efficiency, saving you money on energy bills in the long run.

This guide aims to arm house owners and parents with simple yet powerful strategies for tackling everything from grimy microwaves to soiled ovens. You’ll discover tips on using household items like vinegar and baking soda to achieve a deep clean without harsh chemicals.

Get ready for cleaner, happier appliances!

How to Clean Different Types of Major Appliances

A beautifully organized and spotless refrigerator in a bustling kitchen.

To clean a refrigerator, remove all items from inside, and wipe down the shelves and walls with a solution of mild detergent and water. For the dishwasher, remove debris from the filter area, wipe down the interior with vinegar to eliminate odors, and scrub around the door seal to prevent mold growth.


Refrigerator

An organized refrigerator in a tidy kitchen with various still life items.

Keeping your refrigerator clean not only prevents the growth of bacteria but also ensures it runs efficiently. Start by emptying all contents and removing shelves and drawers. Wash these parts with a mixture of warm water and dish soap.

Wipe the interior with a solution of water and baking soda to eliminate odors, paying extra attention to any spills or stains. This simple yet effective cleaning method helps in maintaining your appliance’s performance while safeguarding your family’s health.

For the exterior, use a damp cloth dipped in soapy water for enameled surfaces, or opt for a specific cleaner if you have stainless steel appliances. Don’t forget to pull the unit away from the wall to vacuum dust off the coils at least twice a year; this step is crucial for maintaining efficiency and extending the life of your refrigerator.

Always ensure that food is properly sealed before returning it to prevent future odors and contamination, keeping your kitchen safe and hygienic for family meals and spring cleaning rituals.

Dishwasher

cleaning major appliances

When it comes to the dishwasher, cleaning both the interior and exterior is crucial for optimal performance. Remove and clean the filter regularly using warm soapy water and a soft brush to remove any food particles or debris that may have accumulated.

Wipe down the door gasket with a damp cloth to ensure a tight seal, preventing leaks during cycles. Additionally, run an empty cycle with a cup of white vinegar in a dishwasher-safe container placed on the top rack to eliminate any lingering odors and disinfect internal components.

To maintain cleanliness, wipe down the exterior with a solution of mild dish soap and water, avoiding abrasive cleaners that could damage the finish. Pay special attention to controls, handles, and buttons as they tend to accumulate grease and grime over time.

Microwave

Cleaning Major Appliances

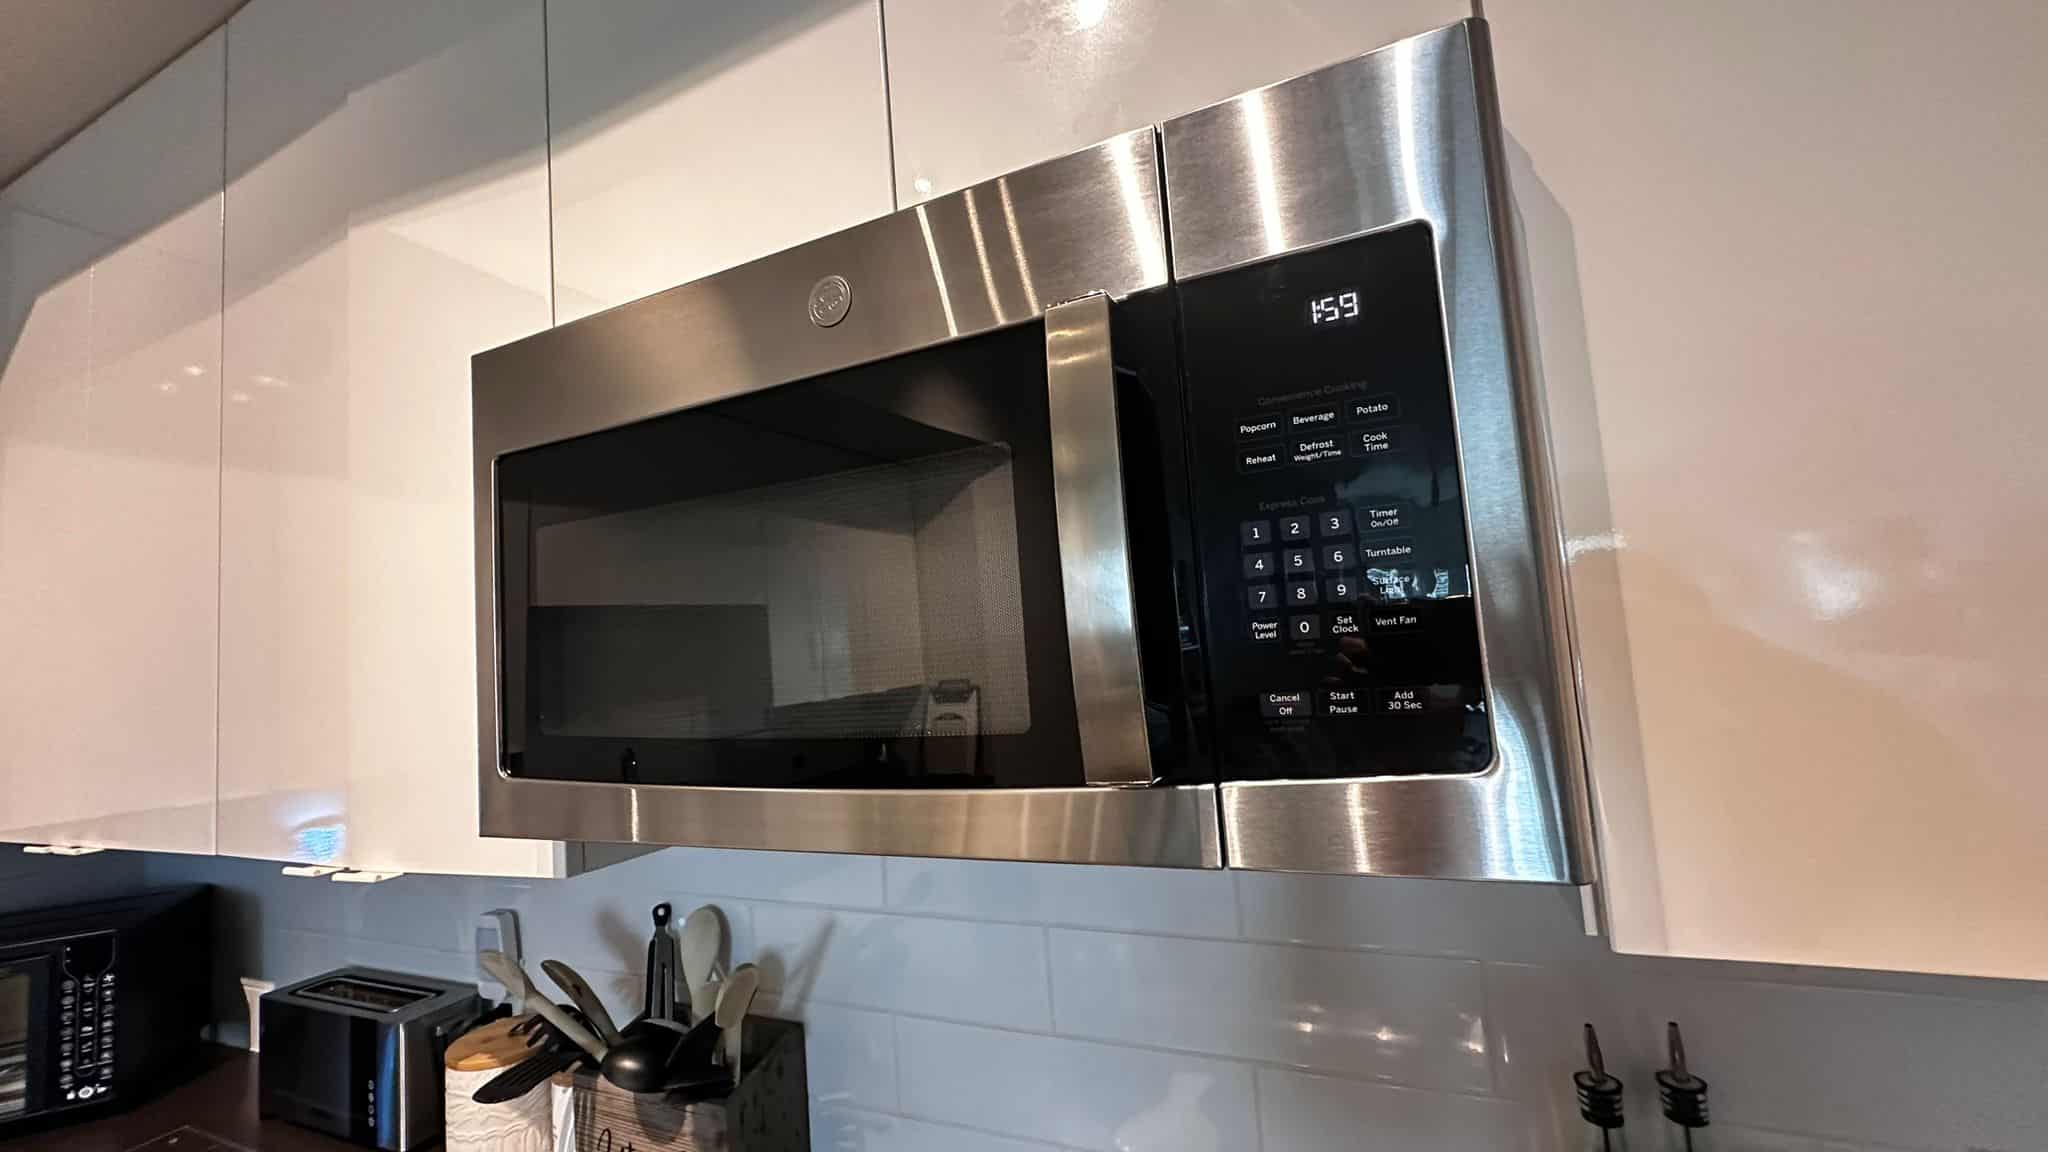
Now, let’s move on to the microwave. To clean the inside, place a bowl of water with lemon slices in the microwave and heat it for 3-5 minutes. This will help loosen any splattered food, making it easier to wipe clean.

Then, remove the turntable and wash it in warm soapy water or in the dishwasher if it’s dishwasher-safe. Wipe down the interior and exterior of the microwave with a gentle cleaner or a mixture of vinegar and water using a microfiber cloth.

For stubborn stains or odors, make a paste using baking soda and water, apply it to problem areas, then scrub gently with a sponge before wiping away with a damp cloth. It’s important to always unplug your microwave when cleaning for safety reasons.

Stove and Oven

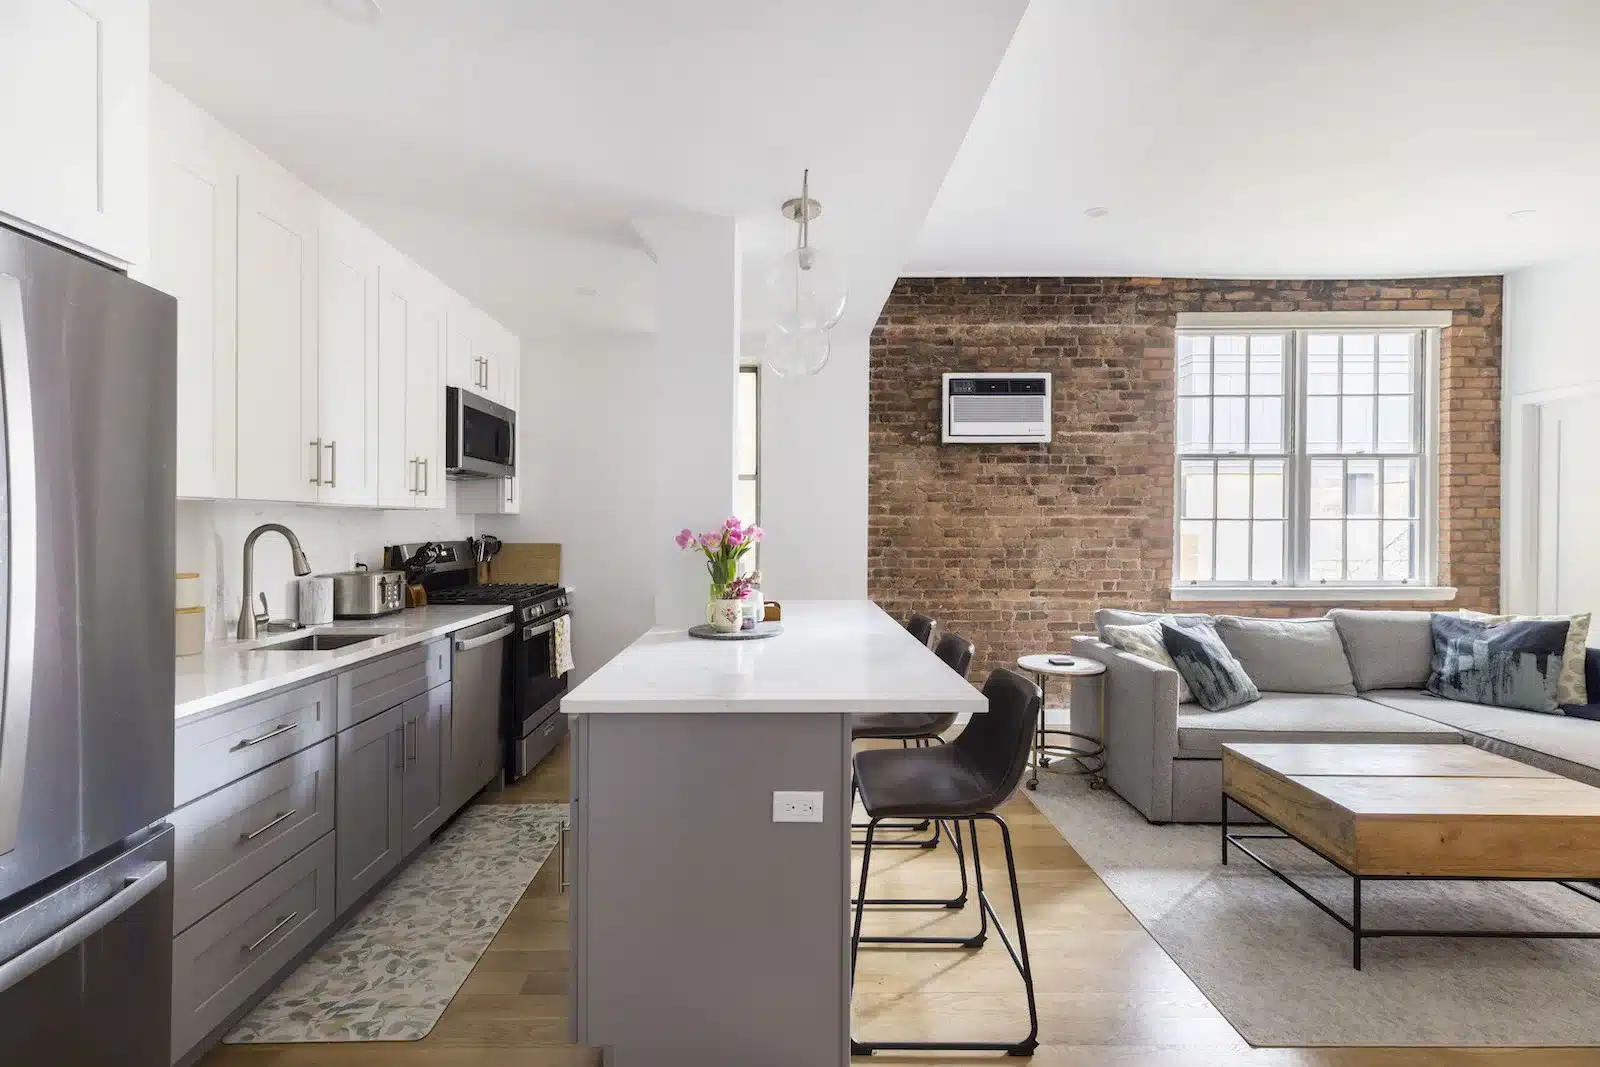
A modern kitchen with a minimalist design and stainless steel appliances.

To deep clean the stove and oven, start by removing the grates and burner caps. Soak them in warm, soapy water for 15-20 minutes. Use a non-abrasive sponge or cloth to wipe down the stove’s surface with a mixture of baking soda and water.

For tough stains on the stovetop, use a paste made from baking soda and vinegar. Clean the oven by wiping it down with a damp cloth after using an oven-safe cleaning solution.

Once both are clean, return the burners to their places and run an empty cycle in your oven at high heat to remove any lingering smells. Regularly doing this will ensure that these appliances remain spick and span.

Stainless Steel Appliances

A modern stainless steel stove and oven in a well-lit kitchen.

Moving on from cleaning the stove and oven, maintaining stainless steel appliances is also crucial in keeping your kitchen looking sleek and stylish. Wipe down your stainless steel appliances with water and a mild detergent, then dry them with a soft cloth to prevent water spots.

For tougher stains or fingerprints, use a mixture of water and vinegar for an effective natural cleaner. To maintain their shine, apply a small amount of mineral oil to the surface and buff it out using a clean cloth in circular motions.

Maintaining the beauty of stainless steel appliances enhances the overall look of your kitchen while keeping them free from smudges and marks. Regular upkeep ensures that they stay looking new for longer periods without needing costly replacements.

Washing Machine and Dryer

A well-maintained laundry room with modern washing machine and dryer.

To keep the washing machine and dryer in top condition, wipe down the exterior with a damp cloth and mild detergent. Ensure to clean the lint filter after every use to prevent buildup.

Clean the inside of the washing machine by running a cycle with hot water and vinegar or baking soda. For the dryer, vacuum out accumulated lint from the vent and drum regularly.

Regular maintenance of these appliances is essential to ensure they function effectively for longer periods. House owners & parents should prioritize cleaning their washing machine and dryer as part of their household cleaning routine.

Tips and Tricks for Effective Appliance Cleaning

A clean, sparkling kitchen with natural cleaning products and tools.

To clean major appliances effectively, mix vinegar and water to create a natural cleaning solution. Baking soda can also be used for degreasing and removing tough stains from different types of appliances.

Using vinegar and water mixtures

Mixing equal parts of vinegar and water creates a powerful cleaning solution. This mixture effectively removes grease, grime, and mineral deposits from various kitchen appliances. The acidic nature of vinegar helps to break down tough stains while the water dilutes its strength, making it safe for use on most surfaces.

Using baking soda for degreasing

cleaning major appliances

Baking soda effectively removes tough grease and grime from kitchen appliances. Sprinkle baking soda on a damp cloth and scrub the greasy areas, then wipe clean with a wet cloth for shiny results.

Baking soda’s mild abrasive properties make it an excellent natural degreaser for stovetops, ovens, range hoods, and other greasy surfaces.

Its powerful deodorizing qualities also help eliminate lingering odors in the process. For particularly stubborn grease buildup, make a paste of baking soda and water to create a thicker scrubbing solution that can tackle even the most challenging spots on your appliances.

Including small appliances in your cleaning checklist

A clean kitchen countertop with small appliances and various hairstyles.

Don’t forget to add small appliances like coffee makers, toasters, and blenders to your cleaning checklist. Wipe down the exteriors with a damp cloth and mild detergent. For difficult spots, use a paste of baking soda and water to scrub away grime.

Run a cycle with vinegar and water through your coffee maker for deep cleaning. Make sure to unplug all appliances before cleaning them.

Regularly wiping down small appliances will keep them looking good while preventing buildup that can affect performance. Neglecting cleaning these items might lead to the growth of bacteria or mold in areas where food particles accumulate.

Regular maintenance and maintenance tips

A person inspecting a refrigerator seal with cleaning supplies in hand.

To keep appliances running smoothly, perform regular maintenance. Wipe down the exterior of appliances with a mild detergent and water to remove any spills or stains. Check seals and gaskets on refrigerators and dishwashers for signs of wear and tear, replacing them if necessary.

Clean filters in washing machines, dryers, stoves, ovens, and microwaves as recommended by the manufacturer to prevent blockages.

For stainless steel appliances, use a soft cloth with mild soap and water to clean surfaces regularly. Use vinegar or baking soda for stubborn stains but avoid abrasive cleaners that can scratch the surface.

Also, remember to inspect power cords and plugs for any damage or fraying that could pose a safety hazard.

Conclusion

A person cleaning a sparkling refrigerator in a pristine kitchen.

Make appliance cleaning a breeze with these effective tips and tricks. Remember to regularly maintain your appliances for optimal performance. Keep those major appliances sparkling clean with simple natural solutions.

Show some love to your kitchen by maintaining and deep-cleaning its major appliances.

Ultimate Guide To Clean Up Your Airbnb Like A Pro

Ultimate Guide To Clean Up Your Airbnb Like A Pro

Keeping your Airbnb clean and welcoming is a big task. Guests expect a spotless space when they check in. If they find dust on the shelves or stains on the sheets, they might leave a bad review.

These reviews matter a lot. They can make or break your success as an Airbnb host.

This guide will show you how to clean up your Airbnb step by step—from dusting off surfaces to washing linens and making sure every glass surface shines.

Get ready for some expert tips on Airbnb Cleaning!

Key Takeaways

  • Use multi-use mops, microfiber cloths, and high-efficiency vacuum cleaners to clean every surface. These tools help save time and make cleaning easier.
  • Start by dusting and vacuuming rooms before sanitizing kitchens and bathrooms. Don’t forget to refresh linens and towels for a fresh feeling.
  • Focus on special areas like pet stains, carpets, upholstery, and windows to ensure your Airbnb is welcoming. Regular deep cleaning keeps the space inviting.
  • Organize your cleaning supplies in one spot for quick access during turnovers. Efficient cleaning techniques speed up the process without skipping details.
  • Handle pet odors with vinegar or specialized sprays, and use hot dryers for linens to keep everything smelling clean between guests’ stays.

    book cleaning service online

    Essential Cleaning Supplies and Equipment

    essential cleaning supplies and equipment

    For a thorough cleanup, you’ll need tools like multi-use mops, microfiber cloths, and high-efficiency vacuum cleaners. These are essential for maintaining a spotless and inviting space for your guests.

    Multi-use mops

    multi use mops

    Multi-use mops are true game-changers for anyone cleaning an Airbnb. They work exceptionally on a variety of floors, inclusive of hardwood, tile, and laminate. Consequently, house owners can transition from one floor type to another without pausing to change tools.

    This convenience translates into time-saving and cost-effectiveness, eliminating the necessity for unique mop heads or pads for each floor type.

    These versatile cleaners guarantee all-encompassing cleanliness across all floors and play a pivotal role in achieving high guest satisfaction scores. The use of microfiber or brush heads promotes potent scrubbing and dusting—essential procedures in getting a home ready before check-in time.

    House owners deem these mops essential for maintaining immaculate surfaces, placing them as a priority on any cleaning checklist.

    Microfiber cloths and brushes

    cleaning up your airbnb

    After analyzing multi-use mops, it becomes necessary to shift our focus to microfiber cloths and brushes. These tools are excellent for handling various cleaning jobs, from dusting to polishing.

    Microfiber materials shine in trapping dirt, dust, and bacteria without the necessity of harsh chemicals. Hence, they become a prime choice for families aiming to maintain their homes neat and secure.

    Microfiber cloths are versatile tools around the house. They can be utilized dry for wiping off your TV screen or moistened with water for cleaning kitchen countertops and bathroom sinks.

    Due to their capability of being machine washed up to several instances, they present an environmentally friendly substitute to disposable goods. Brushes with microfiber bristles perform excellently on stubborn spots that require a touch more scrubbing power, without damaging surfaces.

    These tools make cleaning efficient, while also safeguarding the ecosystem by minimizing waste. Adaptable for various chores like cleaning shower doors or shining faucets, they assure that every nook of your Airbnb sparkles—ensuring guests feel immediately comfortable with minimal effort on your side.

    High-efficiency vacuum cleaners

    high efficiency vacuum cleaners

    After using microfiber cloths and brushes, the next step is tackling floors and carpets with high-efficiency vacuum cleaners. These machines are a game-changer in cleaning both hard and soft surfaces.

    Their power helps owners ensure their Airbnb properties meet the impeccable hygiene standards guests expect.

    High-efficiency vacuum cleaners pull dirt, dust, pet hair, and more from deep within carpets. They work wonders on hard floors too, capturing fine particles that brooms can miss. This type of cleaner makes it easier to maintain a clean home for your guests.

    It ensures superior cleanliness that leads to greater guest satisfaction — something Geaux Maids of New Orleans strongly recommends for any rental property owner or manager aiming to get top reviews.

    Plus, they save time by getting the job done right the first time around.

    Step-by-Step Cleaning Process

    clean up your airbnb

    First, gather all the essential cleaning supplies and equipment. Next, start by dusting and vacuuming every room thoroughly. Then, focus on sanitizing kitchens and bathrooms to ensure cleanliness.

    After that, refresh linens and towels with a thorough wash.

    Dusting and vacuuming

    clean up your airbnb

    Start by dusting high surfaces and then work downward to cover all areas. Use a microfiber cloth or duster to trap the dust rather than spreading it around. Remember light fixtures, shelves, and picture frames.

    After that, grab the vacuum cleaner and start from the farthest corner of the room, working your way towards the door in straight overlapping lines. This ensures no spot is missed! Clean under furniture and cushions as well – these are often neglected but collect a lot of dirt.

    After ensuring every inch is free of dust, move on to disinfecting kitchens and bathrooms for an all-round fresh space.

    Next up – “Disinfecting kitchens and bathrooms”.

    Sanitizing kitchens and bathrooms

    To effectively sanitize kitchens and bathrooms, start by using a disinfectant on high-touch areas like doorknobs, faucets, and light switches. Wipe down countertops, sinks, and cabinet handles with a solution containing at least 70% alcohol.

    In addition, thoroughly clean the inside of microwaves and dishwashers to eliminate germs. For the bathrooms, pay special attention to sanitizing toilet flush handles, faucet knobs, and showerheads.

    When laundering linens such as fitted sheets or towels from these areas use hot water as it helps kill bacteria.

    Always verify guidelines for cleaning products to ensure they are safe on various surfaces in your Airbnb rental – particularly when dealing with delicate fixtures like e-cigarettes or mattress protectors which can be easily damaged by harsh chemicals.

    Keep in mind that guests value cleanliness above all else when booking accommodations for their families so meticulous attention towards these aspects can lead to higher guest satisfaction rates.

    Refreshing linens and towels

    To keep linens and towels fresh, begin by washing them with a high-quality detergent to guarantee they are clean, stain-free, and smelling pleasant. Inspect for any damages or signs of wear and tear to preserve their quality.

    Moreover, replenish toiletries and routinely wash shower liners to prevent mold buildup. Ensure the laundry area is well-equipped with multi-use mops, microfiber cloths, and efficient vacuum cleaners for a thorough cleaning process.

    Proceeding to the next section about “Special Focus Areas,” where the discussion will revolve around managing pet stains and odors.

    Special Focus Areas

    special focus areas

    – Eliminating pet stains and odors can be challenging but is essential for a pleasant guest experience… Learn how to tackle these issues effectively.

    Handling pet stains and odors

    To tackle pet stains and odors, start by thoroughly vacuuming to eliminate hidden sources of odor. White vinegar can effectively neutralize lingering smells, while specialized sprays designed for pet odor removal offer a targeted solution.

    For linens and throw pillows, using hot dryers can eradicate mites and fleas, ensuring a fresh and clean environment.

    Keep in mind to vacuum every nook and cranny to ensure all traces of pet odors are eliminated. Utilizing white vinegar can be effective in neutralizing persistent smells around the home.

    Moreover, investing in sprays specifically designed for removing pet odors can provide targeted solutions. Hot dryers can also help destroy mites and fleas on linens and throw pillows, maintaining cleanliness in between guests’ stays.

    Deep cleaning carpets and upholstery

    Deep cleaning carpets and upholstery is important for maintaining a fresh and welcoming space for guests. Utilizing a high-efficiency vacuum cleaner equipped with HEPA filters can effectively eliminate embedded dirt, dust mites, and allergens from the carpet fibers.

    Employing steam cleaners or hot water extraction machines designed for deep cleansing can effectively eliminate tough stains and bacteria that may be present within the fabric. It is recommended to schedule professional deep cleanings every two to three months to ensure a pristine environment for your Airbnb guests.

    Using non-toxic cleaning solutions is not just about safeguarding the health of occupants but also aligns with eco-friendly practices, which enhances your property’s appeal. Moreover, considering expert support from professional cleaners who specialize in customized treatments for various textiles can support your efforts in maintaining exceptional cleanliness standards.

    Window and glass surface cleaning

    To maintain a spotless Airbnb, it is crucial to clean the windows and glass surfaces regularly. Utilize multipurpose glass scrapers for optimal results. This is an integral part of the comprehensive cleaning method, vital for ensuring guest satisfaction and garnering positive reviews.

    Now, let’s explore some time-saving strategies for swift turnovers.

    Time-Saving Tips for Quick Turnovers

    time saving tips

    Speed up turnovers by organizing supplies for easy access during turnover and using efficient cleaning techniques to ensure the property is ready for the next guests in no time.

    Organizing cleaning supplies

    Store all cleaning supplies in one place, whether it’s a closet, pantry, or utility room. Utilize shelves, hooks, and baskets for organization. Label containers for easy identification and use a portable caddy or locked cabinet to keep items secure.

    Efficient cleaning techniques

    It’s essential for house owners and parents to adopt efficient cleaning techniques in their Airbnb properties. By organizing cleaning supplies strategically, utilizing multi-use mops, microfiber cloths, and high-efficiency vacuum cleaners, they can save time and effort while achieving excellent cleanliness standards.

    Tailoring the cleaning process with comprehensive checklists ensures a systematic approach that efficiently manages inventory and identifies missing or damaged items.

    Having an eye for detail and using time-saving tips like handling pet stains promptly along with deep-cleaning carpets and upholstery as part of the turnover process significantly streamlines operations.

    Moreover, incorporating data-driven insights into their cleaning procedures allows them to provide rational bases for maintaining high standards. Investing in professional services also complements these efforts by ensuring streamlined turnovers that impress guests consistently.

    Conclusion

    clean up your airbnb

    In conclusion, maintaining a sparkling clean Airbnb is crucial for ensuring a top-notch hosting experience. With the right supplies and thorough cleaning process, hosts can achieve an impeccable space that guests will love.

    By focusing on special areas such as pet stains and time-saving tips, hosts can efficiently manage turnovers without compromising cleanliness. Embracing these actionable guidelines and being proactive in scheduling deep cleans will elevate the property to five-star standards, enticing more bookings from satisfied guests.

    how long to deep clean
    Thorough Post Construction Cleaning Checklist

    Thorough Post Construction Cleaning Checklist

    Post-construction cleaning is the finishing touch that makes your new space safe, functional, and beautiful. After construction, there’s often dust and debris that can hide potential hazards and make your project’s true beauty less noticeable. A thorough cleaning not only removes these hazards but also reveals the full aesthetic potential of your design.

    So, are you undertaking this cleaning task on your own? If ‘yes,’ then fear not! A comprehensive checklist is your trusted companion, guiding you through every step of the post-construction cleaning process, leaving no detail overlooked. Just follow this post-construction cleaning guide till the end and your new space will be ready to move in! 

    Key Takeaways 

    • Use masks, goggles, gloves, and steel-toed boots for protection during cleanup.
    • Efficiently clear debris, power wash surfaces, and clean windows for an inviting exterior.
    • Dust thoroughly, care for HVAC systems, and maintain carpets and hard floors for a healthy indoor space.
    • Clean countertops, restock pantries, and check ventilation for a hygienic kitchen and break area.
    • Follow simple steps to disinfect toilets, sinks, and floors for a fresh and clean restroom.
    • Sweeping away micro-debris, sanitizing high-touch areas, and final floor checks add a polished touch.

    book cleaning service online

    Safety Protocols and Preparations

    The best cleanup checklist is the one that prepares you for the hazardous debris and materials that lie ahead of your cleaning process. Here are the essential requirements for their protection:

    Respiratory Protection

    • Use N95 masks or respirators to shield against dust and airborne particles.
    • Opt for higher-grade masks when dealing with potential chemical exposure.

    Eye Protection

    • Wear safety goggles or glasses to protect the eyes from dust, debris, and splashes.

    Hand Protection

    • Wear durable gloves, such as nitrile or latex, to guard against sharp objects and chemicals.
    • Ensure gloves fit securely to prevent accidental removal during tasks.

    Foot Protection

    • Use steel-toed boots to safeguard against falling objects and potential hazards on the construction site.

    post construction cleaning safety

    The Ultimate Post-Construction Cleaning Checklist

    Download and save this post-construction cleaning checklist if you have a renovation project ending soon and want to take up the cleaning tasks by yourself. 

    • Exterior Cleaning Tasks

    Efficient Strategies for Debris Elimination

    Efficient debris removal is a vital step for achieving a clean and safe exterior after construction. Here are some steps to get you started:

    • Assessment

    Begin by walking through the entire construction site. Identify and prioritize areas with the most significant debris, such as leftover building materials or discarded items.

    • Collection

    Utilize heavy-duty trash bags and containers for smaller debris and waste. Ensure proper disposal by segregating materials for recycling, including metal, wood, and other recyclables.

    • Equipment

    For larger debris, consider using construction-grade equipment like loaders or dumpsters. This allows for a swift and effective removal.

    • Recycling

    Make an effort to sort materials for recycling whenever possible. This includes separating metal, wood, and other recyclables from general waste.

    Power Washing Techniques

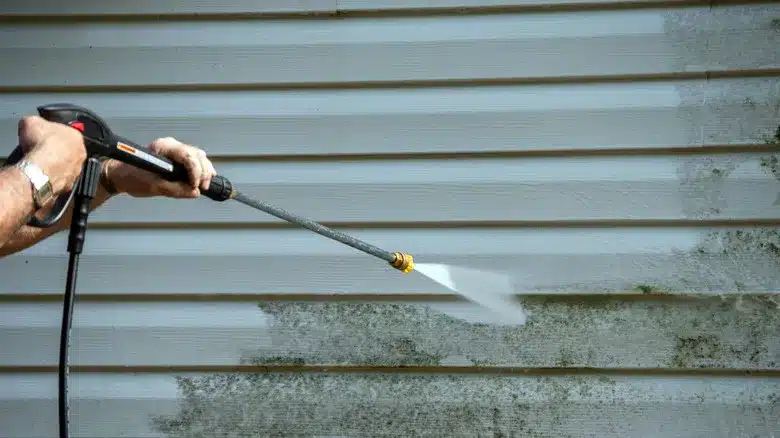
    Power washing is a great method to get rid of stubborn stains on different surfaces that never seem to let go. 

    • Adjust the pressure settings based on the surface type. For softer surfaces like wood, use low pressure (1500-2000 psi). Concrete or brick may require higher pressure (3000-4000 psi).
    • Before applying pressure to the entire surface, test it on a small, inconspicuous area. This helps you determine the right pressure without risking damage.
    • Use a wide-angle nozzle for larger surface areas, covering more ground efficiently. Switch to a narrow-angle nozzle for concentrated cleaning on specific spots.

    Window Cleaning and Restoration

    Windows can accumulate construction-related stains, but with the right techniques, you can bring them back to sparkling clean condition to let the sunshine in once you move in. 

    • Begin by dusting and dry-cleaning windows to remove loose debris. This prevents scratching during the cleaning process.
    • Create a mixture of mild dish soap and water for general cleaning. Pay special attention to construction stains, using a soft cloth or sponge.
    • For stubborn stains, consider a solution of vinegar or a commercial glass cleaner. Apply gently and avoid abrasive materials that could scratch the glass surface.
    • Before diving into the cleaning process, conduct a thorough inspection:
      • Check for cracks, chips, or damage to window panes and frames.
      • Quickly address any damaged areas to prevent further issues.
      • Replace any broken windows to keep up the integrity of your space.

    post construction cleaning checklist
    • Interior Cleaning Tasks

    Once all the outdoor cleaning has been tackled, let’s go inside and take on interior cleaning one by one. 

    Comprehensive Dusting

    • Grab a microfiber cloth or a duster for effectively removing dust without making a mess.
    • Begin dusting from higher surfaces like shelves and furniture, and work your way down to prevent dust resettling.
    • Use a can of compressed air to gently clear dust from your electronics and vents.
    • Wipe down blinds and curtains with a damp cloth or a vacuum attachment to get rid of hidden dust.

    HVAC System Cleaning and Sanitization

    • Change HVAC filters regularly to trap dust and keep the air clean.
    • Take a look at your air ducts for visible dust or debris and arrange professional cleaning if needed.
    • Keep your HVAC coils clean to make sure everything runs efficiently and to prevent dust and mold buildup.
    • Use HVAC-friendly sanitizers to get rid of bacteria and mold, promoting fresh and clean air.

    Carpet Care and Restoration

    • Vacuum your carpets often to get rid of surface dirt. Pay extra attention to high-traffic areas and corners.
    • Tackle stains as soon as they happen with a suitable carpet stain remover or a simple mix of vinegar and water.
    • Schedule professional carpet cleaning sessions to remove deeply embedded dirt and allergens.
    • Fix any worn or damaged spots promptly, considering patching or replacing sections for a refreshed look.

    Hard Flooring Maintenance

    • Regularly sweep and mop hard floors to get rid of loose dirt and maintain a clean appearance.
    • Address spills promptly to avoid staining, especially on surfaces like hardwood or laminate.
    • Use furniture pads to prevent scratches on hardwood floors and be gentle when moving heavy furniture.
    • Give your hard floors a periodic polish to restore shine and protect the surface. Choose a polish suitable for your flooring material.

    hard floor cleaning

    Kitchen and Break Areas

    • Cleaning Countertops and Surfaces

      • Remove any items, appliances, or utensils from the countertops.
      • Wipe down surfaces with a damp cloth or sponge to remove loose debris and crumbs.
      • Choose a suitable cleaner based on the countertop material (e.g., mild detergent for most surfaces, specialized cleaners for granite or marble).
      • Spray or apply the cleaner evenly across the surface.
      • Use a soft-bristle brush or sponge to scrub away any stains or stuck-on residue. Pay extra attention to high-traffic areas.
      • Use a disinfectant spray or solution to kill bacteria and viruses. Let it sit for the recommended time.
      • For glossy surfaces, use a non-abrasive polish to restore shine.
    • Restocking the Pantry with Essentials

      • Empty the pantry shelves completely.
      • Clean shelves with a vacuum or damp cloth to remove dust and crumbs.
      • Group items by category (e.g., grains, canned goods, snacks) for easier organization.
      • Use clear, airtight containers for grains, pasta, and other dry goods to keep them fresh and easily visible.
      • Place frequently used items at eye level for easy access. Reserve higher and lower shelves for less frequently used items.

    Restrooms

    • Toilet and Urinal Disinfection

      • Wear disposable gloves.
      • Use a disinfectant toilet bowl cleaner or disinfectant wipes.
      • Flush toilets and urinals to clear standing water.
      • For toilets, apply disinfectant inside the bowl, including the rim, seat, and handle.
      • For urinals, apply disinfectant to the interior, handle, and flush controls.
      • Use a toilet brush for scrubbing tough stains.
      • Wipe down external surfaces, including handles and flush controls, with a disinfectant solution.
    • Sink and Mirror Sanitization

      • Remove personal items and debris from sink areas.
      • Use an antibacterial cleaner or disinfectant to clean sinks, focusing on faucet handles.
      • Spray glass cleaner or a mixture of vinegar and water on mirrors.
      • Wipe mirrors with a clean, lint-free cloth.
      • Disinfect faucet handles with a disinfectant wipe or spray.
      • Wipe down counters and any shelves with a disinfectant solution.
      • Refill soap dispensers with antibacterial soap.
      • Check and refill paper towels and toilet paper dispensers.
    • Floor Disinfection

      • Remove bath mats, rugs, and any other items from the bathroom floor.
      • Start by sweeping or vacuuming to get rid of loose dirt and debris.
      • Select a bathroom-friendly disinfectant or a bleach and water solution. Check that it’s safe for your flooring type.
      • Wipe down high-touch areas like around the toilet base and corners with a disinfectant wipe.
      • Spray or apply the disinfectant generously across the entire floor, focusing on grout lines and textured surfaces.
      • Use a brush to scrub grout lines, tackling any stubborn stains. For extra cleaning power, try a paste of baking soda and water.
      • Mop the floor with a clean mop or microfiber cloth soaked in the disinfectant. Make sure to cover every inch, especially the nooks and edges.
      • Allow the floor to air dry completely. If you’re in a hurry, use a dry mop or towel to speed up the process.
    post construction cleaning checklist

    Final Touches 

    As you approach the final construction site cleaning process, here are the finishing touches that need to be added:

    • With a handheld vacuum or detailing brush, conduct a meticulous sweep for any microscopic debris lingering in corners, on shelves, or around appliances.
    • Take disinfectant wipes to high-touch zones – doorknobs, light switches, and countertops. Make sure these surfaces not only look clean but are hygienically spotless.
    • Perform a final floor inspection. Address any stubborn spots or marks with targeted cleaning. 
    • Wipe down mirrors and glass surfaces with a streak-free cleaner. 
    • Open each appliance, from ovens to microwaves. Wipe down interiors and exteriors, leaving them gleaming for your cooking adventures. 
    • Open windows wide to let fresh air circulate. This not only refreshes your space but also aids in drying surfaces faster.

    Wrapping Up 

    From dealing with hazardous materials to sprucing up every nook and cranny, each construction project cleaning procedure serves a purpose – to leave no stone unturned. Safety has been our companion throughout, making sure our cleaning efforts are not just effective but also considerate.

    As you tick off every task from the list, you’re going one step closer to adding the final touches to your new space, whether it’s your dream home or an office you always envisioned. This checklist has been crafted by My Cleaning Angel, and we want you to know that we’re here for you every step of the way. If you ever need assistance or a helping hand throughout the post-construction cleaning process, we’re just one call away. Your dream space deserves the perfect finishing touches, and we’re here to make that happen!

    Book cleaning services online. It’s fast and easy, you get a quote with the value right away.

    post construction cleaning checklist

    FAQs

    1. Why do I need a post-construction cleaning checklist?

    A post-construction cleaning checklist is like a roadmap to make sure every inch of your new space is clean and ready to use. It helps you tackle specific cleaning tasks that pop up after construction, from dealing with debris to making surfaces sparkle. 

    2. What safety steps should I take during cleaning?

    Safety first! Wear gloves and masks, especially when handling anything potentially harmful. Make sure the space is well-ventilated, and be mindful of how you dispose of cleaning stuff.

    3. How do I deal with hazardous materials after construction?

    Hazardous materials need careful handling. Bag up asbestos in special bags, use HEPA vacuums for lead-based paint waste, and separate chemical waste properly. Always follow the rules for each type.

    4. Why is cleaning the outside of my new space important?

    Cleaning the outside isn’t just about looks; it’s about keeping your space safe and welcoming. Clearing debris, power washing, and special window cleaning methods ensure a clean and inviting exterior.

    how long to deep clean
    10 Cleaning Tips for Summer Maintenance

    10 Cleaning Tips for Summer Maintenance

    Summertime is the perfect opportunity to give your home a thorough cleaning and get it looking sparkling and refreshed. With the days getting longer and the temperatures rising, now is the time to get outside and get to work. To help you out, we’ve put together 10 essential cleaning tips to help keep your house looking its best this summer. From deep cleaning to the bathroom to tackling the dreaded laundry pile, these cleaning tips for summer will help you keep your home looking clean and organized. So, grab your cleaning supplies, and let’s get started!

    1. Clean the AC Filter

    We can all agree on the fact that having access to a working air conditioner during the summer is a must. Before the extremely high temperatures set in, you’ll want to check that yours is operating at peak performance. If your air conditioner gets dirty, it won’t cool as well. Or even worse, it could break, leaving you extremely uncomfortable in the summer heat. Use warm soapy water or a vacuum cleaner to clean the filter. This is one of the best cleaning tips for summer that can save you a lot of trouble down the line!

    book cleaning service online

    2. Top-Down Dusting

    Having the sun pour in through the windows can infuse your home with a soothing glow. Unfortunately, it can also cause unwanted dust to accumulate inside your house! In the summer, when the air conditioner is on and the house is locked up, dust can become a real issue. Despite being a regular chore throughout the year. 

    To remove dust from surfaces, use a microfiber cloth. It is more effective than cotton at capturing the particles it comes in contact with. Start high up on door frames and ceiling fan blades. And work your way down to surfaces like tables and baseboards with an all-purpose cleaner dampened on a microfiber cloth.

    3. Inside-out Window Cleaning

    You don’t want to spend the summer peering through layers of dust and nasty streaks when the curtains are drawn to let in the sunlight. Exterior windows are best cleaned with a squeegee and some moderately soapy water. While interior windows can be cleaned using a spray-on glass cleaner and a clean, damp towel. Also, don’t overlook the screens! Take them off and clean them with a soapy sponge until they shine like new.

    4. Get the Grill BBQ Ready

    Think about it for a second: when was the last time you gave your grill a good scrub down? The next time you throw a backyard barbecue, make sure to give your grill a thorough cleaning if it has been a while!

    To clean it, first put the grates on and turn on the heat. Clean the grill by placing a cut lemon on the end of a long-handled fork. Dipping the fork into salt, and rubbing it on the grate. Both the lemon’s acid and the salt’s scouring properties are effective at removing grease. Use a block of pumice to scour particularly grimy grates, and then give the grates a thorough cleaning to get rid of the pumice dust.

    5. Disinfect the Refrigerator

    Bacteria multiply at a quicker rate in warmer environments, even when stored in the fridge. Expired or moldy foods should be discarded, and the fridge should be washed down with mild antibacterial soap. You can clean it in the sink if it has detachable parts. Apply a final rinse with diluted vinegar from a spray bottle once you’ve finished cleaning. It will sanitize your fridge and pantry without adding any chemicals that could be dangerous to humans.

    cleaning tips for summer

    6. Prep the Patio/Deck

    There’s something very special about unwinding on a deck or patio, whether that means reading a book in a lawn chair or sharing a few beers with pals. Nonetheless, if you want to make the most of your patio, you should consider spraying it off with bleach and water solution or soda crystals to get rid of the moss and lichen. In either case, the lichen will die and dry out. Leaving you with nothing more to do than rake the patio clean and enjoy your freshly restored outdoor space. For summer maintenance, clean the patio set and outdoor cushions by wiping them down. And if required, giving them a little scrape with warm water and a drop or two of dish soap or laundry detergent.

    7. Sort Out the Clutter

    Spring cleaning? It seems like a decade ago that you attempted such a thing. Summer is a great time to undertake a thorough cleaning (particularly of the dusting variety). To clear the clutter from your home, and to clear your closet of unused items. With children staying at home during the day, there will also be plenty of clutter and spills to tidy up. Get rid of as many toys as you can to cut down on this as much as possible. Donate the kids’ outgrown toys or host a summertime yard sale with their aid to make some extra cash.

    8. Clear the Drain & Waste disposal

    As temperatures rise, food spoils more rapidly and odors become entrenched more quickly. Make sure no food is caught in your drain or garbage disposal. As this can lead to odors in the hot, humid summer months. Put baking soda and vinegar down the drain, let it bubble for five minutes, and then flush it with boiling water to clean it naturally without touching the garbage disposal. It’s recommended to do this every two weeks of summer maintenance to maintain a pleasant odor-free environment.

    9. Wipe Down the Floors

    Your floors will be put through extra wear and tear this summer from the constant coming and going of children. In search of a bathroom, wet shoes from trips to the pool, and sand from trips to the beach. However, there are ways to streamline the summer cleaning process.

    • Install a high-quality doormat at each entrance, and make it a rule that guests must remove their shoes before entering the house. This will cut down on the frequency with which you have to conduct a full sweep and mop, giving you more time to spend outdoors.
    • High-traffic areas should be cleaned once or twice weekly.
    • When it comes to sand, vacuums are best. Instead of using a broom, you should consider using a vacuum cleaner, even if it’s just a handheld model.

    10. Make the Bathroom Mold Free

    Mildew in the bathroom because of the summer’s high temperatures and humidity? Yikes! Remember to leave the bathroom door open and the exhaust fan on when you’re done showering. It can be quite useful in preventing mildew from spreading. After each usage, wipe off the shower’s walls and door with a microfiber cloth to keep mildew at bay! This is one of the most important cleaning tips for summer that is often neglected. 

    cleaning tips for summer

    Why is Summer Cleaning Important?

    Summer cleaning can be a great opportunity to freshen up your home and get rid of any unwanted items. Or clutter that may have accumulated over the year. Not only will this improve the appearance of your home, but it can also have a positive impact on your mental and emotional well-being. Think about it, a clean and organized home can help reduce stress and create a more relaxing and peaceful environment.

    Additionally, summer is the perfect time to take advantage of the warm weather. Open windows to let in the fresh air, which can help to naturally freshen up your home. So, when you’re thinking about summer maintenance, remember that it’s not just about scrubbing and dusting, it’s about creating a space that you love and feel comfortable in!

    6 Hacks to Keep Your Home Summer Ready

    Summer is a time for fun in the sun, but it can also be a time for messy and disorganized homes. With all the outdoor activities, barbecues, and visitors, it’s important to have a few tricks up your sleeve to keep your home summer ready. Let’s find out!

    1. Tackle High-Traffic Areas

    Summer is all about hosting family and friends, but with all the extra foot traffic. High-traffic areas like the kitchen and entryway can quickly become cluttered and dirty. To keep these areas clean, we suggest setting up a shoe and bag station near the front door. This way, as soon as guests enter your home, they can quickly and easily remove their shoes, keeping your floors spotless. Another great idea is to keep a tray or container near the kitchen sink to collect dirty dishes and utensils as they are used. This will prevent them from piling up and making your kitchen look like a disaster zone!

    2. Use Natural Cleaners

    Summer is a time for unwinding, and the last thing you want to do is spend hours cleaning your house with toxic chemicals. That’s why we recommend using natural cleaners. For example, you can make a powerful all-purpose cleaner by mixing equal parts water and white vinegar in a spray bottle. 

    Another great idea is to use lemon juice to remove hard water stains from bathroom fixtures and windows. Baking soda is also a great natural cleaner, it can be used to remove tough stains, and deodorize and clean surfaces. Plus, these natural cleaners are safe for the environment, and your loved ones.

    natural cleaners

    3. Keep Your Outdoor Living Spaces in Check

    Summer is the perfect time to spend time outside, so it only makes sense that your outdoor living areas get some attention. To keep these spaces clean, we recommend investing in a power washer. This powerful tool can quickly blast away dirt and grime from your patio, deck, and outdoor furniture.

    Another great idea is to set up a summer cleaning schedule for your outdoor spaces. This can be as simple as dedicating 15 minutes each week to sweeping and tidying up your outdoor areas. Trust us, your guests will appreciate the extra effort!

    4. Organize and Store Summer Clothes

    Summer is all about light and breezy clothing. But with the change in seasons, it can be easy for your closet to become cluttered with clothes you no longer wear. To keep your closet organized and your clothes in tip-top shape, we recommend sorting through your clothes at the end of each summer. And storing away anything that you won’t be wearing for a while. You can also make use of vacuum-sealed storage bags to keep your clothes fresh and wrinkle-free. 

    5. Create a Cleaning Schedule

    Creating a schedule for your summer cleaning tasks will help you stay organized and on track. You can make a schedule of tasks to be done each day or week. And this will help you to prioritize the most important tasks and make sure that you don’t forget any. This will also help you to stay motivated, as you will be able to see the progress you are making. Our cleaning tips for summer will also help you streamline the cleaning process and make things easier!

    6. Tackle One Room at a Time

    Cleaning your entire house all at once can be overwhelming. Instead, try to focus on one room at a time. Break down each room into smaller tasks, such as dusting, vacuuming, and wiping down surfaces, and tackle them one by one. This will help you stay focused and motivated, and make the cleaning process less daunting.

    outdoor space florida room

    Leave it to the Pros!

    Summer is the season for barbecues, pool parties, and sunshine. Unfortunately, it’s also the season for dust, grime, and clutter to accumulate in your home. But don’t worry! With these 10 cleaning tips for summer, you can tackle the mess and have a spotless home to show off to your friends and family. From decluttering to using natural cleaners, these tips will help you to make the most of your cleaning efforts and leave your home looking and feeling its best. However, let’s face it, sometimes life gets in the way, and we don’t always have the time or energy to tackle the cleaning ourselves. 

    That’s why it’s essential to remember that professional cleaning services are always an option. At My Cleaning Angel, we have the expertise, equipment, and time to get the job done quickly and efficiently, leaving you with a sparkling clean home that you can enjoy all summer long without lifting a finger! Book cleaning services online, it’s easy and fast. Get your quote and see the price right away!

    how long to deep clean
    What to Clean Before Moving Out

    What to Clean Before Moving Out

    Planning a relocation to your dream home in another state? Or maybe you’re making the big move as a sacrifice for better career opportunities. No matter what your reason for moving may be, the entire process is very taxing and stressful for any homeowner. But most of the time, when we are planning to move out, we forget that our own property will be someone else’s dream home too. We have to make sure to leave it in a spic and span condition.

    So, what exactly should you clean before moving out? Let’s dive into some essential tips for a smooth transition and leave your old home sparkling for its new inhabitants with a move out cleaning.

    Key Takeaways

    • Clean before moving out helps in a smooth transition and leaving your old home in good condition for the next occupants.
    • Focus on high-traffic areas like kitchens and bathrooms, and don’t forget about appliances, walls, and baseboards.
    • Clean before moving out is necessary for security deposit return, leaving a positive impression, fulfilling legal obligations, facilitating a smooth transition, and maintaining hygiene.
    • Plan and prepare for move-out cleaning by assembling your cleaning supplies, creating a cleaning schedule, decluttering, and taking photos of the pre-cleaning condition.

    book cleaning service online

    Why Clean before Moving out Is Necessary?

    Before we move on to the ‘what’ of move-out cleaning, let’s find out the main reasons behind conducting this cleaning in the first place: 

    Security Deposit Return

    One of the primary motivations for conducting move-out cleaning is to secure the return of your security deposit. Landlords typically expect tenants to leave the property in the same condition as when they moved in. A thorough cleaning guarantees that you meet this requirement and increases the likelihood of receiving your full deposit back.

    Positive Impression

    Beyond financial considerations, move-out cleaning is about leaving a positive impression. A clean and well-maintained home not only reflects positively on the outgoing tenants but also sets the stage for a positive experience for the next occupants. It shows respect for the property and demonstrates responsible tenancy.

    Legal Obligations

    Many rental agreements include clauses that mandate tenants to leave the property in a clean condition upon moving out. By adhering to these terms, tenants fulfill their legal obligations and avoid potential disputes with landlords. Failure to meet these requirements could result in deductions from the security deposit or legal repercussions.

    Smooth Transition

    Move-out cleaning facilitates a smooth transition for both outgoing and incoming tenants. By leaving the property clean and organized, outgoing tenants make it easier for the next occupants to settle in quickly and comfortably. This contributes to a positive rental experience for all parties involved.

    Hygiene and Health

    Lastly, move-out cleaning is essential for the hygiene and health of future occupants. A thorough cleaning removes accumulated dirt, dust, and germs, creating a healthier living environment. This is particularly important given the current focus on cleanliness and sanitation in shared living spaces.

    security deposit return

    What is Included in Move-Out Cleaning?

    Move-out cleaning is an important aspect of the moving process, guaranteeing that your former residence is left in pristine condition for the next occupants. Whether you’re a tenant preparing to hand over the keys to your landlord or a homeowner getting ready to sell your property, move-out cleaning involves a thorough cleaning of every nook and cranny to restore the space to its original state. 

     In this guide, we’ll go into the specifics of what’s included in move-out cleaning and provide tips for a successful and stress-free cleaning process.

    Planning and Prep Work

    Planning and preparation are key to executing a successful move-out cleaning. Before diving into the cleaning process, it’s essential to assemble your cleaning arsenal. Make sure you have all the necessary supplies and tools on hand, including surface cleaners, disinfectants, microfiber cloths, sponges, scrub brushes, and vacuum cleaners. 

    Before you begin cleaning, take photos of the space to document its pre-cleaning condition. This step is especially important if you’re renting a property and may need to dispute any claims of damage or cleanliness with your landlord. Having photographic evidence can help protect you against unwarranted deductions from your security deposit and guarantee a smooth transition out of the property.

    clean before moving out

    3 Days before Moving Out

    Five days before moving out, it’s time to kickstart your move-out cleaning. Here’s a detailed breakdown of what to clean:

    Decluttering

    Begin by systematically going through each room in your home and sorting through your belongings. Identify items that you no longer need, use, or want, and make decisions about whether to donate, sell, or discard them. Start with larger items such as furniture, electronics, and appliances, and then move on to smaller items like clothing, books, and knick-knacks.

    Packing

    Once you’ve decluttered each room, it’s time to start packing items that you won’t need in the immediate days leading up to your move. Focus on packing off-season clothing, decorative items, and non-essential kitchenware that you can live without until moving day. Use sturdy boxes or plastic bins to pack your belongings securely, and label each box with its contents and the room it belongs to for easy unpacking at your new home.

    Appliance Cleaning

    With decluttering and packing underway, it’s also important to begin cleaning your appliances to make sure that they’re ready for transport to your new home. Start by tackling the refrigerator, oven, microwave, and dishwasher. Remove all food items from the refrigerator and freezer, and then thoroughly clean and disinfect the interior compartments using a mild detergent and warm water. For the oven and microwave, use specialized oven cleaner or microwave-safe cleaning products to remove built-up grease and grime. Finally, wipe down the exterior surfaces of each appliance with a damp cloth to remove any dust or dirt.

    appliances cleaning

    2 Days before Moving Out

    Here’s what to prioritize four days before moving out, and what to clean before moving out:

    1. Deep Clean the Kitchen

    Start by giving your kitchen a thorough deep clean. 

    Cabinets and Drawers

    • Empty all cabinets and drawers, removing any items stored inside.
    • Wipe down the interior and exterior of cabinets and drawers with a multi-purpose cleaner or a solution of warm water and mild detergent.
    • Use a degreaser or vinegar solution to remove any grease or grime buildup.
    • Allow surfaces to dry completely before restocking cabinets and drawers.

    Countertops and Backsplash

    • Clear countertops of any appliances, utensils, or decorative items.
    • Wipe down countertops with a disinfectant cleaner, paying special attention to seams and edges.
    • Use a scrub brush or sponge to clean grout lines in tiled countertops.
    • Clean the backsplash using the appropriate cleaner for the material (e.g., tile cleaner, stainless steel cleaner).
    • Remove any grease splatters or food residue from the backsplash surface.

    Sink Area

    • Clean and disinfect the sink basin using a sink cleaner or a mixture of baking soda and vinegar.
    • Use a toothbrush or scrub brush to clean around the faucet and drain.
    • Remove any mineral deposits or soap scum buildup with a limescale remover.
    • Polish the faucet and handles with a stainless steel cleaner for a shiny finish.

    Appliances

    • Clean the exterior of all appliances, including the refrigerator, dishwasher, microwave, and toaster oven, with a damp cloth and mild detergent.
    • Remove and clean stove burner grates and drip pans using hot, soapy water or a degreaser.
    • Wipe down the stove surface with a cleaner specifically formulated for stove tops, removing any burnt-on food residue.
    • Clean the range hood and vent filter, removing grease buildup and dust with a degreaser or hot, soapy water.

    Floor

    • Sweep or vacuum the kitchen floor to remove any loose dirt, crumbs, or debris.
    • Mop the floor using a cleaning solution appropriate for the flooring material (e.g., hardwood cleaner, tile cleaner).
    • Pay attention to corners and edges, ensuring they are thoroughly cleaned.
    • Allow the floor to air dry or dry it with a clean, dry mop or towel.
    clean before moving out

    2. Clean and Disinfect Bathrooms

    Next, focus on cleaning and disinfecting the bathrooms in your home.

    Toilet

    • Apply toilet bowl cleaner or disinfectant to the inside of the toilet bowl, allowing it to sit for several minutes to dissolve stains and kill germs.
    • Scrub the inside of the toilet bowl with a toilet brush, paying attention to areas under the rim and around the waterline.
    • Wipe down the exterior of the toilet, including the tank, seat, and base, with a disinfectant cleaner or wipes.
    • Use a clean cloth or paper towels to dry and polish the surfaces for a sparkling finish.

    Sink and Countertop

    • Remove any items from the sink and countertop, such as toothbrushes, soap dishes, or toiletries.
    • Spray disinfectant cleaner or a mixture of vinegar and water onto the sink and countertop surfaces.
    • Use a sponge or scrub brush to scrub the sink basin and countertop, removing any soap scum, toothpaste residue, or water spots.
    • Wipe down the faucet, handles, and fixtures with a disinfectant wipe or cloth.
    • Rinse the sink and countertop with clean water and dry them with a towel or paper towels.

    Shower and Bathtub

    • Remove any items from the shower and bathtub, such as shampoo bottles, soap dishes, or bath toys.
    • Spray the shower walls, bathtub, and shower door or curtain with a shower cleaner or a mixture of vinegar and water.
    • Use a scrub brush or sponge to scrub the surfaces, focusing on areas with soap scum, mildew, or stains.
    • Rinse the shower walls and bathtub thoroughly with water to remove any cleaner residue.
    • Replace any old or worn-out shower curtains or liners with new ones for a fresh look.

    3. Dust and Wipe Down Furniture and Surfaces

    Take the time to dust and wipe down all furniture and surfaces throughout your home. Use a microfiber cloth or dusting wand to remove dust from shelves, tables, and other surfaces. Wipe down furniture, including chairs, sofas, and coffee tables, with a damp cloth to remove any dirt or stains. Pay special attention to high-touch areas like light switches, door handles, and handrails, and disinfect them with a disinfectant spray or wipe.

    4. Clean Windows and Window Treatments

    Clean windows inside and out to make sure they’re sparkling clean. Use a glass cleaner and a microfiber cloth to clean the windows, wiping them down in a circular motion to avoid streaking and remove smudges. Don’t forget to clean window sills and tracks, as well as any blinds or curtains. If your window treatments are machine washable, remove them and launder them according to the manufacturer’s instructions.

    5. Touch Up Walls and Baseboards

    Finally, take the time to touch up walls and baseboards to remove any scuff marks or stains. Use a Magic Eraser or a mild detergent solution to spot clean walls, paying attention to areas around light switches and door frames. Wipe down baseboards with a damp cloth to remove any dust or dirt buildup.

    Take this opportunity to touch up any paint chips or scuff marks on walls and baseboards. Use a matching paint color and a small brush or roller to cover any imperfections. Make any necessary minor repairs, such as fixing loose doorknobs or tightening cabinet handles. Addressing these issues now will ensure that your home is in pristine condition for the next occupants.

    bathroom moving out cleaning

    1 Day before Moving Out

    On the day before your move, focus on outdoor cleaning and final preparations to guarantee a smooth transition. Here’s a detailed plan for outdoor tasks and what to clean before moving out:

    Lawn Maintenance

    Trim the grass and edges of your lawn for a tidy appearance. Use a lawn mower to cut the grass to an appropriate height, and use a string trimmer or edger to clean up the edges along sidewalks, driveways, and landscaping beds.

    Garden and Flower Beds

    Weed garden and flower beds to remove any unwanted vegetation. Pull out weeds by hand or use a garden hoe or weeding tool to loosen and remove them. This will help maintain the appearance of your outdoor spaces and prevent weeds from spreading.

    Outdoor Furniture

    Clean and organize outdoor furniture, such as patio tables, chairs, and umbrellas. Wipe down surfaces to remove any dirt, dust, or debris, and arrange furniture in an orderly manner. If necessary, cover or store furniture to protect it from the elements during the move.

    Sidewalks and Driveways

    Sweep and clean sidewalks, pathways, and driveways to remove leaves, debris, and dirt. Use a broom or leaf blower to clear away any loose debris, and consider pressure washing surfaces for a thorough clean if needed. This will enhance the curb appeal of your home and create a welcoming entryway for the next occupants.

    clean before moving out

    Moving Day

    On the moving day, it’s crucial to complete final checks and preparations before leaving your old home and embarking on your new journey. So don’t worry about moving your stuff, get long distance moving quotes. Here’s what to prioritize:

    Final Checks

    Conduct a thorough walkthrough of each room to ensure nothing is left behind. Check closets, cabinets, and drawers to make sure they’re empty. Turn off all lights, lock doors and windows securely, and adjust thermostats to appropriate levels. 

    Retrieve Your Deposit

    If you’re renting your old home, don’t forget to retrieve your security deposit. Coordinate with your landlord or property management company to schedule a walkthrough and finalize any necessary paperwork. Let all the hard work and cleaning you’ve done up till now pay back!

    Final Thoughts

    As you prepare to move out, taking the time to clean before moving out thoroughly is key to leaving on a positive note. It’s not just about getting your security deposit back; it’s also about showing respect for the next occupants. By decluttering, scrubbing, and fixing up any minor issues, you’re ensuring they’ll step into a fresh, welcoming space. Plus, a clean home makes for a smoother moving process for you as well. Book cleaning services online, it’s fast and easy. Get a quote, see the price and book it now.

    But moving out is a stressful process especially when you’re leaving a property where you made tons of memories. And between all the packing chaos, cleaning can take a back seat. That’s where My Cleaning Angel steps in to save the day. With our professional move-out cleaning services, you can trust us to handle the dirty work while you focus on the excitement of your upcoming move!

    clean before moving out

    FAQs

    What areas should I focus on cleaning before moving out if I don’t have much time?

    Focus on cleaning high-traffic areas like kitchens, bathrooms, and living spaces. Pay attention to surfaces, floors, walls, and fixtures.

    Do I need to clean appliances like the refrigerator and oven before moving out?

    Yes, it’s essential to clean appliances thoroughly, including removing food remnants, wiping down surfaces, and cleaning both the interior and exterior.

    Should I hire professional cleaners for move-out cleaning, or can I do it myself?

    It depends on your preference and the condition of the property. While some people prefer to do it themselves, others opt for professional cleaners for a thorough and stress-free cleaning experience.

    how long to deep clean