fbpx
Select Page
How To Clean Walls?

How To Clean Walls?

The Walls Hold Up the Home  

Walls don’t just have to be sturdy – they have to be clean. Having clean walls helps greatly to maintain a pristine outlook and aesthetic for your home. Many people are shocked by the sheer difference a clean wall can make to illumination and expanded space. Walls with dirt and debris may appear discreet, but they in fact make your house appear dingy, stuffy, and cramped. Most walls are dust magnets, and not cleaning them routinely means that any other cleaning you’re doing is ineffective. Since the dust from the walls can permeate the whole house. If you’ve seen some grime hiding that beautiful cream paint. Or noticed a particularly obvious scribble, it’s time for a wall-cleaning ritual! 

 It is normal for walls to fall under your radar as you do your house cleaning. But it’s simple to make sure that doesn’t happen again. From brushing off the cobwebs to removing greasy toddler hand prints, restore your walls to their former glory with these helpful step-by-step tips!

Are you moving out and need help with your home cleaning before leaving? We wrote 10 tips on what to do before a move out cleaning.

From Overlooked to Over Bright 

Most people spend their time scouring the floors and carpets and curtains. Which means their walls are absolutely filthy! Wondering why your dust allergies aren’t getting any better after thorough house cleaning? Dust, dirt, allergens, and bacteria are constantly finding a happy home on your walls, coming in from vents and windows left open. These irritants can only be flushed out if you frequently wash your walls! Mold, seepage, and webs can make the prettiest of paints appear ghastly and old. But a new, sprightly look along with health benefits is what you will gain if you routinely clean your walls. Here’s how to do it: 

book cleaning service online

Plan, Prepare, Execute 

Beware: getting a sponge and attacking large areas of your wall isn’t the way to go! If you don’t plan wall cleaning properly, you can scratch paint layers, leave splotchy patches and make interior walls look very unpleasant. Instead of cleaning only the portions you can reach, the first thing you will need to do is bare your walls of all ornaments, décor, and furniture obstructing your workspace. This is essential in ensuring effective cleaning. Since walls can be an expansive space to tackle all at once, delegate it room-wise or finish 2 out of 4 walls per day.

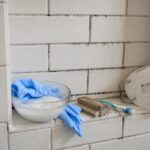
Remember, it is a Herculean task if you don’t plan ahead of time. The next thing to do is gather the material. You don’t need to break the bank buying commercial wall-cleaners. You can simply use: step-ladder/stool, broom, dust cloth, sponges, liquid soap, distilled vinegar, bucket, and towels/absorbent cleaning rags. Make sure to cover your furniture or carpet with a tarp to prevent it from being damaged by cleaning agents and dirt residue from the walls.

Off the Wall

If you make the cardinal mistake of not dusting off the dirt and dust before you wet the surface of the wall, you will only be spreading the grime instead of removing it. Step number 2, therefore, is thoroughly dusting off and de-cob-webbing the walls before you wash them. Cleaning out the corners is very important since that space accumulates the most dust and a couple of unwelcome spiders, too! Use a broom or your vacuum cleaner to clear the wall of all loose debris. Choosing the correct broom/duster is essential to avoid scratches or marks on the paint surface or wallpaper. Use a rag or cloth to wipe down the whole wall to remove any remaining disturbed dust before you dampen the surface. 

The Special Concoction

Commercial products are readily available for specific types of wall surfaces. But you can get the job done effectively with our special DIY concoction. To achieve that bright spotless wall, you can use half a cup of vinegar in a bucket of water, or dish shop in a similar bucket. This mixture is as effective a cleaning agent as you can get. However, in making sure it’s not abrasive and doesn’t leave unsightly smudges on your wall where the paint has washed off, make sure to test a small, hidden portion before you get scrubbing! Using circular motions to scrub gently is the most effective way to loosen grime that is clinging to your walls. Don’t use copious amounts of the solution. And never use a brush with hard bristles! You won’t just dislodge the germs; you will wash off the paint!

clean walls

Say ‘Adios’ to Stains

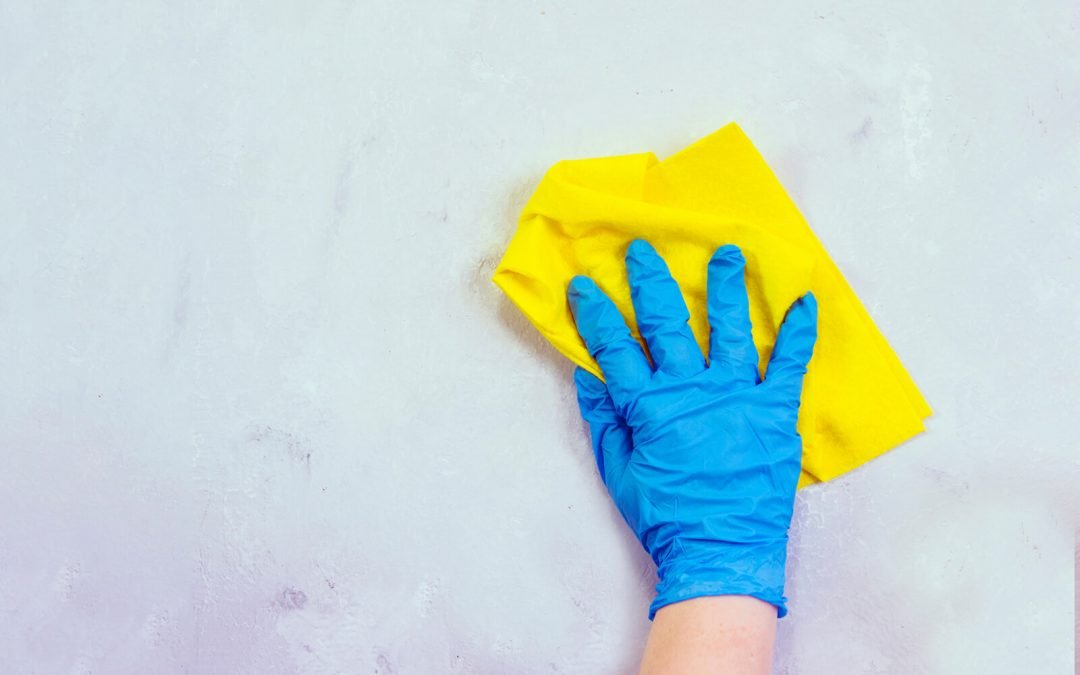
Households with small children will be hyper-aware of how grubby hand prints and crayon scribbles can stain walls at an alarming rate. People with pets will have the same issue. So a soft cloth should be your go-to for stain removal. Dip it in the cleaning agent, wring out the excess, and rub away in circular motions. For more stubborn stains, get a stronger potency of the solution, and de-stain your heart out!

All kinds of materials can get on your walls and leave marks and stains on it. Painters in Philly brought tips to remove different types of stains and marks from your walls, amazing info.

Stop! Don’t Scour  

One advantage of making your own cleaning agent, testing it, and diluting it if need be is that it preserves your wall paint. One important thing to remember is that stronger, weatherproof paint is used for doors, window wills, and exterior walls. But interior paint is less durable. The worst mistake you could make is scouring hard at these interior walls to even get the stubborn blemishes out.

Harsher chemicals and commercial products are extremely abrasive on flat, satin, and eggshell finishes. And that is made worse by using brushes and scouring pads to get stains out. A soft sponge or cloth will suffice if you use the right strength of the cleaning solution. Mild de-greasers are the only kind of product you should be using on walls with a glossy finish to maintain their shine, even in high-traffic, dirtier areas like kitchens and restrooms. The process is bound to be therapeutic as you see the grime leave your walls instantaneously!

Textured Walls Maintained Well

Textured walls add extra personality in your home. So extra care should be exercised while cleaning them. Their grainy, carved surfaces are very prone to catching dust. To sanitize them fully, your gentle wall cleaner with a clean cloth should suffice. To get into the cracks and wipe the dust off, go over the surface multiple times and avoid soaking it with an extra solution or water. Stubborn splotches and grime can be easily removed with circular pressure, and you should leave textured and wooden walls to dry longer.

clean walls

Rock Wall? You Know What to Do 

Interior walls constructed from rocks and stones interchangeably are all the rage. This also means that they attract the most dust and debris between their crevices. Our special DIY concoction with a soft brush dipped in can cut straight through the grime and sanitize the mortar. You can use a soft cloth covered with salt as an abrasive (don’t use scouring pads here either!). Brick and stone walls can absorb water, so avoid dousing it with the cleaning agent. And instead use a nominal amount on a cloth to clean the surface.

Professionals for Perfection

While wall-cleaning can be the occasional family effort during spring cleaning, professionals can do it even better! Our team at Cleaning Angels is always stocked with the material and expertise geared to your cleaning needs. Booking cleaning services online is so easy and fast, you should give it a try. If you want to avoid paint flaking off, damp spots in your walls. Or simply don’t have the time to get that one unsightly crayon scribble off, hiring our expert team saves you a lot of worries. Need that extra illumination and glossy paint before the holidays or party? Give us a call anytime!

How to Clean Windows?

How to Clean Windows?

Windows are the Mirror to your Home 

If you’re noticing your home looking extra dingy and poorly-lit, your windows are most likely the reason why. Even in houses with large, expansive windows and light curtains, illumination is always a problem. Even if the glorious sun is blessing your home with an extra amount of light rays, the dirt, dust, murdered bugs, bird droppings and water spots splattered across the surface of your window inside or outside are blocking the rays from entering. Summertime is the best time to gain the advantage of extra-bright, sunny homes. So make sure you keep window-cleaning on the top of your spring cleaning to-do list!

Cleaning your windows routinely guarantees that better light permeates into your house. With health benefits such as improved vision and the feeling of increased space as added bonuses. Cleaning windows is part of house cleaning and is a simple task. So don’t fret about it too much. We are here with tried and tested tips on how to get your windows sparkling in no time.

book cleaning service online

The Magic Potion

There is no shortage of commercial window cleaners on the market. By why spend money to get a cleaner when you can make an effective one at home with regular ingredients? This special concoction is extremely simple and efficient alike in removing the dullness and grime off your windows. And get them sparkling like a new pin. You will need 2 cups water, 1/2 cup white or cleaning vinegar, and 1/4 cup rubbing alcohol 70% concentration. Combine these elements together. Pour this solution into a spray bottle and spritz away at your windows, wiping them clean with an absorbent rag, or squeegee! 

Rags, Towels, or Newspaper?

Your grandpa may not have had microfiber and lint-free rags available readily when he was scouring the family home. So ditch the newspaper while cleaning windows. Newspaper ink can get dislodged by your liquid solution and stain your windows. A completely counterproductive after-effect. More effective absorbent material to readily dry your window can be reusable microfiber cloths. That keep the planet happy and the sun shining through your sparkly clean windows. To leave your window surface streak-free, microfiber rags with honeycomb textures can rub off spots. And remove stains from the surface of your window without scouring the surface. Paper towels can be the less eco-friendly alternative. But make sure to use ultra-absorbent ones so there are no remnants of toilet paper-like shreds on your window! To find out the best microfiber cloth in the market, check the Spruce article.

The Basics Breakdown

Understanding the basics of window cleaning is very essential to do a good job getting your windows as spick and span as can be. The essential equipment you will need is a large bucket, a scrubber (not too abrasive so as to prevent scratches), a microfiber cloth, and a squeegee. When buying a squeegee, it is always a good idea to get a couple of extra rubber blades. So their surface is not eroded and porous and they clean the soap off your windows properly. If the squeegee is leaving streaks and there is a lot of residues left over after wiping your window down, it’s time for a replacement. You can simply switch over to the other edge to elongate the life span of a blade. The correct way of storing squeegees is making sure nothing touché s the blade.

Wondering how much is a monthly maid service? Wonder no more, here you’ll find out that and more.

clean windows

The Indoors Mantra 

Many people make the cardinal mistake of assuming that not cleaning their windows from the inside will result in clean windows. And that’s simply not the case. Window glass is transparent, so the slightest smudging on the inside could substantially reduce the light filtering through from the outside. 

Here’s a quick chronological list of how to clean indoors windows:  

1. Pick a suitable day- cool and cloudy days are perfect for window cleaning 

2. Fill your bucket with clean water

3. Place towels/absorbent cloth to catch the run-off water, and prevent it from staining the floor/furniture

4. Spray the window glass with your vinegar-water solutions

5. Use an absorbent microfiber towel to wipe off the excess

6. Go over stubborn stains and dirt as many times as needed to clean them fully. 

The Outside Operations 

Bird poop onslaughts, roof dirt run-offs, and dirt and debris are the most common sight on outside windows, and so cleaning them routinely is a sure-fire way to get the best of sunlight filtering into your house. To undertake what seems to be a Herculean task in a simple way, here is how you can clean your outside windows:

1. Use a garden hose or jug down the window with water thoroughly to wash off the dirt and debris

2. Fill up your bucket and add a few drops of the soap for a more thorough clean 

3. Use your microfiber, absorbent cloth to mop up the excess run-off and remove the soap from the glass. Higher windows will need some ladders, maneuvering, and extendable pole mops. 

4. Use your cleaning agent in the spray bottle to spritz the solution all over the glass. 

5. Instead of performing the second wipe-down with a microfiber cloth, use a clean squeegee with a rubber blade. A squeegee helps you remove the cleaning agent off faster. Remember to work the squeegee from top to bottom to avoid streaking and residue. If you do this the other way around, run-off will collect at the top ledges of your window and drip down after you are done cleaning, ruining all your hard work. 

clean windows

The Outside Operations – Continuation

6. It’s very important to wipe your squeegee off after each pass so as to prevent the run-off from staining your windows. You can do this alternatively if your windows are relatively cleaner. 

7. If you don’t want to spend the extra bucks on purchasing the squeegee, lint-free towels and absorbent microfiber cloths can work just as well but will need a tad more time and energy. 

8. We have all seen those stubborn, cemented bird droppings on windshields and windows alike, and instead of getting out a scouring pad or a brush, just simply douse the area with your vinegar solution and leave it for several minutes. The vinegar will soften and dislodge the bird droppings and a manner of other stains. If this doesn’t work out, and a harsher stain like oil paint or grease is staining your window, you can use a softer scrubby sponge to prevent scratches and yet remove the stain. 

9. Remembering the window screens and netting are crucial to your windows being clean for a longer time. If you clean just the glass, its wet surface will in fact attract all the dust and dirt from the screen and netting. You can rinse the screen, spray your vinegar concoction, and rinse it off again. Remember to make sure the screen dries so as to prevent the run-off from staining your newly-cleaned window.

Need Window Cleaners? 

Once you have established these new mechanisms and created your own special cleaning concoction, you will reap the benefits of increased illumination in your house. However, if you cannot spare the time and material to undertake the work yourself, learned professionals are a call away at our service. Trained to handle interior and exterior windows at different heights on your premises. Our expert team does the job thoroughly and fast. Booking cleaning services online is super easy, here you’re going to learn how to do it.

If you have large windows throughout the exterior of your house, professional window cleaning works as a cheaper renovation. Making your house look warm and welcoming. Hiring window cleaners to wash off your windows twice a month may be more than enough. Depending on how dirty they get, and establishing a regimen will ensure that you don’t neglect this sort of cleaning in the future.

How to Clean Your Living Room?

How to Clean Your Living Room?

Living Rooms are the lifeline of all households. It is the place where every member of the house gathers together for family leisure time and meal time. It’s the most sociable place in the house and it is important to maintain its cleanliness for an enjoyable and relaxing time however that’s easier said than done. Let’s explore some tips and tricks to not only have a clean living room but to also keep it that way.

We also collaborated in a Redfin article, the complete living room cleaning checklist, amazing content, check it out.

Tips for Cleaning the Living Room

Grab your supplies

Assemble a cleaning basket or caddy with cleaning supplies. This will save time and effort every time you need to clean. Just grab the basket and you are all set to clean. Some general things to put in the caddy will be microfiber cloths, paper towels, sponge, glass cleaner, furniture polish, and plastic bags. You will also require either a vacuum cleaner or a broom. 

Make a Checklist

Make a list of all the cleaning chores for the living room. Print the checklist and slip it into a plastic cover. Use a dry erase marker to mark your progress. When you are done, wipe it and it will be ready for the next time you clean. The checklist will help you stay focused on the task at hand.

Checklsts are very helpful, including when moving out. Tenants not always get the full deposit back, but we can help you. Check this checklist to help you move out and get your deposit back.

book cleaning service online

Family Bonding

Get the whole family involved in the cleaning process. Assign a specific task to each member of the family. Make cleaning a family fun game. 

De-Clutter

Clutter makes any clean room look messy and unkempt. Place back all the items you collected that don’t belong in the clean living room. Make sure when you are done using an item, you put it back in its proper place. Clutter starts small and develops into a big pile in no time at all. If it is an item that you hardly ever use try donating it. Sometimes less is more. 

Finishing Touches

When you are done cleaning spray the room with an air fresher or light a scented candle. Nothing is more refreshing than having a clean home that smells great too. Now relax, put your feet up and enjoy a great cup of coffee. 

Professional House Cleaning Help

If you feel overwhelmed by the mammoth cleaning task or you just don’t have enough time in your busy schedule, you could hire a reliable cleaning company to do the job for you. Folks at My Cleaning Angel are happy to help you.

You can book cleaning services online, it’s fast and easy. With less than 60 seconds you can book a home cleaning with no headache.

clean living room

Tips to Maintain a Clean Living Room 

Maintain a Cleaning Schedule

The solution to a clean living room is following a cleaning schedule. Consistency is key in maintaining the space’s cleanliness.

Daily

Gather all items that don’t belong in the living room like toys, mail, blankets, or dishes. Store away those items where they belong. Fluff up the sofa cushions to make them look presentable.  

Weekly

On a weekly basis, dust the surfaces in the living room. After dusting it’s a good idea to vacuum the carpet. Rotate the sofa cushions for even wear and tear.

Monthly

Clean any hard-to-reach places. Move the furniture and vacuum underneath. Dust the blinds and drapes and clean the windows.

Yearly 

It is a good practice to shampoo your sofas, rugs, and carpets once a year. Clean that fireplace at least once every year. 

Adequate Storage

Be realistic about the amount of storage you need. Don’t try to cram too much stuff into storage that might not be enough. 

Wicker or fabric baskets are a great way to store away things that you use daily like laptop cables, toys, and blankets. The baskets camouflage the things and give a visually pleasing and neat look.

Place Things Neatly

Neatness can make a difference between things looking out of place or put away. A pair of shoes placed neatly aligned and on a designated spot will not look out of place. A quick straightening up (that doesn’t entail physically putting away) will give the same effect. 

Creative Coffee Table

Get a coffee table with storage drawers. The drawers are great for storing smaller things that otherwise end up on the coffee table like remotes, puzzles, and sketchbooks.  

The Magic Basket 

If organizing things is too much of a chore to maintain a clean living room, the solution is a large basket. Toss all the stuff you need to put away in this basket. Make sure to use one with a pop of color and a lid to add décor to the room. Put away the contents of the basket when you clean the living room.

clean living room

Designing tips to give a clean feel 

Furniture Placement

Use your furniture and rug placement to define the living room space.  This will keep the other rooms’ clutter from gathering in the clean living room space.

Color

A big part of making things look like they’re in order is moving the eye around so you experience a space dynamically. This occurs when things are arranged purposefully, and one of the easiest ways to do this is with color. Notice how the bright teals and deeper blues lead your gaze from object to object and the entire effect is harmonious.

Symmetry

Symmetry is soothing to the eyes and applying this concept in room décor will make the space feel organized. Everything does not have to be the same but the balance on both sides of the room will give a symmetrical feel.

Vertical Illusion 

Utilize the vertical space in the room. Artwork displaced higher up, draws the eye upward around the room thus giving the impression of order. Hanging things on the wall that you don’t use daily frees up valuable space and minimizes clutter on lower surfaces

clean living room

Like Things Together

Group like things together. This will make the room look neat and purposeful.  You could also contain small decor in a tray to make it look like one decoration piece instead of small pieces scattered all over.

Dual Purpose Furniture

Buy furniture that serves a multipurpose. An ottoman that also serves as storage will be a more functional furniture piece than a sofa. A storage cart that also serves as a side table will keep clutter contained. 

Fewer Pillows

When it comes to pillows, less is more. Few pillows are easier to maintain and just enough to give a soft and comfortable look to the couch. If you keep just a few pillows very little time is required to fluff them up and maintain a clean look of the sofa. Need help keeping your pillows clean? Good house keeping wrote tips on how to wash and keep them clean.

Projector vs. TV

Try installing a projector system in your living room as opposed to a TV. The projector does not require a myriad of cables like a TV and it can be stored away out of sight.   

Keeping these tips in mind is a great way to improve the tidiness of your living room on a daily basis. If you’d like to take a shortcut, hire My Cleaning Angel to clean your living room!

How To Clean The Bathroom?

How To Clean The Bathroom?

You go to the bathroom if you want a relaxing bath after a stressful day. For a cold shower during hot summers, or even to relieve yourself. Most of us visit the bathroom 6 to 10 times a day. Some even more, so we can say that it is a very important part of our lives. When you are going to the bathroom that often, it is essential to keep it clean. Since the bathroom is prone to moisture and steam, fungus, grime and bacteria can quickly accumulate. It is reported that a standard 16.5-inch toilet bowl can have up to 34,000 units of bacteria that can multiply at a rapid rate. If your bathroom is that dirty, then how can you clean the bathroom?

House Cleaning can be intimidating because there are so many different parts in the bathroom and each part requires a specific kind of cleaning, plus there are so many ways you can clean a bathroom. This article will teach you the tips and tricks that will help you clean bathrooms quicker and more efficiently.

Looking for booking cleaning service online? We’ll help you how to find a good company and book a cleaning service online.

Declutter

Before cleaning the bathroom, it is important to declutter. You need to have a clean work surface so that it is easier to access the whole area. You need to remove everything from the counters, throw away any empty bottles or containers and remove any soiled clothes or pending laundry.  After you do this, the bathroom will be much easier to tackle since there won’t be any obstacles blocking you or distracting you.

book cleaning service online

Cleaning the Toilet

The toilet is not an exciting place to start and it is the hardest to clean. But once you are done with this, the rest of the cleaning will be smoother. Start by spraying the surface of the toilet with an all-purpose cleaner. Make sure to spray the whole surface of the toilet, outside, inside under the toilet seat, and even on the base of the toilet. Then spray the toilet with an enzyme cleaner which will help eliminate any smell coming from the toilet. Wipe down the toilet with either paper towels or reusable sponges.

Open the lid and pour liquid toilet bowl cleaner, letting it soak and work its magic. Use a toilet bowl scrubber to clean the inside of the bowl, targeting the stains in the toilet. Flush the toilet to see if there are any more stains and clean those, if the stains aren’t going away, use a pumice stone to break the grime down. Spray the antibacterial spray inside the bowl and on the toilet seat; make sure to wipe away the excess. Disinfecting it will kill all the bacteria and prevent new bacteria from accumulating. 

Cleaning the Tiles and Glass

Once you get the cleaner of your choice, apply the solution on the tiles with the soft side of a sponge. Use the scrubber on the other side to scrub at the tiles to remove any build-up. Make sure to catch the grout while you clean your tiles and rinse everything with water.

Spray all the glass surfaces in the bathroom with vinegar and rub it in with a soft sponge. Vinegar helps the build-up on the glass breakdown and makes it easier to clean. After you rub in all the glass surfaces with vinegar, rinse them with water and buff them with a newspaper or a microfiber cloth for a clean finish.

clean the bathroom

Cleaning the Bathtub

Select an all-purpose cleaner and spray the whole surface of the tub with it. Allow it to soak in to dissolve the dirt and the stains. Rub in the cleaner with a soft sponge since the tub can easily scratch if you use excessive force. Use scrubbing pads if there are difficult stains that the soft side cannot remove. Rinse the cleaner with water. Run your hand along the surface of the tub and if you feel any friction, then that means that there are still parts on your tub that are dirty. Rinse the tub with water and buff it dry. The Spruce wrote a more detailed guide on how to clean a bathtub, I think you should read it.

Cleaning the Sinks

The sink is also prone to dirt and grime since we use the sink continuously. Toothpaste stains and other types of products can build-up on and in your sink. To clean your sink, spray it with an all-purpose cleaner. Then go in with an old toothbrush to scrub the corners of the sink, around the drain, and around the tap. Then take a soft sponge and buff in the all-purpose cleaner. Use the toothbrush to scrub at the stains. Rinse the sink with plain water and buff it dry with a microfiber cloth or a newspaper. 

Cleaning Everything Else

Remember to clean the rest of the stuff in the bathroom such as countertops, shelves, hardware, etc. Use an all-purpose cleaner to spray down everything, scrub, and buff. Spray down all the surfaces, especially the countertops, with disinfectant spray. Cleaning the floors is similar to cleaning everything else. Spray with cleaner, scrub and then rinse. The only additional step is using the wiper to guide the excess water down the drain. The last step is cleaning the door of the bathroom and disinfecting the knobs.


clean the bathroom

How to Choose a Cleaner for Your Bathroom

There are different types of bathroom cleaners available in the market that you can select from. You want to clean the bathroom without any harsh chemicals then you can create your own cleaner. Homemade cleaner not only prevents you from using harsh chemicals but in most cases, it is also much cheaper than a store-bought cleaner. There are many recipes available online but the easiest recipe is mixing dish soap with vinegar and baking soda. These ingredients all help in breaking down dirt and stains all while being gentle to the surfaces in the bathroom. You can use the homemade cleaner for regular cleaning and if you are unable to remove the stains, then you can use targeted cleaners that are available in stores to remove them.

To Conclude

We use the bathroom frequently and because of the frequent interaction, an unclean bathroom can make us sick since bacteria thrive in moist environments. To prevent illness it is important to clean the bathroom. In this article, I go over tons of tips and tricks that help in cleaning the bathroom quickly since many people dislike cleaning. All the parts in the bathroom use different types of cleaning supplies and techniques and once you familiarize yourself with them, cleaning will be much easier. If bathroom cleaning still feels daunting to you then there are plenty of cleaning services that clean bathrooms for you. Workers at My Cleaning Angel excel at cleaning.

What do maid services include? If you can’t imagine what’s included in a maid services, you can count on us to discover these and more.