As the winter season starts to fade away and the first hints of spring emerge, it is time to throw open the windows and let the fresh air in. But wait… what’s that you see? The accumulated dust, dirt, and grime seem to have taken up residence during the colder months. Fear not! With the arrival of spring comes the perfect opportunity for a one-time cleaning spree. So, how do you spring clean like a pro?
Let’s dive in and uncover some expert spring cleaning hacks and tricks to transform your space from winter dreariness to springtime freshness! Let’s start this deep cleaning in the spring!
Key Takeaways
- Spring cleaning is an essential seasonal task that refreshes your home and prepares it for the warmer months ahead.
- Start by creating a checklist and gathering essential cleaning supplies to stay organized and efficient.
- Break down tasks into smaller, manageable steps and deal with high-traffic areas first for a thorough clean.
- Don’t forget to declutter your space and add DIY touches to refresh your decor for the season.

Preparing Your Spring Cleaning Supplies
Let’s kick off spring cleaning with a few essential cleaning supplies that you’ll find around your home.
Take inventory of your cleaning supplies, including:
- All-purpose cleaner
- Disinfectant wipes
- Glass cleaner
- Microfiber cloths or cleaning rags
- Broom, mop, and vacuum cleaner
- Scrub brushes and sponges
Make a shopping list for any missing items to make sure you have everything you need.
How to Do Spring Cleaning Like a Professional
Spring cleaning is a time-honored tradition that refreshes your home and prepares it for the warmer months ahead. To ensure your spring cleaning efforts are thorough and efficient, follow these professional spring cleaning guide and complete every step like a pro.
Step 1: Customize Your Own Spring Cleaning Playlist
Creating a playlist of your favorite songs or podcasts can make cleaning more enjoyable and keep you motivated. Choose upbeat music or engaging podcasts that you love to listen to while you clean. Use your playlist to help you keep track of time and maintain momentum during your cleaning sessions.
Step 2: Create a Checklist
Before diving into your spring cleaning tasks, it’s essential to create a detailed checklist to keep you organized and on track. A thorough checklist may seem like a lot at the time, but it will make your cleaning process much smoother.
Pro Tip: Print out our detailed checklist and add your additional tasks to it! We have done the work for you!
- Room-by-Room Approach: Start by walking through each room in your home, like bedrooms, bathrooms, kitchen, and living room. Note down specific cleaning tasks as you go along.
- List Specific Tasks: Write down exactly what needs to be done in each room. For example:
- Bedroom: Dust furniture, vacuum carpets, change bed linens, tidy up closets.
- Bathroom: Scrub tiles, clean shower and toilet, wipe down counters and mirrors, swap out towels.
- Kitchen: Clean appliances inside and out, wipe down cabinets and counters, wash the sink, and organize the pantry.
- Estimate Time: Think about how long each task might take. Allocate time slots for cleaning sessions accordingly. It’s important to be realistic.
- Keep It Visible: Once your list is ready, put it up somewhere you can easily see it. Checking off tasks as you complete them helps you keep track of your progress and stay motivated. And, let’s face it, checking the bullets on a list is an unmatched exhilarating feeling.

Step 3: Declutter Your Home Inside Out
Start by focusing on one area at a time, such as closets, cabinets, or storage spaces. Take everything out of the designated area and sort through each item, asking yourself whether you truly need or use it. Items that haven’t been used in months or no longer serve a purpose should be set aside for donation or disposal. As you go through each item, be strict in your decision-making to avoid holding onto unnecessary clutter.
Once you’ve decluttered the main storage areas, don’t forget to tackle hidden spots like under the bed and behind furniture. These areas often accumulate forgotten items and dust bunnies over time. Pull out items stored underneath beds or tucked away in corners, and assess whether they should stay or go. Be sure to vacuum or sweep these areas thoroughly to remove any dirt or debris that may have accumulated.
Step 4: Make a Rule – Smaller Cleaning Tasks First
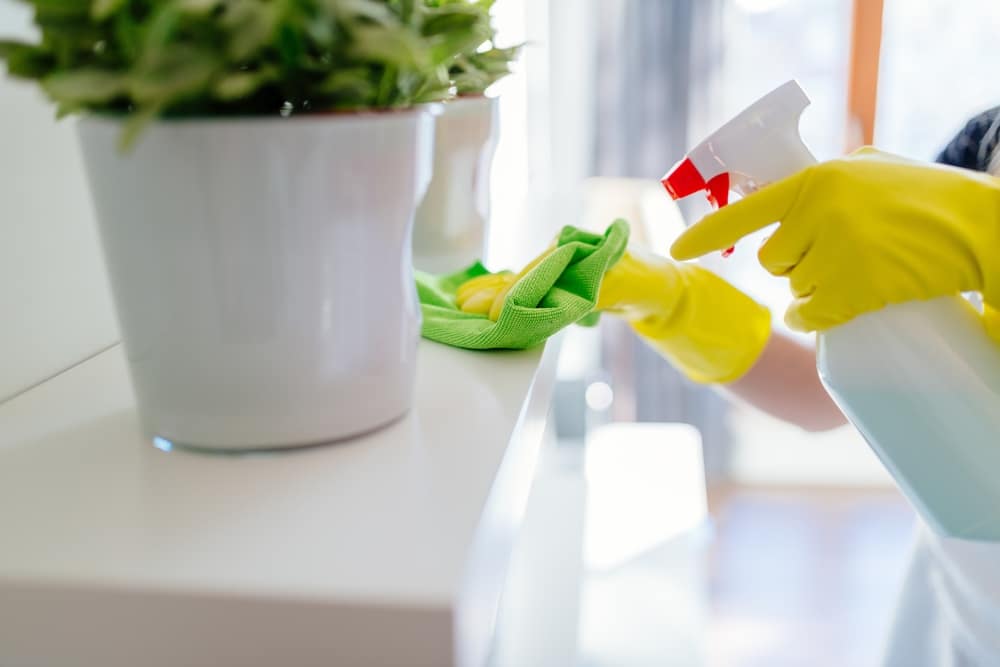
To avoid feeling overwhelmed, one of the top strategies for spring cleaning is to start with smaller cleaning tasks before moving on to larger ones. Begin with high-traffic areas like the bathroom, kitchen, and fridge.
Kitchen:
- Clear countertops: Remove any items and wipe down countertops with a multipurpose cleaner.
- Clean appliances: Wipe down the exterior of appliances like the microwave, oven, and refrigerator.
- Scrub the sink: Use a cleaning solution to scrub and sanitize the sink basin, faucet, and drain.
- Clean stovetop: Remove grates and burner covers, clean the stovetop surface, and wipe down knobs and controls.
- Organize cabinets and drawers: Declutter cabinets and drawers, wipe down shelves, and organize items.
- Wash dishes: Hand wash or load dirty dishes into the dishwasher for cleaning.
- Sweep and mop floors: Sweep or vacuum floors to remove debris, then mop with a suitable floor cleaner.
Fridge:
- Remove contents: Take out all food items from the fridge and place them on the counter.
- Dispose of expired items: Check expiration dates and dispose of any expired or spoiled food.
- Wipe down shelves and drawers: Use a mild cleaner to wipe down shelves, drawers, and door bins.
- Clean interior walls: Wipe down the interior walls of the fridge to remove any spills or stains.
- Sanitize surfaces: Use a disinfectant spray or wipes to sanitize high-touch areas like door handles and controls.
- Organize contents: Group similar items together and place them back into the fridge neatly.
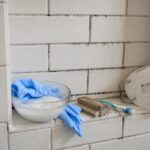
Washroom:
- Clear surfaces: Remove toiletries and other items from countertops, shelves, and ledges.
- Clean surfaces: Wipe down countertops, sinks, and faucets with a suitable cleaner.
- Scrub tiles: Use a tile cleaner and scrub brush to clean grout lines and tiles in the shower or bathtub.
- Clean toilet: Scrub the toilet bowl, seat, lid, and exterior with a toilet brush and cleaner.
- Wipe mirrors: Clean mirrors and glass surfaces with a glass cleaner and lint-free cloth.
- Sanitize high-touch surfaces: Use disinfectant wipes to clean doorknobs, light switches, and towel racks.
- Replace towels: Swap out used towels for fresh ones, and launder dirty towels as needed.

Step 5: Move to Other Rooms
After completing the smaller tasks, it’s time to move on to cleaning the other rooms in your home. Begin by focusing on the bedroom, living room, and dining room to ensure a thorough spring cleaning.
Bedroom:
- Dust furniture: Use a microfiber cloth or duster to remove dust from dressers, nightstands, and other furniture.
- Vacuum carpets and rugs: Use a vacuum cleaner to thoroughly clean carpets and rugs, paying special attention to high-traffic areas.
- Change bed linens: Strip the bed and replace it with fresh sheets, pillowcases, and bedding.
- Organize closets: Declutter and organize clothing, shoes, and accessories in closets and drawers.
- Wipe down surfaces: Clean bedside tables, lamps, and any other surfaces with a damp cloth.
Living Room:
- Dust the furniture: Dust all surfaces including coffee tables, bookshelves, and entertainment centers.
- Vacuum upholstery: Use a vacuum cleaner with upholstery attachments to remove dust and debris from sofas, chairs, and cushions.
- Clean windows and window treatments: Wipe down windowsills and frames, and dust or wash curtains or blinds.
- Declutter surfaces: Clear clutter from tables and shelves, and organize items in decorative baskets or bins.
- Vacuum floors: Vacuum floors thoroughly, including underneath furniture and in corners.
Dining Room:
- Dust and polish furniture: Dust dining table, chairs, and any other furniture with a microfiber cloth.
- Clean dining table: Wipe down the dining table with a damp cloth to remove crumbs and spills.
- Wash tableware: Wash dishes, utensils, and glassware used during cleaning breaks or meals.
- Dust light fixtures: Dust chandeliers or pendant lights, and wipe down light switches and fixtures.
- Sweep or vacuum floors: Sweep or vacuum dining room floors, and mop if necessary to remove any remaining dirt or debris.
Step 6: Target High Traffic Areas
High-traffic areas like floors, windows, walls, and floors require special attention during spring cleaning. Start by vacuuming and mopping floors throughout your house, paying extra attention to spots that see the most activity. Use a vacuum with attachments to reach into corners and under furniture where dust accumulates. For hard floors, opt for a gentle cleaner appropriate for the surface. Consider steam cleaning carpets and upholstery to deeply cleanse and eliminate embedded dirt and allergens.
Next up, let’s get on with those windows! Begin by clearing away debris from frames and sills, then wash windows using a mild solution or commercial cleaner. Dry them carefully to prevent streaks. For outdoor windows, use a hose or pressure washer to remove dirt before washing.

Step 7: Check up on HVAC Filters
As part of your spring cleaning routine, don’t forget to check and replace HVAC filters and batteries in smoke detectors and carbon monoxide detectors. These tasks make sure that your home’s air quality remains optimal and that your safety devices are in proper working order.
Homeowners in cold climate cities like Minneapolis and Chicago use spring as the moment to flush out months of trapped heating dust from their ductwork and inspect furnace components before storing them for the warmer season, those in humid markets like Houston and Miami prioritize mold inspections inside vents and coil cleanings to reset after a long moisture heavy winter, families in high pollen regions like Atlanta and Dallas focus heavily on filter upgrades and air purifier maintenance as allergy season peaks, and right here in the desert where winter still pushes dust through every vent in the house, booking a professional service like Air Duct LV providing certified air duct cleaning services, inspecting dryer vents for lint buildup, checking exhaust fans in bathrooms and kitchens, and testing your thermostat calibration ensures that spring cleaning goes beyond the surface and addresses the hidden systems that keep your home running safely and efficiently all year long.
Step 8: Add a little DIY for Spring Decor
Inject some creativity into your spring cleaning routine by incorporating DIY projects around the house. Consider painting an accent wall, refreshing furniture with a new coat of paint, or creating a gallery wall with framed photos or artwork. These simple DIY projects can breathe new life into your home and make it feel fresh and rejuvenated for the season ahead.
Treat your spring cleaning like holiday cleaning by incorporating seasonal decor and accents into your home. Swap out heavy winter textiles for lighter fabrics, add pops of color with fresh flowers or vibrant throw pillows, and bring in natural elements like potted plants or botanical prints.
Step 9: Reward Yourself
After putting in the hard work of spring cleaning your home, it’s important to take some time to reward yourself for a job well done. Treat yourself to a well-deserved break and indulge in activities that bring you joy and relaxation.
Sit back, relax, and enjoy a few moments of peace and quiet. Put your feet up, sip on your favorite beverage, and simply unwind. Escape into the pages of a good book and let your mind wander to far-off places or dive into a captivating story.
Spend quality time with your partner by cooking a delicious meal together. Or treat yourself to some pampering with a DIY spa day at home. Draw a warm bath, light some candles, and indulge in a luxurious soak. Do anything that brings you joy after a tiring day of cleaning, scrubbing, and decluttering.
Wrapping Up
Mastering the art of spring cleaning doesn’t have to be a daunting task. By following the best spring cleaning tips mentioned in this guide, you can tackle your spring cleaning like a pro and achieve a fresh and rejuvenated home.
Starting with smaller tasks helps prevent overwhelm while targeting high-traffic areas ensures a thorough clean. Don’t forget to add a touch of DIY creativity and embrace the opportunity to redecorate for the season ahead. And if spring cleaning becomes too overwhelming, remember that you can always rely on the professionals at My Cleaning Angel to handle the rest, allowing you to enjoy a sparkling clean home without the stress!

FAQs
What’s the best way to tackle spring cleaning if I have a busy schedule?
If you have a busy schedule, it’s essential to prioritize tasks and break them down into manageable chunks. Consider setting aside dedicated time slots for spring cleaning tasks or taking the help of family members or professional cleaning services to lighten the workload.
What should I do with items I no longer need during spring cleaning?
Items you no longer need during spring cleaning can be donated to charity, sold or given away to friends or family, or disposed of responsibly. Consider decluttering and organizing items before deciding their fate and remember to recycle or properly dispose of any items that cannot be donated or reused.