

If mirrors fog fast or a musty odor lingers, the bathroom exhaust fan likely needs care. Dust slows the fan, traps moisture, and fuels mold growth that hurts indoor air quality.
Cleaning the bathroom exhaust fan every six months keeps moisture under control and extends the fan’s life. It also improves air circulation, so steam clears quicker and smells fade.
This guide shows safe, simple steps using a vacuum cleaner, microfiber cloth, soft brush, mild soap, and a screwdriver. It also covers proper ventilation checks, early damage signs, and easy maintenance habits anyone can manage at home during your house cleaning.
Want fresher air across the house? Keep reading.
Key Takeaways
- Clean the bathroom exhaust fan and vent every 3 to 6 months to limit mold growth and control moisture.
- Turn off the wall switch and the circuit breaker before touching the fan motor, blades, or wiring.
- Use a vacuum with brush tools, a soft brush, a microfiber cloth, and mild soap for thorough dust removal.
- Replace the fan if noise continues after cleaning, airflow stays weak, or parts are cracked or scorched.
- Quick flashlight checks reveal buildup early; fast cleanup improves air quality and reduces allergens.
Why Cleaning Bathroom Exhaust Fans and Vents Is Important

Dust and humidity love to camp inside a bathroom exhaust fan. That mix feeds mold and mildew, which can spread quickly in damp rooms. Regular dust removal, plus proper ventilation to the outdoors, keeps indoor air healthier for families.
Cleaning Frequency and Fan Type Considerations
For bathrooms with high moisture levels or unique exhaust fan designs, consider cleaning the bathroom exhaust fan every three months. Adjust dust removal methods to match fan motor sensitivity and fan housing design.
Preventing mold and mildew buildup
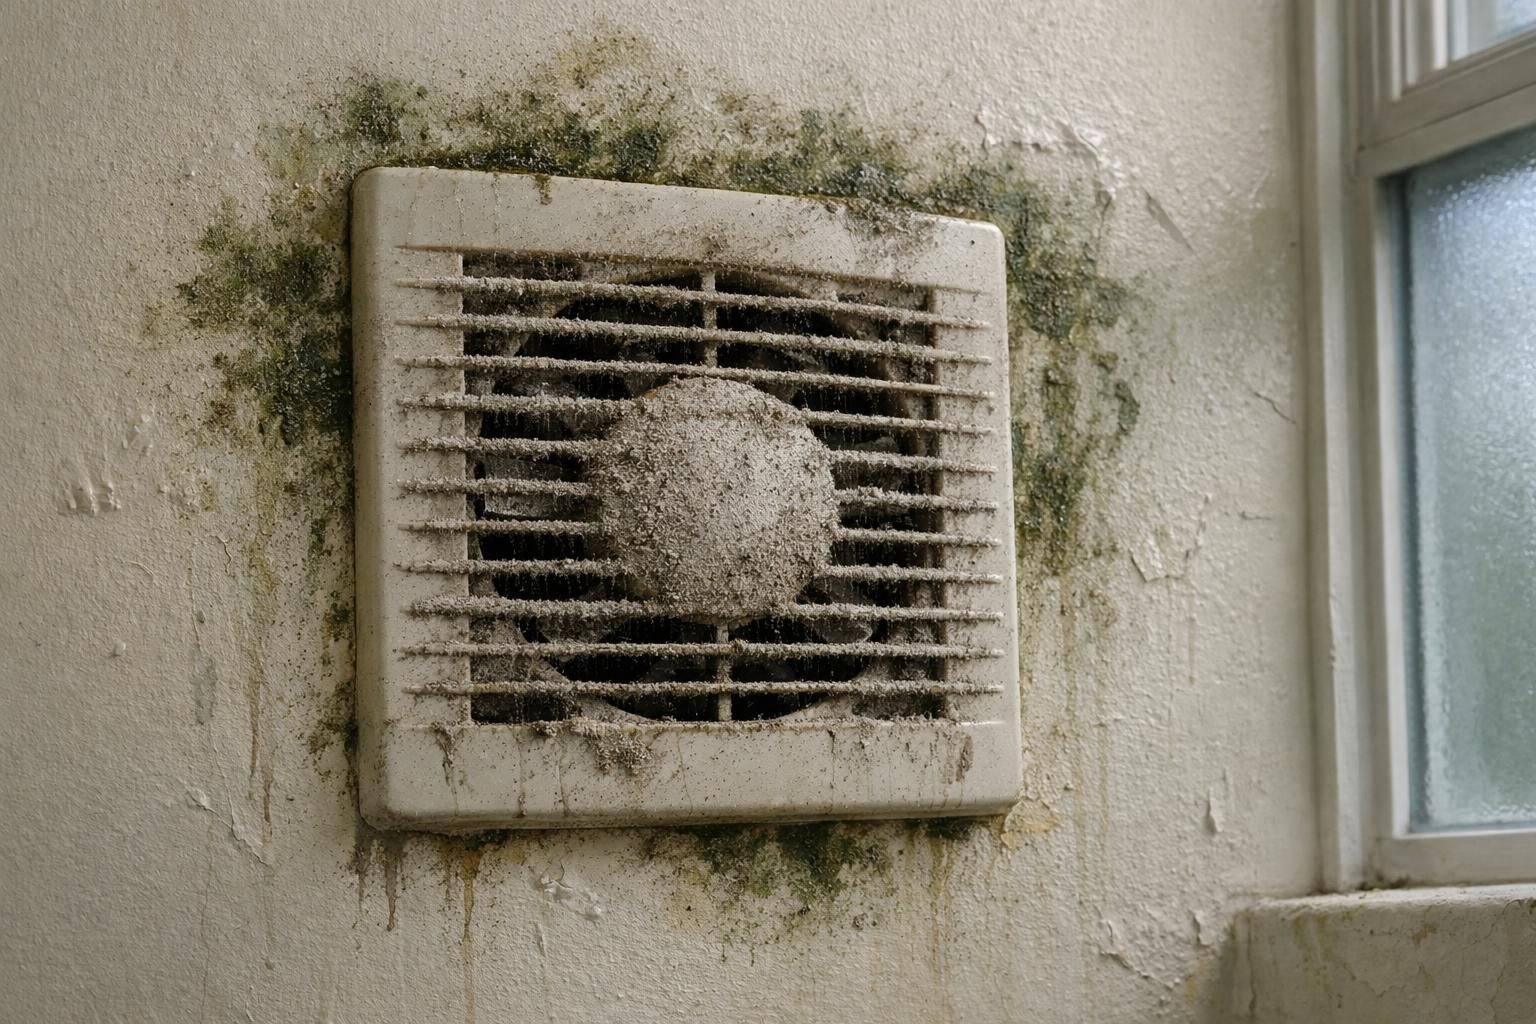
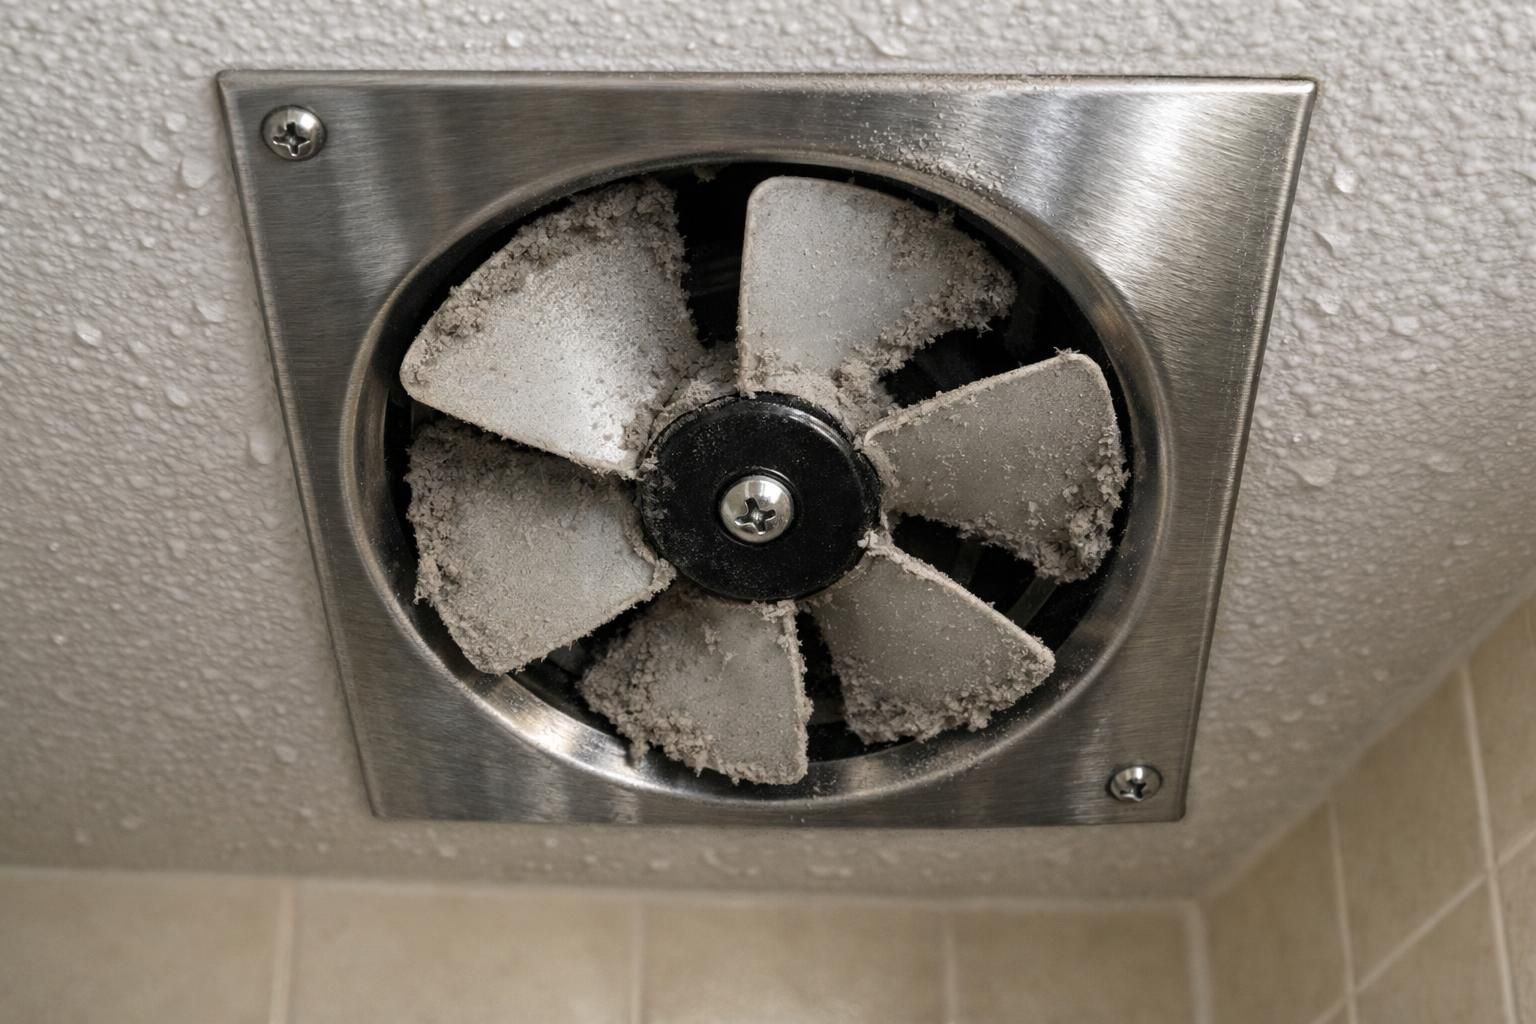
Bathroom fans help pull moist air out, which is key for moisture control. When dust coats the fan blades and the housing, the unit works harder and stays damp longer. That damp film can host mold growth within 48 hours after hot showers.
Make sure the fan vents outside, not into an attic or crawlspace. Trapped condensation up there can drip back into living spaces and cause more damage. Clean with mild soap and a damp cloth, including the fan motor area, and let parts dry fully before reassembly.
Indoor air pros suggest cleaning at least twice a year. That routine cuts spores, keeps walls cleaner, and helps families breathe easier, especially in allergy season.
Improving air quality

A dusty bathroom fan sends particles back into the room. Along with lint, it can push mold spores and allergens like pet dander into indoor air. Children with asthma may feel the difference during daily routines.
Cleaning every three to six months boosts air circulation and reduces odor. A service like DUCTZ can confirm the vent exits outdoors, not into the attic, which matters for proper ventilation and lasting results.
Now that the benefits are clear, here are the tools that make dust removal faster and safer.

Enhancing fan efficiency

Thick dust on fan blades and inside the housing slows the fan motor and wastes energy. That buildup weakens air circulation and leaves mirrors foggy longer. Clean fans move steam out quickly, which keeps walls and ceilings drier.
A regular wipe keeps airflow strong and noise reduction effective. With less strain, the fan lasts longer and needs fewer repairs. That is money saved and fewer headaches for busy households.
Tools and Supplies You’ll Need
A few simple tools make the job quick and tidy. With the right gear ready, cleaning a fan feels like a short chore, not a project.
Screwdriver
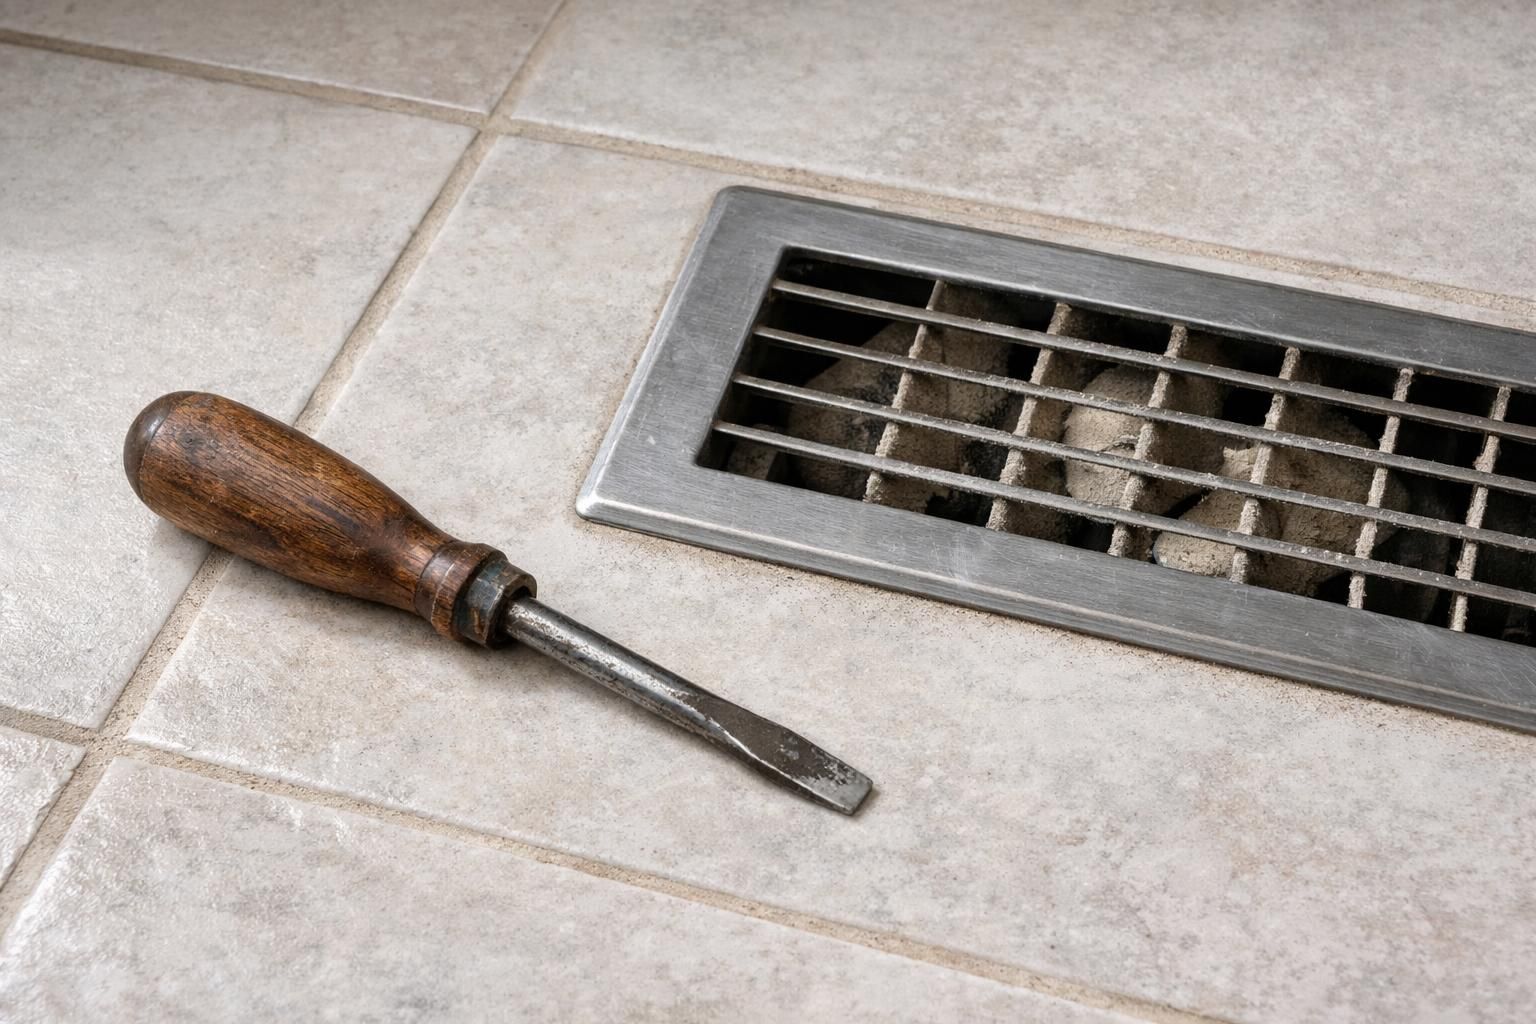
A screwdriver opens the path to a deep clean. Most covers use spring clips or a couple of screws. A Phillips or flathead will remove them without fuss.
Drop the screws in a cup so they do not disappear across tile. With the cover off, hidden dust around the fan blades and housing is easier to reach and clean.
Vacuum with attachments
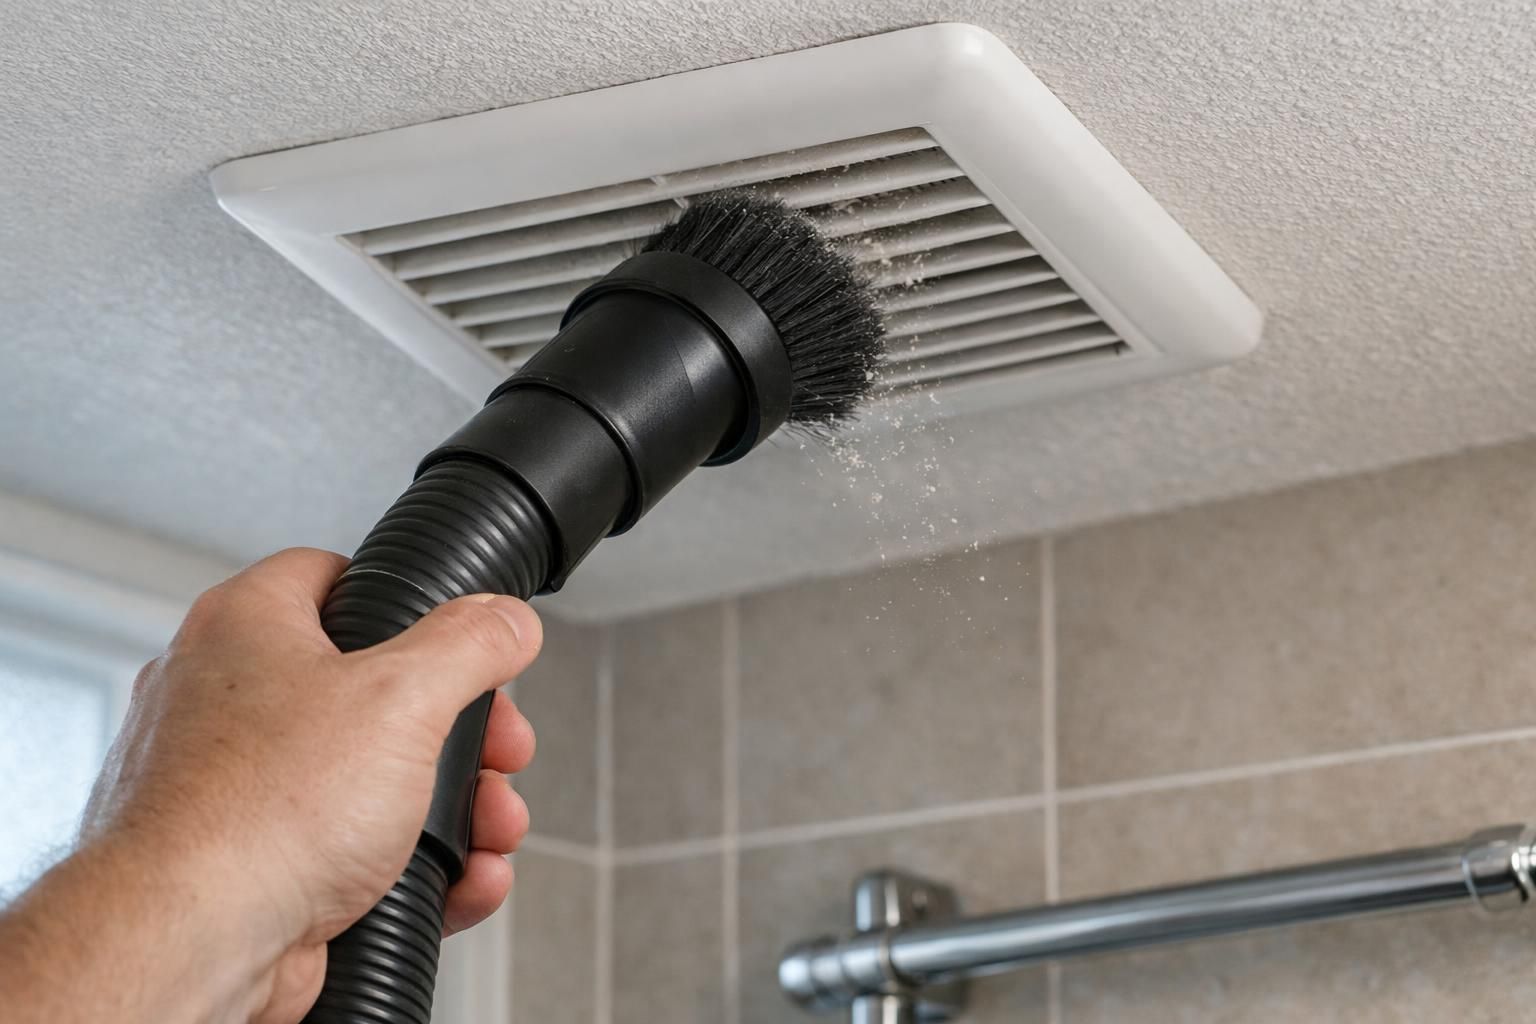
Use a vacuum with a brush tool to pull dust from the fan blades, fan motor area, and housing. The bristles loosen grime without scratching plastic or metal parts. It is a fast way to clear years of lint.
Even older fans benefit from this step. A stronger airflow helps moisture control and keeps indoor air fresher day to day.
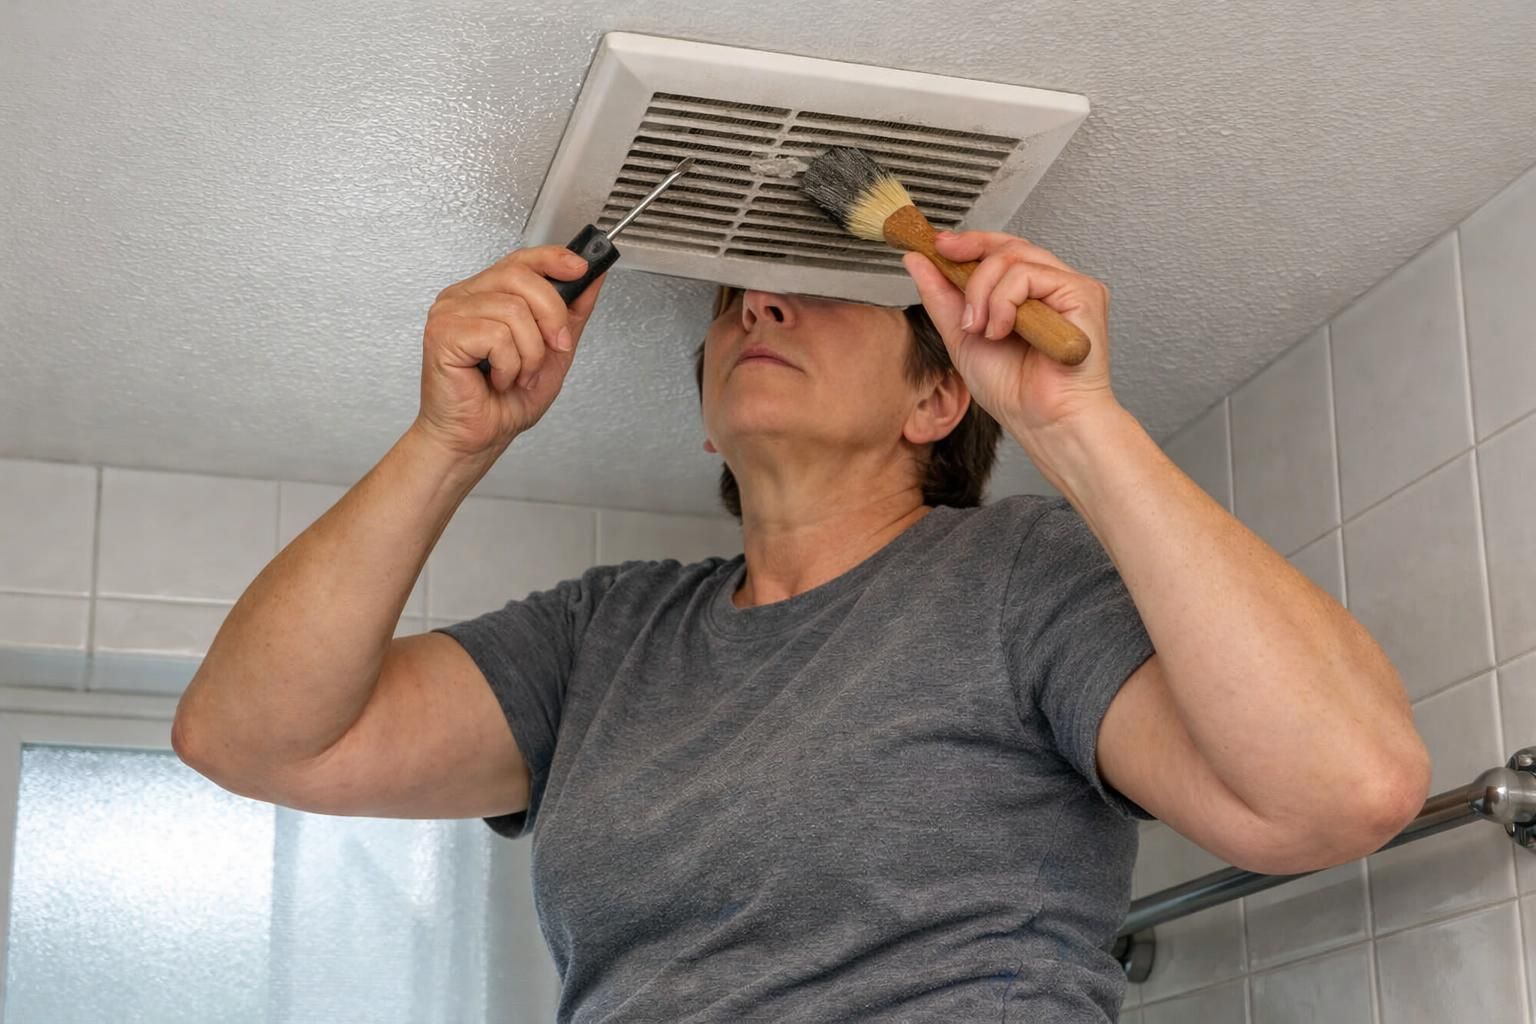
Soft brush or synthetic paintbrush
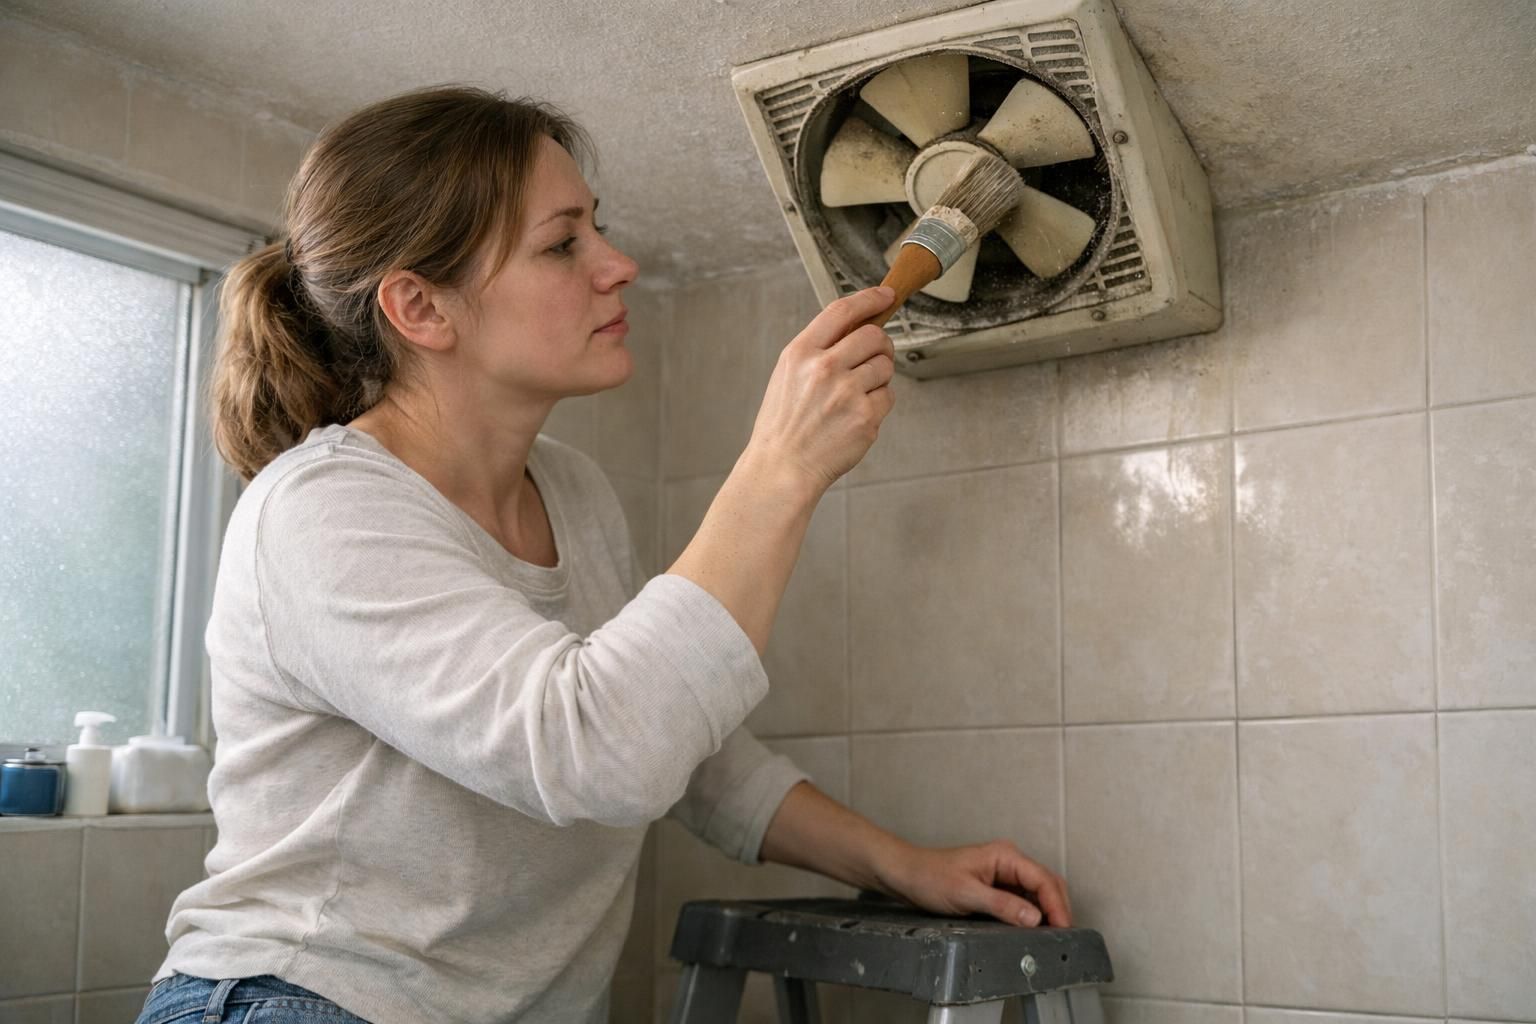
Dust sticks to fan blades like glue. A soft brush, small paintbrush, or old toothbrush loosens stubborn buildup along edges and tight spots. The small bristles reach behind the fan motor and along seams.
Gentle brushing helps prevent mold growth by letting the fan move damp air out faster. Plan a few extra minutes if the blades are caked with grime.
Microfiber cloth
After brushing, wipe with a damp microfiber cloth to catch the fine dust. A quality cloth grabs particles from the fan blades, vent cover, and housing instead of spreading them around.
Let parts dry fully before reassembly. Dry pieces support proper ventilation and steady airflow, which helps keep bathrooms clean and comfortable.
Mild soap or cleaning solution
Warm water with gentle dish soap cuts sticky residue on plastic and metal surfaces. Scrub the vent cover with a soft brush or cloth, focusing on grooves and corners where grime collects.
Rinse with clean water and dry thoroughly. Reinstalling a damp cover can trap moisture, which invites new problems later.
Step-by-Step: How to Clean Your Bathroom Exhaust Fan
With a few basic tools, this job takes less than an hour for most homes. Safety first, then simple steps for the fan blades and housing.
Turn off the power to the fan
Switch the fan off at the wall. Then shut off the circuit breaker for that room. Cutting power at both spots lowers the risk of electric shock, especially in a damp bathroom.
Test the switch to confirm the fan will not run. If anyone is unsure about wiring or sees damaged cables, a licensed electrician should handle it.
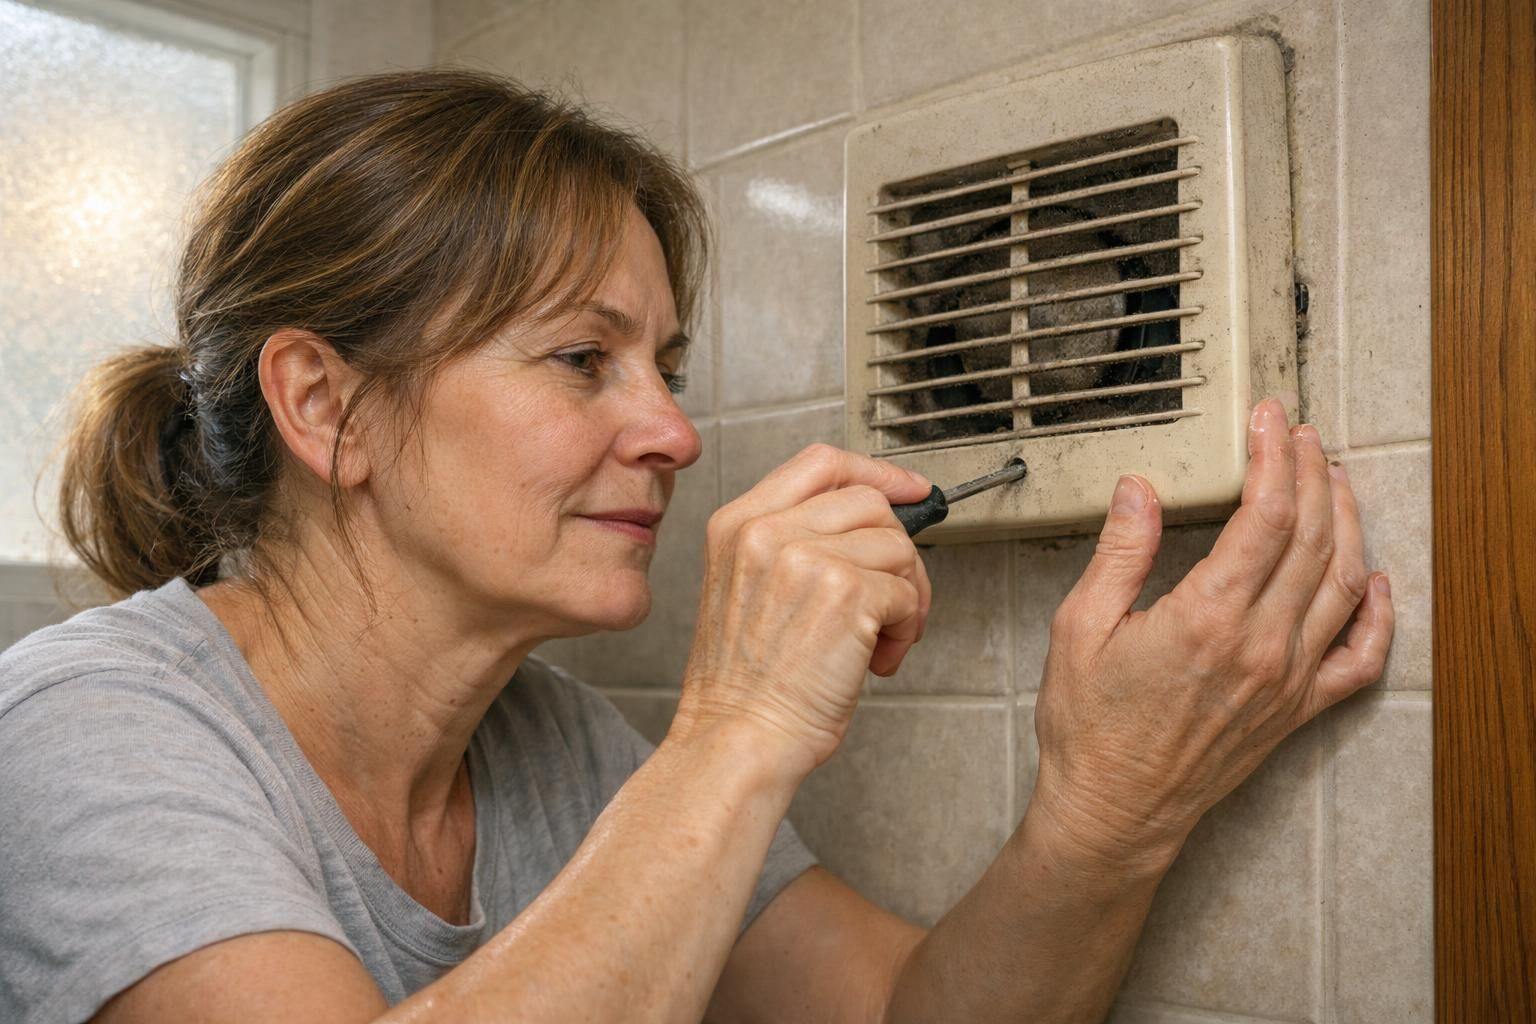
Remove the exhaust fan cover
Place a towel on the floor to catch falling dust. Most covers use spring clips or small screws. Gently pull the cover down, squeeze the metal clips, or remove screws with a Phillips screwdriver.
If the cover sticks, wiggle it side to side. Avoid forcing it, since plastic tabs can snap. Set the cover aside for washing.
Wash and clean the vent cover
Soak the cover in warm soapy water. Use a soft brush or toothbrush to clean the slats and corners where grime hides. Soap helps break down sticky film from steam and residue.
Rinse well and dry with a microfiber cloth. A damp cover can lead to mold growth within days, so take the extra minute here.
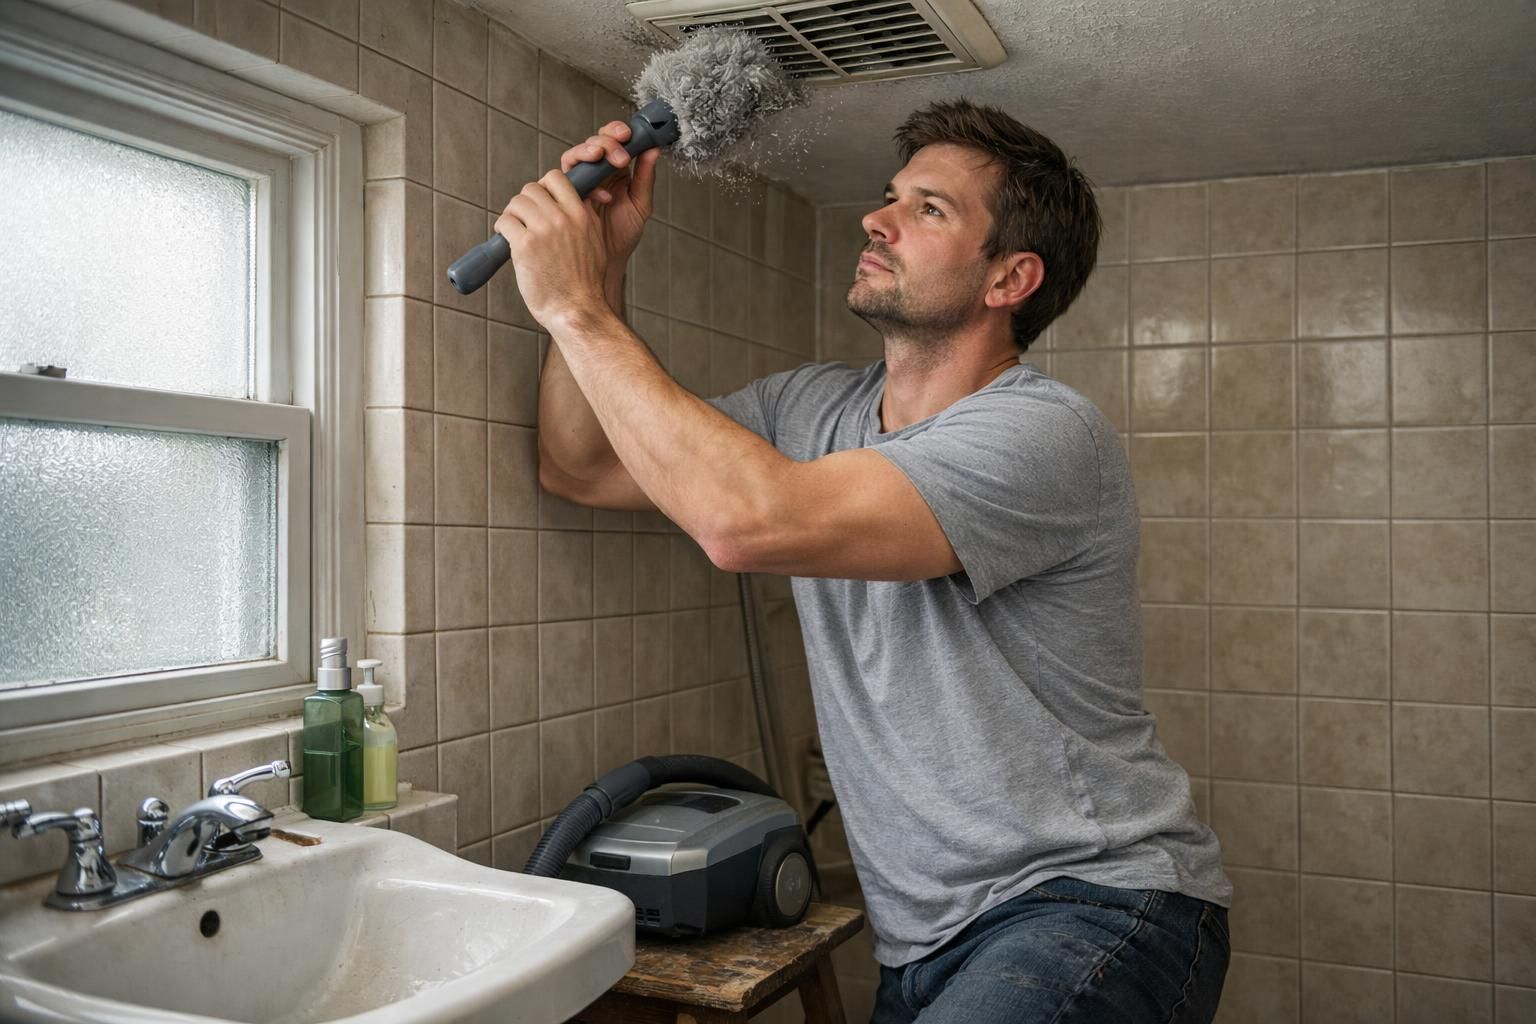
Vacuum the fan blades and housing area
Use a vacuum with a brush attachment to clear dust from the fan blades, fan motor area, and housing. Work slowly along seams and around screws where lint collects. For stuck grime, loosen it first with a soft brush or toothbrush.
Pulling dust out of the housing restores air circulation and supports proper ventilation. That makes the bathroom dry out faster after showers.
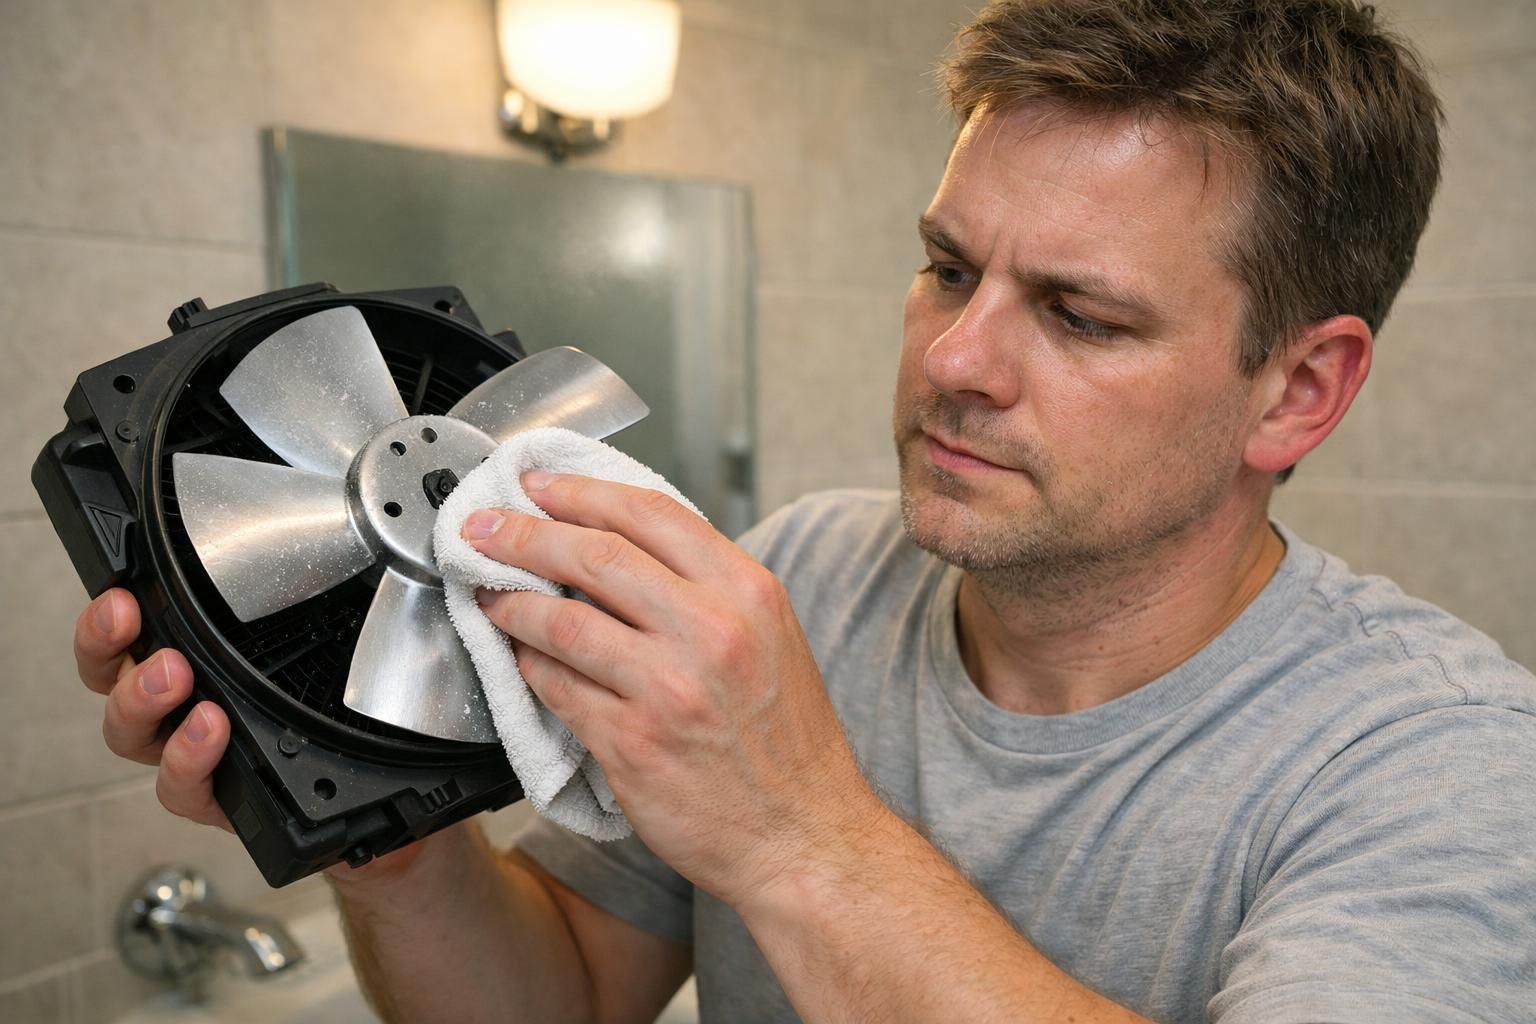
Wipe down all components with a damp cloth
Wipe the fan blades, housing, and fan motor area with a damp microfiber cloth to remove the last residue. Take care around wiring and moving parts. A clean bathroom fan helps control moisture and keeps the room smelling fresh.
Set parts on a towel to air dry before reassembly. For dust-sensitive people, a mask and safety glasses can help.
Reassemble the fan and test functionality
Clip or screw the cover back on. Restore power at the circuit breaker, then flip the wall switch. A clean bathroom fan should sound smoother and push stronger airflow.
Check for rattles or scraping. Strong suction and quieter operation point to better fan efficiency and healthier indoor air.
Routine Maintenance Tips
Light maintenance keeps airflow strong and bathrooms smelling clean. A few quick habits save time and prevent bigger repairs later.
Clean the fan every 3-6 months
Bathroom fans collect dust quickly. Clean the cover and fan blades every 3 to 6 months, or more often in busy homes. Regular dust removal controls moisture and stops mold growth before it spreads.
Vacuum attachments clear clogs fast. A damp cloth and mild soap finish the job without harming plastic or metal clips. Many homes do best with a spring and fall cleaning schedule.
Inspect for dust or debris buildup regularly
Use a flashlight monthly to check the cover and housing for dust. A quick brush or vacuum pass keeps airflow steady and reduces allergens. Small efforts now prevent a heavy scrub later.
Skipping this step leaves fans starved for air. That makes the room feel muggy and encourages mildew around corners and caulk lines.
Check for any unusual noises or reduced airflow
Listen after each cleaning. Rattles or buzzing can mean loose parts or a tired fan motor. Weak air flow may point to a clogged duct or stuck damper outside.
Fix small issues early to protect indoor air quality and avoid mold growth behind walls. If problems persist, replacement might be smarter than another repair.
Signs It’s Time to Replace Your Exhaust Fan
Even a clean unit reaches the end. If the fan cannot clear steam or keeps acting up, a new model may be the better answer.
Persistent noise even after cleaning
If grinding or rattling continues after a careful cleaning, the bearings or fan motor may be worn. That noise often grows worse and can point to internal damage.
At that stage, replacement is safer and usually cheaper long term. A quiet, efficient fan protects air quality and reduces moisture problems.
Poor airflow despite regular maintenance
When mirrors stay foggy after routine cleaning, the fan motor may be fading. Some older fans simply cannot move enough air for today’s steamy showers.
Upgrading to a stronger unit restores proper ventilation and helps stop mildew from creeping along grout and paint lines.
Visible damage or wear on the fan components
Cracked fan blades, bent grilles, loose screws, or rust on metal parts are red flags. Dark or scorched spots near wiring require immediate attention.
Damaged parts reduce air flow and can become unsafe. Replacing a failing fan protects the home and the people living in it.
Conclusion
A clean bathroom exhaust fan is a small task with big payoffs. With a vacuum, mild soap, a brush, and a microfiber cloth, most homeowners can finish in under an hour. That simple habit improves air circulation, trims humidity, and helps prevent mold growth.
Make cleaning part of a seasonal routine. If noise stays loud or air flow stays weak, consider a replacement for proper ventilation year round. Cleaner air, less fog, fewer smells. That is a win for any busy household.
FAQs
1. How often should I clean my bathroom exhaust fan to stop mold from growing?
Clean your bathroom exhaust fan every six months. Dust removal keeps air moving and stops dampness, which helps prevent mold buildup.
2. What steps do I take to clean a bathroom fan vent properly?
Turn off the power first for safety. Remove the cover and wash it with soap and water. Use a vacuum or brush for dust removal inside the vent and on the fan blades.
3. Can cleaning my bathroom fan really help with mold problems?
Yes, regular cleaning of your bathroom exhaust fan removes moisture-loving dust that can feed mold growth in vents.
4. Is there an easy way to remember when to clean my bathroom exhaust fans?
Tie it to another routine chore like changing smoke detector batteries; this habit makes sure you never forget about your bathroom fan again!